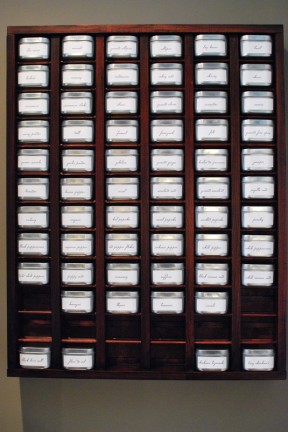
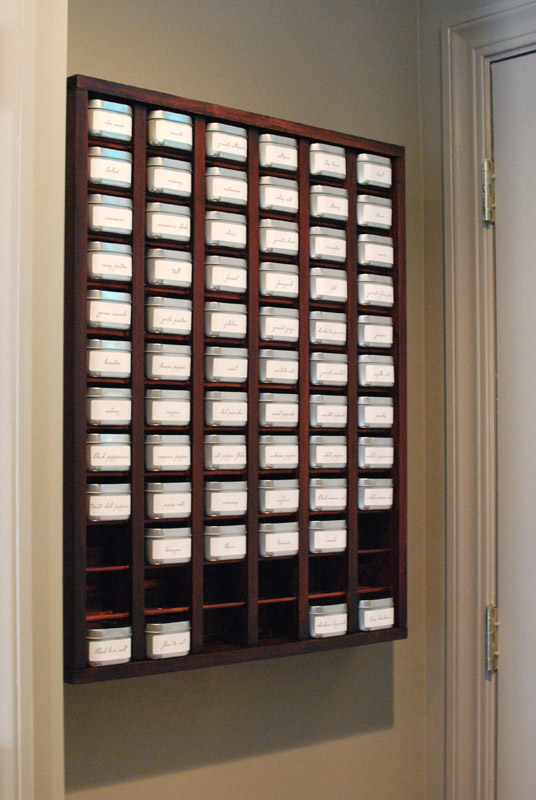
I’m sure this is highly uninteresting to most people, but this is one of the things that’s been keeping me busy lately. We built a new spice rack! I am almost embarrassingly excited about it.
For years, my spice collection has been growing as such things will: slowly and imperceptibly. You buy a little of this and a little of that for various recipes, until one day you realize that half your spices are being stored in the cabinet above the oven, dying inglorious deaths in the heat therein. I had long known that the tiny, two-tier lazy Susan that had laughably served as the primary storage location was no match for my collection; but it was only after a tally that I realized exactly what I was up against. Yes, for my fifty-seven (!) spices, I needed something serious.
I’d seen wall-mounted spice racks, which I liked the look of, and it seemed like that solution would easily accommodate the largest number of containers with a minimum amount of real estate taken up, a real concern in our 500 square feet. It had to hang on one particular wall, right behind the back door, across from the stove. Complicating things, the breaker box is on that wall, so we couldn’t install anything permanent or that couldn’t be easily removed.
We built a simple frame from poplar boards and dowels, stained dark, and designed it specifically to accommodate a tin that I found for reasonably cheap online. The tins are big enough to hold a ridiculous amount of any given spice, somewhere around 1 cup or so.
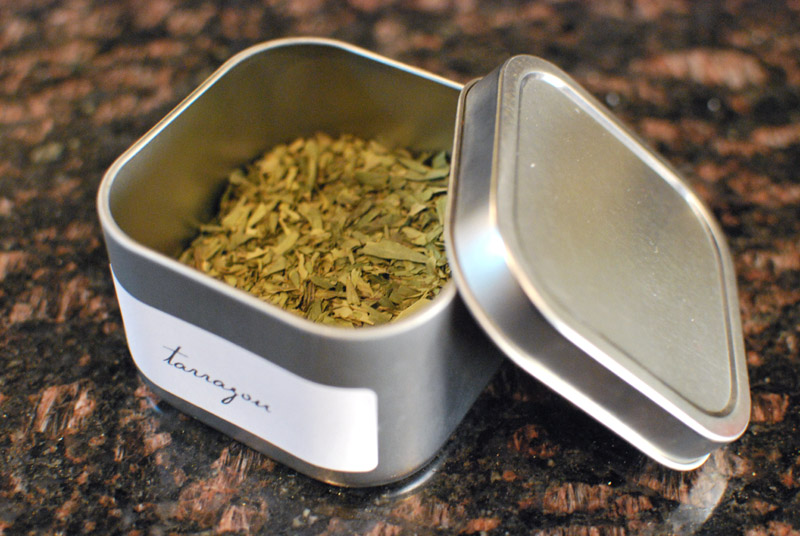
The tins are fairly air-tight, but more importantly, keep light away from the fragile spices. A printed label unifies the look, and prevents any mix-ups, as can happen when your unlabeled bag of aniseed looks dangerously similar to the unlabeled bag of celery seed. (Turns out those two are not interchangeable in the slightest, and your coleslaw will be ruined. Do not think you are impervious to such mistakes, either; it is hubris, and you will be punished for it.)
As an added bonus, I now have plenty of breathing room in the cabinet for my oils, vinegars, and other liquid seasonings. Who knew I had tarragon vinegar?
With all my spices carefully labeled and organized (alphabetically, of course), and knowing exactly what I have on hand, I feel absolutely inspired to get back in the kitchen and (ahem) spice things up. It’s hard to believe that I went for so long with such a crucial part of my culinary arsenal in such disarray. You may notice there’s a few empty spots towards the bottom of the rack; obviously, I had to leave room for the collection to grow. At least now, I won’t feel bad about bringing home a new spicy friend, since I won’t have to store him over the stove anymore.
Here are some unglamorous before and after shots:


JULY 2021 UPDATE:
This is by far my most popular post, and so! many! people! have asked about the construction to replicate their own spice racks. Flattering! So here are some more detailed pictures of the inner construction. Hope these are helpful.
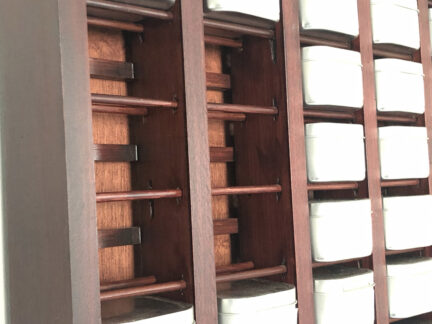
Yes! This photo is awful! HOWEVER, it shows the nasty inner bits. The board on the very left is the left vertical side of the entire rack. You can see the tins rest on two thin dowels, run through holes drilled in the inner vertical boards. We clearly didn’t give a shit if the wood split when drilling, because you’ll never see it. The dowels are not affixed in any way, and can rotate freely if they so choose. Free range dowels.
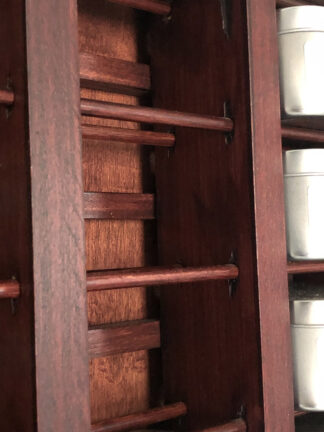
Behind the tins are 1/2″ square dowels. Pretty sure we nailed those to the back of the inner vertical boards, but WHO KNOWS. We made this literally 11 years ago, and I can’t even remember last week. These square dowels are intended to push the tins forward slightly, to make them easy to grab. And so they are.
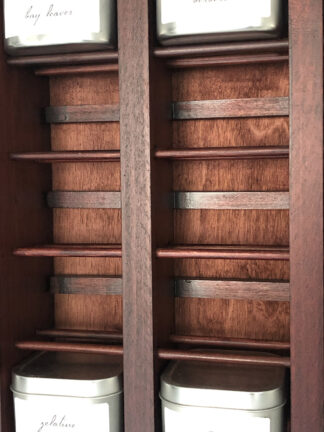
Another angle.
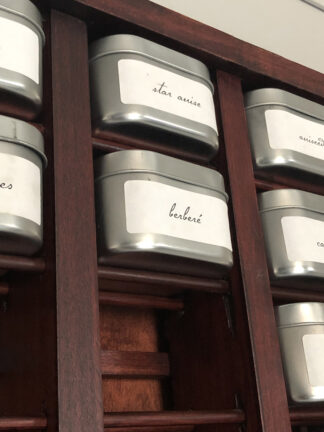
But oh shit! If you look at the top, you’ll see the inner vertical boards don’t quite match up with the outer frame! WHAT’S UP WITH THAT.
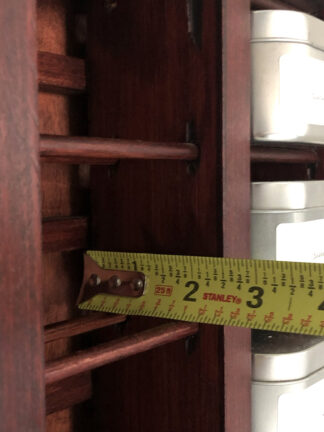
The inner vertical boards are 2 1/2″ inches deep. And they don’t touch the plywood backer that covers the whole back, because of the aforementioned 1/2″ square dowels.
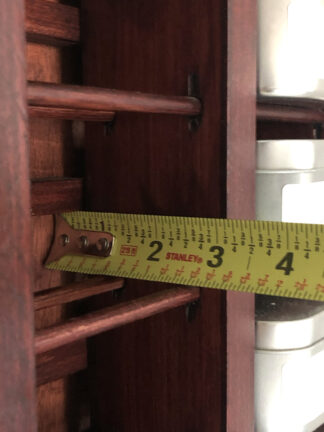
So from the plywood backer, the leading edge of the inner vertical boards sticks out 3 1/8″.
If you need any further measurements, they’re all in the comments. It’s a goldmine of info in the comments. Hope that helps!


I know this is way late, but – does the rack have a plywood backing or is it just open to the wall? I can’t tell from the photos.
Brian: it does have a backing, but made of a poplar panel, not plywood. I didn’t want the tins to fall out the back.
Thank you!! 🙂 Looking forward to building this soon.
I hate to bug you again, but I’m about to make this and i’m realizing that the boards you used are 3.5″ deep and the tins are 3″ deep yet somehow they’re sticking out past the boards. Trying to figure out how that happened and if I need a different size of boards. Are the interior ones 2.5″?
Brian: I UPDATED THIS 11 YEAR OLD POST JUST FOR YOU. You guessed correctly, the inner boards are indeed 2.5″. Let me know if you have any other questions!
haha I just saw the new post. Wow 11 years…. thanks so much for the update and I have just finished mine 🙂 Really appreciate it, excited to get this up, just need to apply some clear coat.
Brian: NICE ONE!