You can’t hide from me, I can see you.
I know who you are.
You’re the one reading cooking blogs and magazines every day, always trying to figure out what to cook next, often getting a little perturbed at restaurants because you know you could’ve cooked your entrée just a little bit better than the chef did. You’ve purposefully sought out recipes marked “difficult”. You’ve mastered pie crust, can roast the most succulent chicken in a five-mile radius, and can roll a perfect French omelette every flippin’ time.
And you still buy canned stock.
Don’t try to hide it behind the cans of tuna or the cereal boxes; I know it’s there. Maybe you buy the wax-coated aseptic boxes, or maybe you buy the jars of stock concentrate, but we all know what’s going on.
I know, because I used to be just like you.
Yes, for years, even a culinary school graduate like me, who prides herself on her homemade everything, couldn’t be bothered to make stock. For me, the problem wasn’t the requisite 4 hours of simmering, it was the ingredient list. The very specific ingredient list. The very specific ingredient list that, if deviated from, would turn any effort into nothing but a massive waste of time.
As I was taught, and as many recipes indicate, a proper homemade stock requires the following: bones, lots of them, and all from the same kind of animal; a meticulously diced mirepoix of onions, carrots, and celery, in a perfect 2:1:1 ratio; and a bouquet garni of parsley stems, bay leaves, fresh thyme, and black peppercorns, preferably tied up in a cheesecloth bag.
And people, I don’t mind spending time in the kitchen, but that’s an awful lot of work for something you can just buy at the store when the need arises.
So I made sure the need would arise only rarely. I learned to quietly avoid recipes that used words like “use homemade stock if possible”. I learned which purchased stocks were the best. I lived a risotto-less, chicken-soup-less, pan-sauce-less life. I carried a twinge of shame within me that I crushed easily and repeatedly with a flippant, “That’s too much trouble.”
I’m here to tell you that it’s all a lie. Stock is easy! I am now a converted stock-maker and -freezer. And therein lies the secret: the freezer. Well, the freezer, and a plastic zip-top bag.
It struck me like a great striking thing, when I recently read on a blog (which one is now forgotten, unfortunately) that there are brilliant people out there who save vegetable scraps and trimmings in bags in the freezer, solely for the purpose of making stock. They even had a clever name for it: a stock bag. Everything goes in one bag, then into the pot when there’s enough. I’ve ambitiously saved bones before (and then very un-ambitiously thrown them away months later) , but never thought to save vegetable odds and ends.
True, it’s not a classically correct stock, and you might never get the same result twice (which I find exciting), but it’s the simplest way I’ve heard yet to keep your fridge stocked with (ahem) stock. Whenever you cut up vegetables for anything, keep the scraps. Pile them all in a freezer zip-top bag. Everything goes here, as long as it’s been washed, from onion skins, to carrot peelings, to parsley stems, to snapped-off asparagus ends.
Whenever you have them, save bones of all sorts, wrapped in foil. Even shrimp shells will make an excellent stock. The only caveat is to avoid mixing meat and fish. Pork bones and chicken bones will go together, but not so much beef bones and a grouper skeleton. Other than that, it’s as simple as simple gets.
Here’s the method: empty the bag of frozen vegetable bits into the biggest pot you have. In this batch, I’ve got scallion ends, celery root skin, leek tops, shiitake stems, and lots of other random scraps. I happened to have half an ancient onion in the freezer (God knows why), so that went in as well.
Add any bones you’ve got, though this is actually optional! This is a pheasant carcass…
…and I threw in some chicken leg bones too, for good measure. If you remember, a bay leaf or two, and a small palmful of black peppercorns are nice additions, as is a branch of thyme, but it’s fine to leave them out too.
Cover everything with cold – that’s important – water. (Luckily for you, since all your vegetables are frozen and will chill your water further, even room temperature water will work here. Don’t use hot water, is all.) Things will float up as you add water; just gently push them down.
Bring everything just to a boil, then reduce to a simmer. Depending on how frozen your vegetables are, and how cold your water is, your pot may condense.
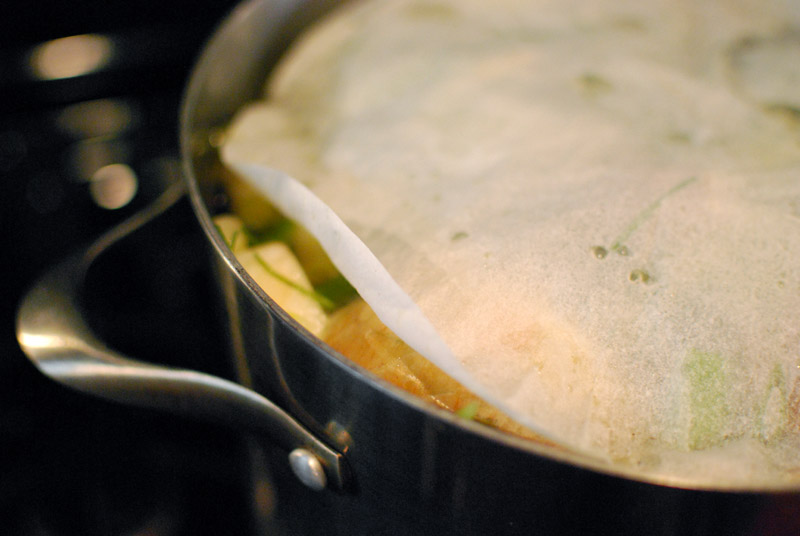
If your pot is very full, things might not stay submerged as they simmer, which will lead to darkening (which you don’t want). If this is the case, cover the top with a round of parchment paper.
Simmer uncovered, or with the lid slightly askew, for at least 2 hours (3 if you’re using bones), and up to 5 or 6 hours for the most extraction of flavor. The timing is up to you; there’s no correct amount of time to simmer everything. Classically, they say to simmer at least 4 hours for stock with bones, but if you’ve only got 3, then I say it’s close enough. Simmering longer won’t do any harm, though, and it will probably make a more flavorful stock. Oh, and no stirring! Stirring will make a cloudy stock.
As it cooks, keep an eye on the liquid level. If it drops below the top of the ingredients, just add a little extra water. Things will start to look drab, as the color and flavor leaches out of the vegetables and into the liquid.
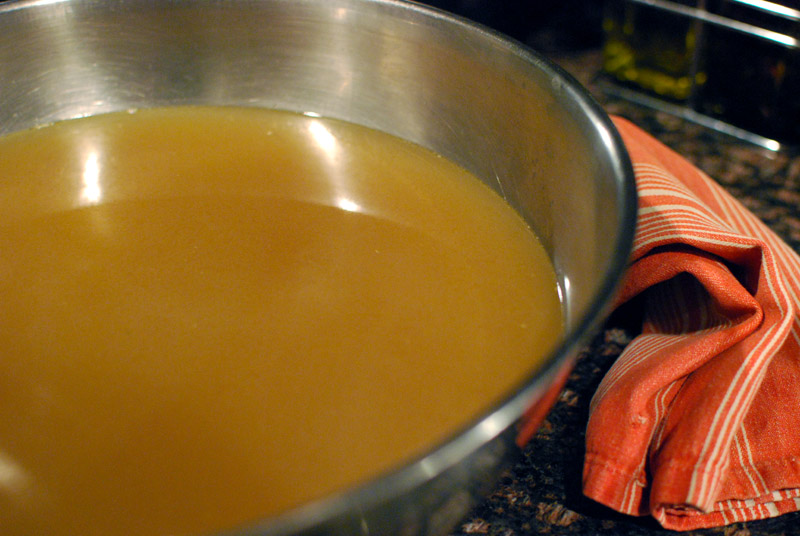
When the time is up, lift the solids out of the stock into a fine mesh strainer set over a large bowl. Press on them to extract as much liquid gold as possible, and then discard them. When all the big solid pieces are out of the pot, gently pour the stock through the strainer into the bowl. Straining like this (as opposed to dumping everything into the strainer all at once) will make for a less cloudy stock, and will make much less of a mess. (Trust me on this one.)
Cool the stock to room temperature as quickly as possible (but definitely within 2 to 3 hours). You can do this by splitting the stock into multiple smaller containers, or by setting the large bowl of stock in an ice bath. Do not simply put the huge bowl of hot stock into the refrigerator! Unless, that is, you’d like to spoil all the food in your fridge in one go.
Once the stock has cooled to room temperature, either freeze it or refrigerate it. If you’ve got no room in the fridge, you can reduce the strained stock by boiling it; add extra water back in whenever you need it.

And that, Gentle Readers, is how I learned to stop worrying and make stock. Despite the lengthy description, it’s really this easy:
1. Put frozen vegetables and/or bones in pot.
2. Cover with water.
3. Simmer. Go about your day.
4. Strain and cool.
5. Profit.
No more excuses, now. Get yourself a gallon zip-top freezer bag, and start saving those scraps! They’ll add up before you know it, and you’ll soon be savoring your very own, very simple, homemade stock, ready for you to cook rice in, make soups with, deglaze pans, even make risotto with. I won’t fault you for keeping an emergency can of stock in the pantry, but you might end up forgetting all about it with the wealth of stock you’ll have in your freezer.
Take it from one who knows.


Eating such a huge amount of vegetables, I was always sorry for all this non edible stuff that would go wasted.. So they can be frozen and then turned to stock? What a brilliant idea! Thanx for sharing!
Thank you.
Other bloggers will no longer make fun of me (true story). It’s cruel in the blogosphere.
Thanks for the tip – I found this post by frantically Googling “how to strain your homemade stock” 🙂 My first batch of stock (EVER) has been simmering on the stove for about 4 hours, and I just realized I have no idea how I’m going to deal with the whole straining issue. So yay, thanks for this!
Kim: Congratulations on your first stock! And I’m super glad I could help you figure out the logistics. 😉 Happy cooking!