UPDATE: She said yes!
Now, I can die happy.
I have a crush.
I have a serious crush on Ruth Bourdain.
There, I’ve said it, and I don’t care who knows.
And today being Valentine’s Day, I’ve done what any sensible person would do: I’ve prepared a four-course dinner for my Special Lady, complete with drink pairings, and comprised of all her favorite foods. I’ve dimmed the lights, and put on gentle music. I got roses.
For the first course, only roasted marrow bones will do. Accompanying are lightly-toasted baguette slices, and a vibrant breadcrumb topping with celery, scallion, parsley, and cayenne. There are eight bones, because I want to make sure Ruth has enough to be satisfied. Hell hath no fury like a woman with too little bone marrow. A jammy, tannin-heavy Australian Shiraz is a fantastic match for the unctuous stuff, and gets the evening off to a properly-buzzed start.
The second course, a soup course, features honeycomb tripe in a flavorful broth, with tomatoes, onions, and celery. Slowly simmered for hours, the frilly tripe softens into a lush tenderness, proving that even the most leathery flesh can be made supple with the right treatment. The wine, a Chenin Blanc/Gewurtztraminer/Chardonnay blend from California, with its whip-crisp and flinty tone, lets her know that I’m not all warm fuzzies and sweet poetry.
As much as I would like, I can’t literally give Ruth my heart; but perhaps a veal heart will suffice instead. The entrée, slices of braised veal heart stuffed with mushrooms, onions, bacon, breadcrumbs, and parsley, features a gratuitous pile of carrots alongside. I don’t believe she’ll eat them, but a little color is always nice on the plate. We devour with our eyes first, of course. For such a special evening, I must open the bottle of Cabernet Sauvignon Reserve to pair with this course. It’s only from 2005, but usually I can’t keep any wine around for longer than about a week; I found this one in the back of the cellar, hidden behind the Two Buck Chuck.
And finally, the pièce de résistance created especially for my Little Sweetbread: a smoked tangerine panna cotta. I smoked cream, steeped it with tangerine zest, star anise, and cinnamon, and set it softly into a cool custard. Tangerine suprêmes brighten the plate, and a simple almond florentine lends a crunching contrast to the yielding smooth flesh of the panna cotta. Cocktails are in order at this time of night, and I present a ruby-red rye, Campari, Herbsaint, and sweet vermouth mixture called a New Pal. The bracingly well-balanced drink is simple to whip up, and it’s a good thing, because I’m ten sheets to the wind at this point.
So, humbly, I present myself and this simple meal, in hopes that I might catch her eye, in hopes that she might notice me. I don’t presume that she will deign to answer, but even a word from her savory lips, or a note written by her meat-slick fingers would lift my hungry soul to the company of angels. Then, oh then, we might feast blissfully together on buffalo Seraphim wings and whole roast Cherubim, and be happy together.
Ruth Bourdain, will you be my Valentine?
***********
MENU
Roasted marrow bones, breadcrumb topping, baguette
Australian Shiraz
Tripe soup
Californian Chenin Blanc, Gewurtztraminer, and Chardonnay blend
Braised stuffed veal heart, carrots
Californian Cabernet Sauvignon Reserve, 2005
Smoked tangerine panna cotta, almond florentine
New Pal
***********
Roasted Marrow Bones with Breadcrumb Topping
Makes about 1 1/4 cups breadcrumb topping
I don’t give an amount for the marrow bones here, as it is determined by the number of guests being served, and the rest of the menu. Four people will handily finish off the marrow of eight three-inch bones, if the following courses are reasonably light (and if RuBo hasn’t been invited). The breadcrumb topping makes more than enough for such an amount, and the leftovers (kept refrigerated) make a fantastic topping for pasta or fried eggs, if re-crisped briefly in a hot pan.
1 cup (about 2 ounces) panko, or fresh breadcrumbs
1 tablespoon olive oil, plus extra as needed
1 clove garlic
1/4 cup finely minced celery hearts
2 scallions (white and pale green parts only), finely minced
2 tablespoons finely chopped fresh parsley
1/2 teaspoon dried thyme
1/2 teaspoon whole coriander seeds, ground
1 large pinch cayenne pepper
Salt and black pepper, as needed
Marrow bones, cut into 3 to 4 inch lengths or split lengthwise by butcher
Baguette, thinly sliced
1. Preheat oven to 275º F. Toss panko with 1 tablespoon olive oil, and spread on a rimmed baking sheet. Bake for about 30 minutes, stirring every 10 minutes, or until well-browned and very crunchy. Cool completely. Increase oven temperature to 400º F.
2. Meanwhile, roughly chop the garlic. Sprinkle with a pinch of coarse salt, and smash into a paste by dragging the flat side of a knife across the garlic. Transfer to a medium bowl. Toss with the minced celery, scallions, parsley, thyme, coriander, and cayenne until thoroughly combined. Set aside.
3. Place marrow bones cut-side up in a shallow oven-safe dish just large enough to hold all bones and keep them level. Roast at 400º F for about 20 minutes (less if your bones are split lengthwise), or until marrow bubbles and offers no resistance at all when pierced by a skewer or thin, sharp blade. Remove from oven and let cool briefly.
4. Meanwhile, lightly brush both sides of baguette slices with olive oil. Place in a single layer on a baking sheet, and toast in the oven for 3 to 4 minutes, or until just barely toasted.
5. When ready to serve, toss browned panko with the celery and herb mixture. Taste, and correct seasoning with salt and black pepper as needed. Do not do this too early, as the breadcrumbs may lose their crispness.
6. To serve, run a thin blade around the edge of the marrow to release it, if needed. Serve warm either in the bone, or released onto a plate, with the baguette slices and the breadcrumb topping.
Stay tuned, more recipes to come soon!
Lunch today: leftover mujadara (recipe heavily adapted from Molly Wizenberg at Orangette) with an egg scrambled into it, topped with yogurt and served with whole wheat flatbread. That egg-scrambling trick is my all-time favorite way to deal with leftovers.
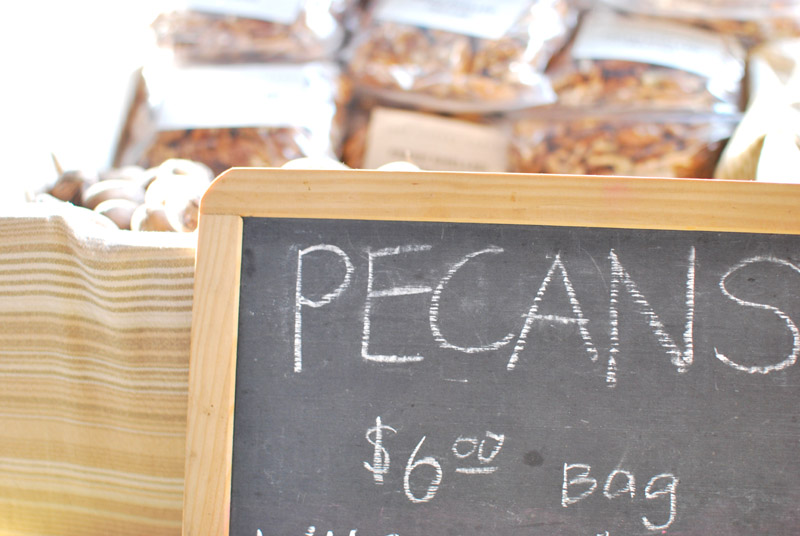
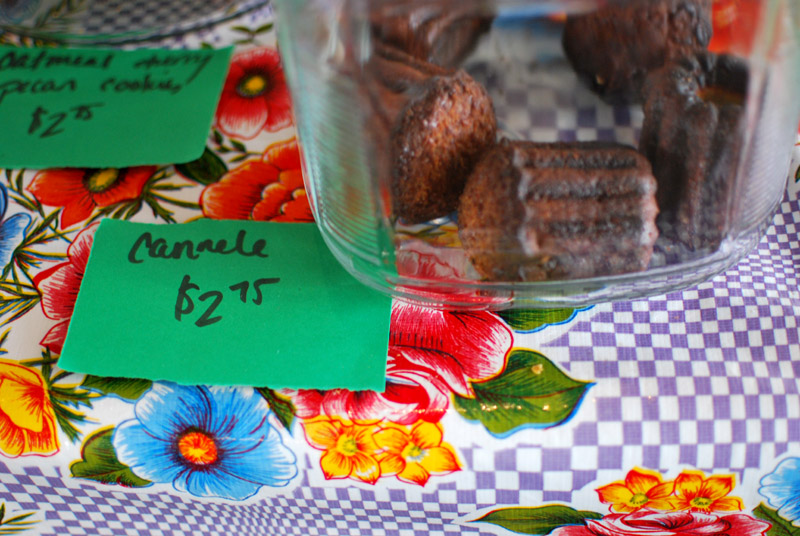
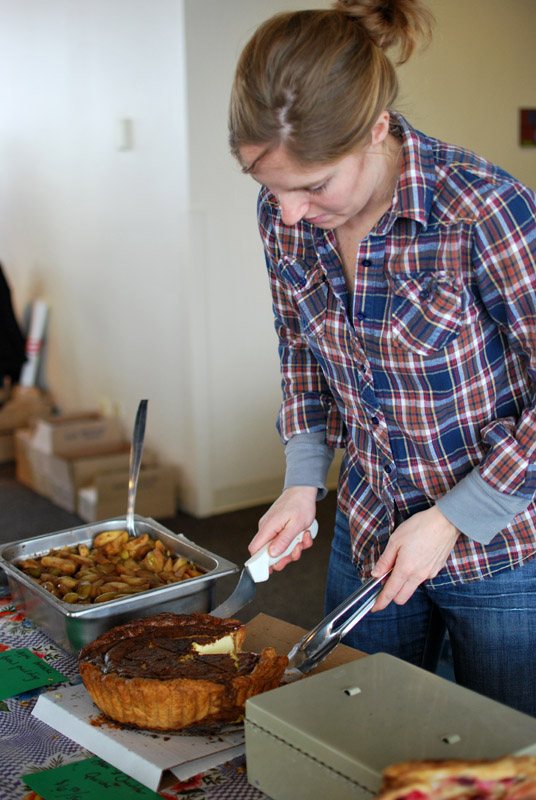
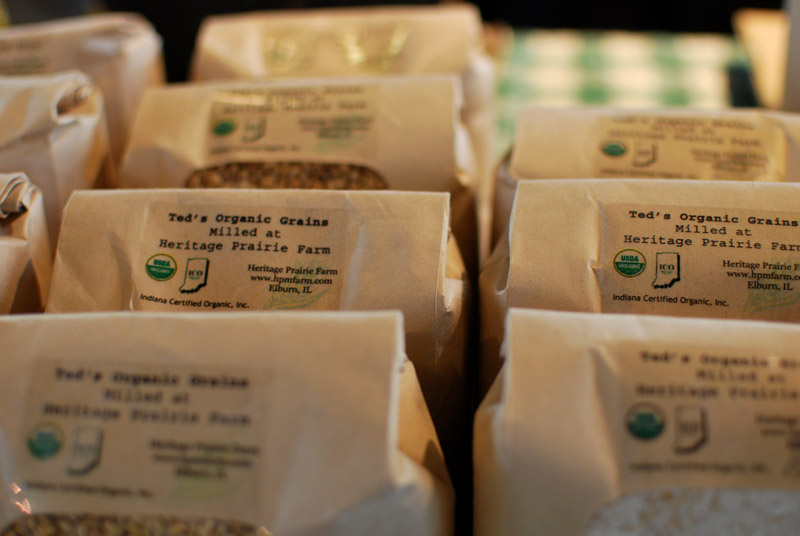
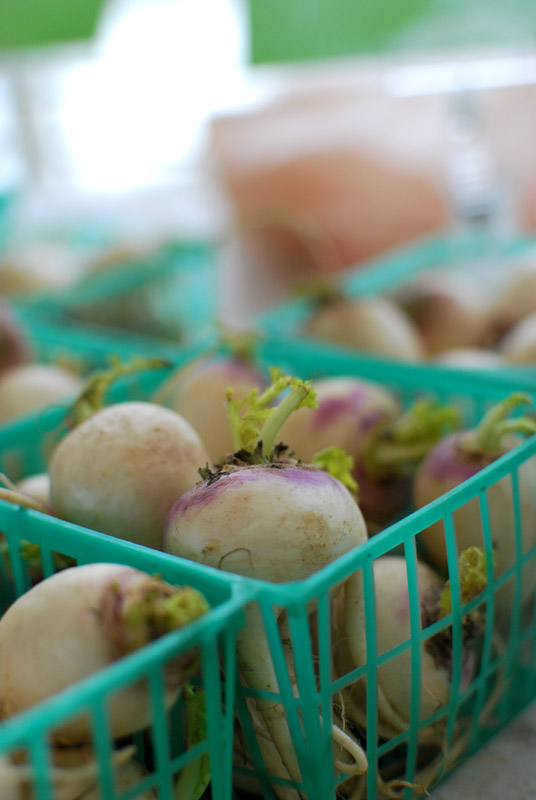
Here in Chicago, the granddaddy of all farmer’s markets is the Green City Market, the only market to stay open all year round. If you’re interested in local, sustainable, organic, farm-direct food (and we certainly all are, am I right? Every meal, right?), you’re bound to end up shopping at Green City for most of your food.
Their rigorous standards for their vendors guarantee that everything is as it appears, that you actually are buying those apples or tomatoes from the nice lady or man who grew them, not from a re-seller. And in the depths of Winter, when every other farmer’s market has shut down, Green City remains not as a deplorable sole option with a captive market, but as glamorous and worthy a destination as it is any other time of year.

Green City Market recently ran a photo essay contest, in which they invited food and photography junkies to shop at the market on a particular date, cook the food at home, and share the photos of the whole experience. I decided to participate on a whim, mostly because any excuse to practice and improve my photography skills is probably good for me.
You can see the photos I entered, along with all the other entries, on this site they’ve set up. If you like, you can rate each entry by clicking on the stars at the top of each one. And remember, thumbnails rarely do justice, so click on each photo to see it full-size.
As there was a limit to the number of pictures one could submit, I had to whittle down the over 100 photos I took that day, so I’m posting some extras here. And as a special bonus to all my lovely, lucky readers, below you’ll find the recipe I created to showcase the bounty I brought home from the market.
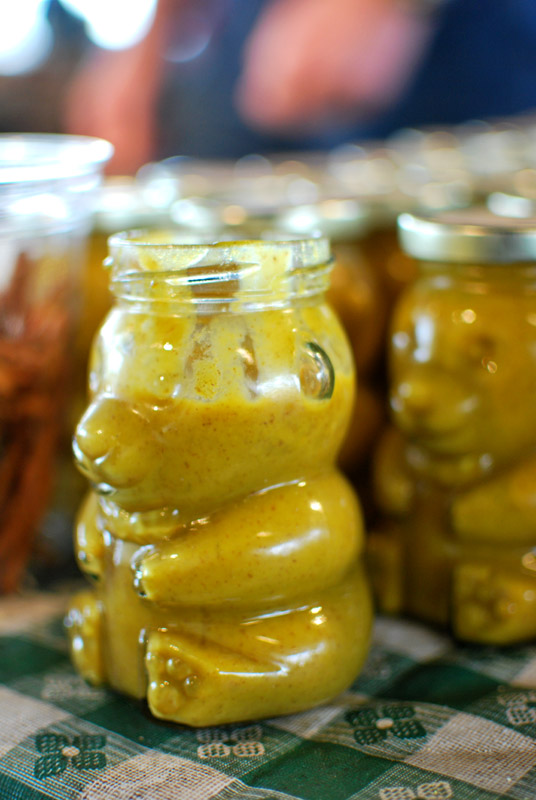
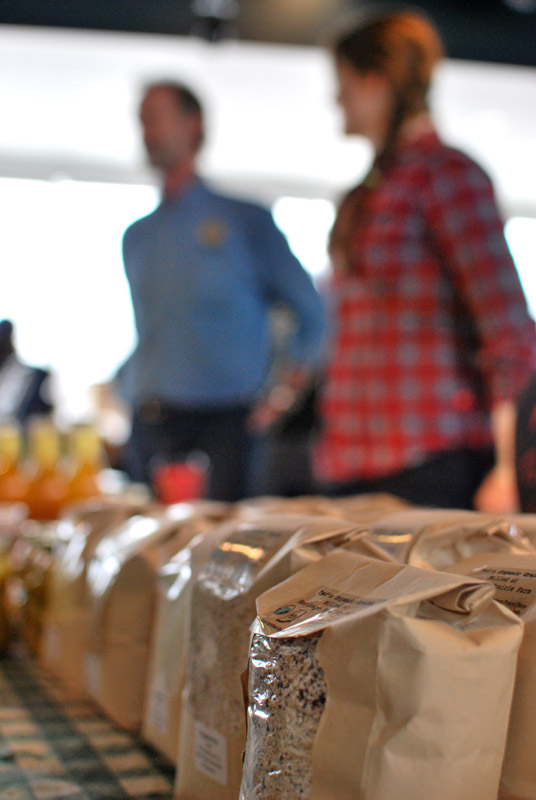
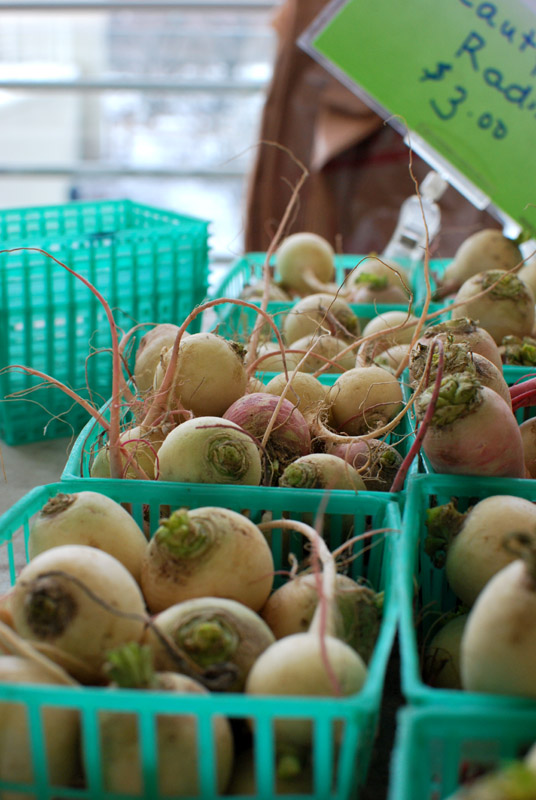
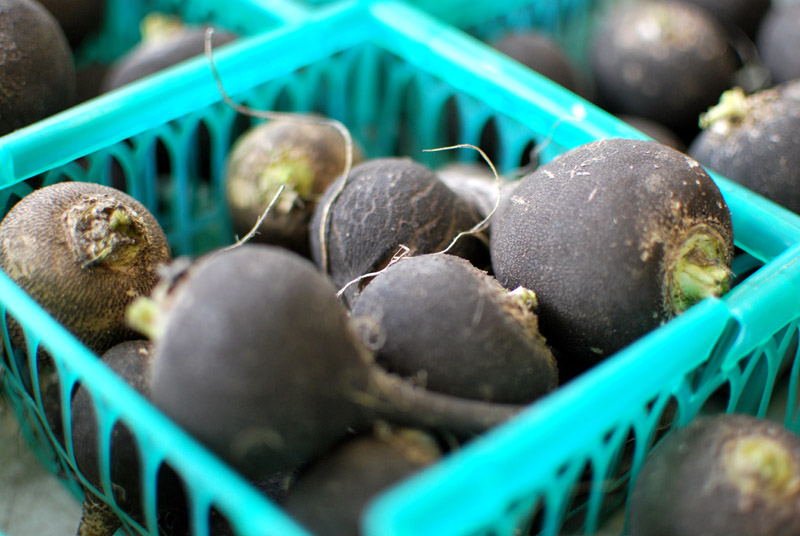
Don’t forget to check out the rest of the pictures from this contest!
Wheat Berries with Radishes and Pecans
Serves 4 to 6
This recipe has a lot of different steps, true, but they are all accomplished in the time it takes the wheat berries to cook. Even better, you only use two pans: one for the wheat berries, one for every other step (with no washing-up required in between). The flavors here are Spanish-inspired, with smoked paprika, thyme, Sherry, and anchovy; the chewy wheat berries soak them all up with gusto. This dish would be great any time of year, warm in the Winter, and cold in the Summer. We ate this as a main dish, but it would also be a special side dish for any simply-prepared meat or poultry.
For wheat berries:
6 cups chicken stock or water
2 cups wheat berries, rinsed and drained
1 teaspoon salt
3 anchovy fillets packed in oil, drained
1/4 cup olive oil
1 tablespoon fresh thyme
1 tablespoon Sherry vinegar
1 tablespoon fresh lemon juice (zest it first!)
1/4 cup (packed) chopped parsley
3 scallions, chopped
Salt and black pepper, to taste
For anchovy-toasted pecans:
3 anchovy fillets packed in oil, drained
1 tablespoon butter
1 cup raw pecans, chopped roughly
Salt, to taste
For smoked paprika breadcrumbs:
1 scant tablespoon butter
1/2 cup panko
1/4 teaspoon smoked paprika
Zest from 1 lemon
Salt, to taste
For sautéed radishes:
2 to 3 teaspoons butter
1 bunch radishes (about 1 pound), cut into quarters
Salt and black pepper, to taste
Optional finish: fried or soft-boiled eggs
1. Bring the chicken stock or water to a boil in a saucepan over high heat. Add the wheat berries and salt, and return to a boil. Reduce the heat to low and simmer, covered, until wheat berries are tender. Depending on the type of wheat berry, this may take anywhere from 45 to 90 minutes; taste occasionally to determine doneness. Add additional liquid if the pot begins to dry out before the wheat berries are cooked. When fully cooked, drain wheat berries of any remaining liquid if necessary.
2. Meanwhile, heat a skillet over medium-low heat. Add the anchovy fillets and cook, stirring, until broken up, just a minute or two. Scrape into a large, non-reactive bowl, and whisk in olive oil. Let cool briefly. Add thyme and set aside. Don’t bother washing the skillet.
3. While wheat berries finish cooking, make the remaining accompaniments. To make the toasted pecans, heat the same skillet over medium heat. Add the anchovy fillets and cook, stirring, until broken up. Add the butter, and let melt. Toss the pecans in, and stir often until fragrant and toasted, about 5 minutes. Sprinkle with a little salt. Remove to a plate to cool. Wipe the skillet out with a paper towel if necessary to remove any dark or burnt bits that may remain, but don’t bother washing it.
4. Heat the same skillet over medium-high heat. Add the butter, and melt. Add the panko, and toss until evenly coated with butter. Cook just until beginning to turn golden brown. Remove from heat, and stir in the paprika, lemon zest, and a pinch of salt. Transfer to a bowl. Don’t bother washing the skillet.
5. Heat the same skillet over medium-high heat. Add the butter, and melt. Add the radishes and sauté until cooked to desired doneness, 2 to 3 minutes for al dente, slightly spicy radishes, or up to 8 to 10 minutes for softer, less peppery ones. Remove from the heat and set aside.
6. To finish, add the Sherry vinegar, lemon juice, parsley, and scallions to the flavored olive oil in the large bowl. When the wheat berries are fully cooked, drain if necessary. Add to the bowl while still warm, and toss with the dressing. Let stand 5 minutes or so to absorb some of the dressing. This is a good time to fry or soft-boil an egg (follow these directions, but let stand only 4 minutes) if you’d like one; a runny egg yolk is highly recommended here. (If you’re frying an egg, there’s no reason you can’t use the same skillet again. Bonus.)
7. Toss the wheat berries with the toasted pecans and sautéed radishes. Serve each portion topped with an egg (if using) and a heavy-handed sprinkling of paprika breadcrumbs on top. Leftovers keep quite well in a refrigerator for up to a week, and are even better the second and third day.
Every year, I ask my boyfriend not if he wants an elaborate, ridiculous, complicated, over-the-top birthday cake, but what kind.
As I was trained as a pastry chef, the chance for me to flex my pâtissière muscles once a year is irresistible. I dive into the research stage like a student studying for final exams, poring over books and trawling through websites in search of the perfect combination of flavors and textures. I plan, brainstorming ingredients and scribbling cross-section views to determine proper layering. I bake, sometimes for several days, but always with the utmost care and professionalism, as this is serious business. We invite others to help devour the behemoth.
The first year we lived together, he requested simply that it be “so unusual that most people wouldn’t want to try it based on the description”. Thus was born the chocolate, pear, walnut, and blue cheese cake. Five layers of it. Oh, yes. (And, in fact, many people did not want to try it based on that description, leaving us to finish most of it.)
The year after that, the request was for stark contrast to the previous year, something that could be described as yellow cake with white icing, but with a gourmet twist. This resulted in the Meyer lemon cake with white chocolate buttercream, polka-dotted on the side with lavender macarons.
The challenge for this year was a simple request: fall fruit. Having already offered pear (albeit subtly), and hating to repeat myself, I settled on apple as the dominant flavor. My fevered brain concocted a vision of apples, walnuts, browned butter, and rum, layers of soft cake alternating with the airy crunch of dacquoise (basically, meringue with nuts).
Funnily enough, I ended up not using one single apple in the cake, preferring to use trusted recipes that would behave predictably, and flavoring with apple cider wherever possible.
The finished cake was a seven-layer stunner, and tasted just as good as it looked. Yes, it was quite sweet and rich (and the tall pieces necessitated laying the fork down for a breather halfway through), but the friable walnut dacquoise yielding between the teeth and the rum buttercream literally melting over the tongue were compulsion enough to finish the plate. The cider flavor was subtle, but crisply present, playing very nicely with the browned butter cake layers. The texture was the real star here, each bite equally soft, crunchy, and luxurious.
There was not one single piece left over at the end of the night. I’d say that’s a pretty good review.
Apple Cider and Walnut Birthday Cake
Makes one huge cake
For the cake layers, I turned to Rose Levy Beranbaum’s French Génoise (recipe can be found here). I doubled the recipe almost exactly, but used 120- 130 grams (about 9 tablespoons) of beurre noisette to really accentuate the browned butter flavor. Additionally, instead of using only vanilla, I reduced a small pan of apple cider until it was nearly thick as honey, concentrating the apple flavor, and used that instead of half the vanilla.
2 9-inch French Génoise Cakes (recipe here)
Cider Cake Syrup (recipe below)
Rum Buttercream Frosting (recipe below)
Walnut Dacquoise (recipe below), edges trimmed to 9 inches to match the cakes
1. Cut the tops off the cakes to make them level. Carefully cut each into two layers. Place the bottom layer of one cake on a cake plate, cut-side up. Slide thin pieces of wax paper or parchment under the cake, to prevent frosting from getting on the plate. Brush the cake with the syrup, gently and thoroughly, but taking care not to drench the cake (otherwise, the buttercream will be difficult to spread).
2. Place a large dollop of buttercream on the cake layer, and spread to an even thickness of 1/8 to 1/4 inch. Add additional if necessary, but take care not to get crumbs in the main bowl of buttercream. Wipe the icing spatula as needed.
3. Place a round of dacquoise on top, and press very lightly into the buttercream. Spread another layer of buttercream on top of the dacquoise, taking care to not break the dacquoise.
4. Repeat layering of cake (using the top halves of each cake, brushing each layer with syrup), buttercream, and dacquoise, until only one cake layer remains. For the last cake layer (the bottom of the other cake), brush the cut (top) side with syrup before placing cut-side down on top of the cake (the brown bottom should be on the very top).
5. Place a huge dollop of buttercream on the top of the cake. Spread evenly across the top in a very thin layer, and let the excess fall over the sides, spreading evenly as it does. Smooth extra buttercream over the sides in a very thin layer. Do not worry about visible crumbs (which may be many) in this layer. When the cake is fully coated with a very thin, even layer of buttercream, transfer to the refrigerator. Let chill approximately 30 minutes, or until buttercream is firm.
6. To finish frosting the cake, spread another thin layer of room-temperature buttercream over the top to hide the visible crumbs in the first layer. Either spread buttercream over the sides, or pipe decorative vertical lines (start at the bottom) around the cake as shown. Return to the refrigerator until ready to serve. The wax paper or parchment strips will be easiest and cleanest to remove if the cake is well-chilled. If well-chilled, let sit at room temperature for 30 minutes before serving.
Cider Cake Syrup
Makes about 1/2 cup
A light syrup such as this is one trade secret to achieving a moist, yet close-crumbed cake, ideal for thin cake layers.
2 1/2 ounces (70 g) water, about 5 tablespoons
2 1/2 ounces (70 g) apple cider, about 5 tablespoons
2-3 tablespoons sugar, or to taste
1. Stir together over medium heat until the sugar dissolves. Let cool before using.
Walnut Dacquoise
Adapted from The Professional Pastry Chef, by Bo Friberg
Makes four 9 inch rounds, plus a few extra meringue cookies
For this cake, you only need 3 dacquoise rounds, but one will invariably break.
6 ounces (170 g) raw walnuts, about 1 1/2 cups
1 ounce (30 g) cornstarch, about 1/4 cup
1 cup egg whites, at room temperature
14 ounces (400 g) granulated sugar, about 2 cups
1. Preheat the oven to 250º F, using convection heat if possible. Spread the walnuts in an even layer on a baking sheet, and toast for 10 minutes. Let cool. Position racks near the top and bottom thirds of the oven.
2. Meanwhile, draw four 9 inch circles on sheets of parchment (the cake pan you will use to bake the cake layers is a perfect template), and mark the center of each circle. Invert the parchment onto baking sheets, so that the pencil or ink side is down. Make sure you can see the circles through the parchment.
3. Chop the cooled walnuts, preferably in a food processor, until very finely ground. Take care not to over-process them, and make a paste. Toss with the cornstarch.
4. Using a stand mixer, beat the egg whites with the whip attachment on high speed until thickly foamy, or approximately quadrupled in volume. Continue to whip while very slowly adding the sugar, taking about 4 minutes to add it all. Whip until stiff peaks form.
5. With a large rubber spatula, lightly but thoroughly fold the walnuts into the whipped egg whites by hand. Transfer the dacquoise into a piping bag fitted with a 1/2 inch (number 5) round tip. Fill the bag only slightly more than halfway for an easier time piping.
6. To pipe the dacquoise rounds, start in the marked center of each circle. Holding the piping bag vertically, and using even pressure, let the dacquoise fall from the tip into a flat, tight spiral on the parchment, leaving no gaps in the spiral. Try to pipe each spiral in one continuous ribbon. Repeat with remaining dacquoise and circles. Pipe any leftover dacquoise into small cookies around the edges of the piped spirals (do not let them touch). (Alternatively, if you don’t have a piping bag, gently spread the dacquoise out into as even a layer as possible, using the circles as templates. Use a spoon to make cookies out of any leftover dacquoise.)
7. Bake the dacquoise at 250º F for one hour, or until thoroughly dry. If after one hour, you are unsure whether or not it’s dry, simply turn the oven off and leave the dacquoise in the oven with the door closed for one more hour, or up to overnight. If not using immediately, store in an airtight container until ready to use.
8. When ready to use, trim the edges of the dacquoise with a serrated knife, to make the rounds exactly as big as the cake layers you are using.
Rum Buttercream Frosting
Adapted from The Professional Pastry Chef, by Bo Friberg
Makes 4 1/2 pounds, or enough for one 7 layer cake, or more than anyone reasonable should ever have on hand
This recipe, a classical French Buttercream, really requires the use of a thermometer for the sugar syrup. It seems perhaps unnecessarily complicated, but produces a much more stable buttercream than a simpler method. Do not be tempted to estimate temperatures here, as accuracy is fairly crucial. Be sure your butter is well-softened before beginning; it will make your life so much easier. And you are reading that correctly, you need two whole pounds of butter. They don’t call it “buttercream” for nothing.
1 1/2 pounds (680 g) granulated sugar, a scant 3 1/2 cups
1/2 cup water
12 egg yolks, at room temperature
2 pounds (910 g) unsalted butter, at room temperature
2 to 3 tablespoons dark rum, to taste
1. In a medium saucepan, bring the sugar and water to a boil over medium-high heat, stirring just until the sugar is dissolved. Without stirring further, cook the syrup until it reaches 240º F (sugar crystallization is the enemy here, and stirring will help form crystals). Use a pastry brush dipped in water to wash any forming crystals off the side of the pan.
2. Meanwhile, beat the egg yolks in a stand mixer on medium-high speed with the whisk attachment until fluffy and lightened in color, 3 minutes or so. When the sugar syrup is fully cooked, lower the speed to medium-low. Slowly drizzle the syrup down the side of the bowl into the yolks, avoiding the moving whisk as much as possible (which will fling syrup against the bowl, creating hard lumps that may later end up marring the smooth texture of the frosting).
3. When all the syrup is added (do not scrape the pan; it’s okay if some remains), turn the speed to high and whip until the mixture has cooled. This will take some time, maybe even 10 to 15 minutes.
4. When the mixture has cooled enough to not melt the butter, turn the speed back to medium-low. Add the butter gradually, only adding it in as fast as it can be incorporated. The mixture will look curdled and broken at times, but do not despair. Continue whipping, and all will be made well in the end. When all (yes, all) the butter has been added, add the rum gradually, until it tastes right to you. Use immediately, or refrigerate, bringing to room temperature before using.
Every New Year’s Day, like a good Southern girl, I cook up a large batch of luck and money. That is, I fix a huge pot of black-eyed peas (for luck), with a side of cabbage (for money). I invite everyone and prepare enough to feed an army of hangovers. And every year, hardly anyone manages to drag themselves through the cold to our remote neighborhood, except for a brave few stragglers.
Sigh.
This, in turn, means that every year, I have enough leftover black-eyed peas to last until practically next year. This year was no exception. And delicious and fortuitous though they may be, after eating them for six days straight, they start to wear a little thin. Or, more correctly, if I had to choke down one more black-eyed pea, luck or no luck, I might scream.
With a packed-full freezer prohibiting long-term storage of the remaining glut (what on Earth is even in there?), the only option was to get creative. Since we had been drowning our plates of leftovers in jalapeño-based green Tabasco sauce, and because I’m obsessed lately with poblano peppers, I settled on pea-filled chiles rellenos.
It’s traditional to fry the filled chiles in an airy, whipped egg white batter; but as January is the most ascetic month, an unadorned and healthier baked version was more in order.
I’m not a proponent of unnecessary gadgets in the kitchen, but there’s one particular item that I never get to use enough. I know it’s not in everyone’s arsenal, but I couldn’t resist pulling it out to char the peppers.
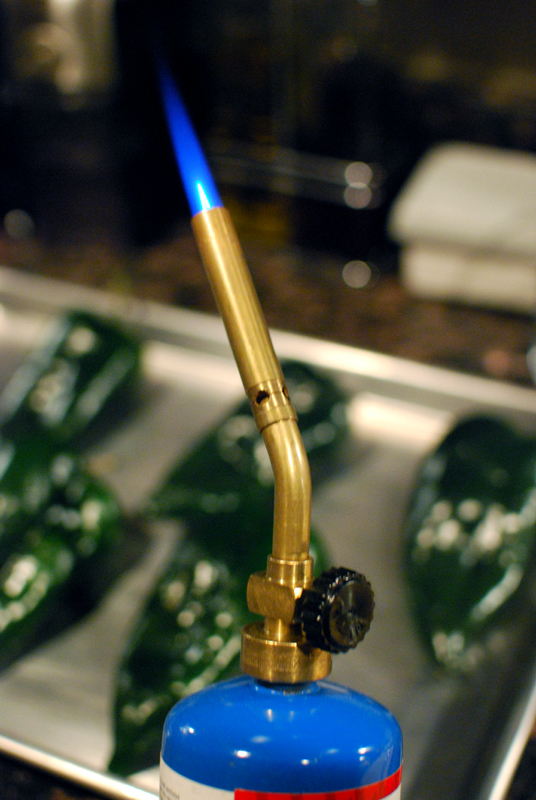
The rationale was that the propane torch would char the skin more evenly than the broiler (which it did), it would leave the flesh itself less cooked and therefore holding its shape better (which it also did), and be entirely delightful to use (which it always is).
Unfortunately, it didn’t really work as well as intended. The small, though agile, flame handily blackened the skin, but made it fairly difficult to peel off, even with the aid of paper towels (I dared not try rinsing it off with water, for fear of losing flavor in the process). And yes, the flesh remained firm and resilient, but it never really achieved that seductive sweetness of a softer and more thoroughly-cooked roasted pepper. Next time, skip the power tools and go with the tried and true method of using a broiler.
The filling was a blend of the aforementioned black-eyed peas and an equal measure of crumbled queso fresco, to add richness. Any soft, mild, melting cheese is appropriate here, and practically requisite; I don’t think I’ve had a chile relleno yet that didn’t include a significant amount of cheese melting seductively under the spicy green cloak of poblano.

For a sauce, I wanted a sharp acidity to counteract the relative sweetness of the roasted poblanos and the creamy peas; tomatillos were a natural fit. Suppressing a natural urge to char the paper-clad darlings, I blended up a vibrant raw salsa, brightened with celery, onion, cilantro, and lime.
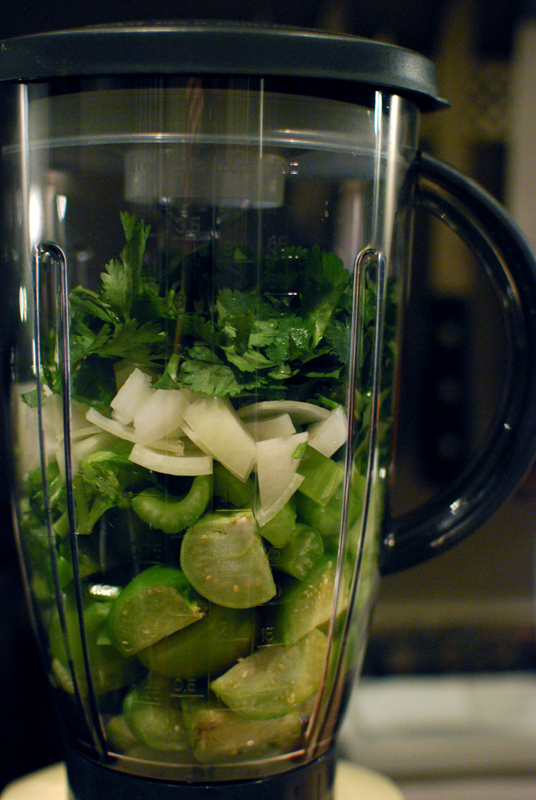
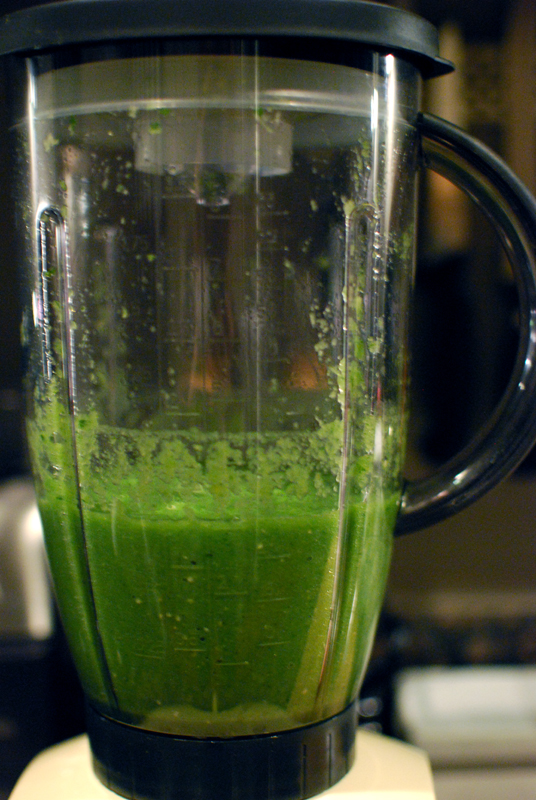
A batch of polenta cooked in chicken stock anchored the whole dish, and provided a bed to soak up any errant juices. I simply had to include corn, since I’m a sucker for cornbread with any kind of peas or beans, not to mention how beautifully cornmeal and green peppers play together.
The final dish was exactly what I needed: spicy, bright, creamy, even a bit glamorous. After the previous six nights of dowdy dinners, those chiles rellenos looked like Dolores del Río. Most appealing of all, of course, I didn’t have to endure any more ghastly plates of plain black-eyed peas.
Lucky me? I should say so. Now I just need that lucrative cabbage to kick in….
Black-Eyed Pea Chiles Rellenos with Raw Tomatillo Salsa
Makes 6
Do be careful with the poblano peppers, and consider wearing rubber gloves to deal with them, something I usually obstinately refuse to don. They aren’t quite as spicy as a Serrano or jalapeño, but after seeding six of them, they can still leave plenty of capsaicin in your fingertips. I discovered this after replacing a fallen-out contact lens the next morning, a painfully tearful lesson. Someday, I may learn.
The tomatillo salsa has an unusual but optional ingredient: cocktail bitters. In some sauces, I find that bitters help round out the flavors, just as they do in cocktails. Magic! If you don’t have any, they can certainly be left out; in that case, the longer you can let the salsa sit, the better. It’ll be much better the next day anyway.
For the raw tomatillo salsa:
12 ounces tomatillos (about 8 to 10), paper removed, and rinsed
1 small white onion (1/2 large onion)
3 ribs celery
1 large clove garlic
1/2 to 1 cup cilantro, packed
Juice of 1/2 lime (about 1 tablespoon), or to taste
3 dashes Peychaud’s bitters (optional)
Salt and black pepper, to taste
For the chiles:
6 poblano peppers
2 cups leftover cooked black-eyed peas (or canned), drained of as much liquid as possible
2 cups crumbled queso fresco (or queso chihuahua, jack, mozzarella, or any other mild and soft cheese), about 8 ounces
Salt and black pepper, as needed
For the polenta:
4 cups chicken stock (or water)
1 teaspoon salt
1 cup polenta or coarse cornmeal (preferably stone-ground)
1 bay leaf
1. To make the tomatillo salsa, cut the tomatillos into quarters, and roughly chop the onion and celery into 1 inch pieces. Place all ingredients except salt and pepper into the jar of a blender. Process until smooth. Taste, and correct seasoning with salt, pepper, and lime juice. Transfer to a bowl, and let sit at least 1 hour.
2. To make the chiles rellenos, preheat the broiler to high, and position a rack as close to it as possible. Place the poblanos on a rimmed baking sheet, and broil until charred and well blackened. Turn each poblano as necessary to blacken evenly. Remove from oven, and place peppers in a plastic or paper bag, sealing it tightly. Let rest 10 to 15 minutes. Turn the oven to 375º F, and position a rack in the middle of the oven.
3. Meanwhile, combine the black-eyed peas with the crumbled cheese. Season to taste with salt and pepper if necessary. Set aside.
4. For this step, wear rubber gloves, unless you’d rather not touch your face for two days. Remove the peppers from the bag, and gently peel off the blackened skin, which should come off easily. Make a single slice lengthwise into each pepper (if the pepper has split open, use that side).

Using kitchen scissors, carefully cut away the seeds and membranes. You may need to make a short crossways cut close to the stem in order to fully access the seeds.
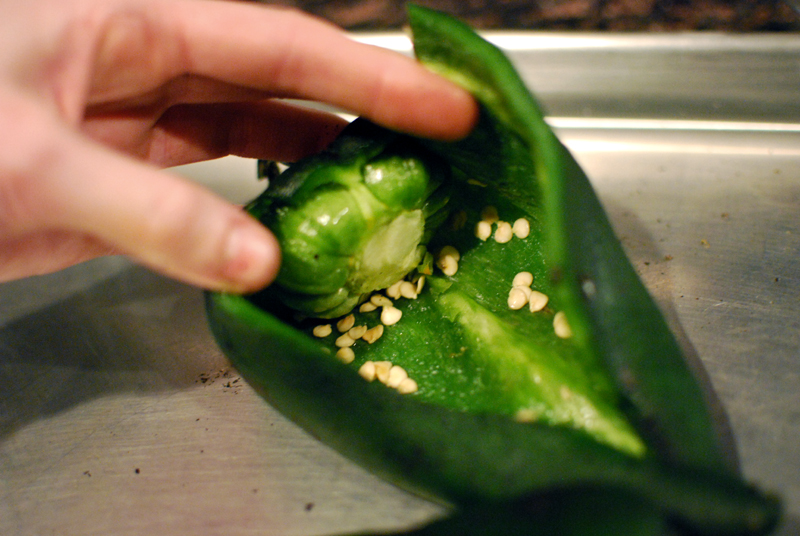
Remove and discard as many seeds as possible, using your hands. Do not ever rinse peppers after roasting, as that washes away much of the smoky flavor that has developed.
5. Fill each pepper with as much of the black-eyed peas as it will allow, taking care to not overfill and rupture the pepper. Close the pepper with toothpicks, if desired, and place again on the rimmed baking sheet. Wash your hands thoroughly if you’ve touched the peppers (particularly the insides) with your bare hands.
6. Bake the filled peppers at 375º F for 15 to 20 minutes, or until warmed through, and cheese is melty.
7. Meanwhile, make the polenta. Bring the chicken stock to a boil in a medium saucepan. Add the salt. Slowly add the polenta, whisking as you pour it in order to prevent lumps. Add the bay leaf. Reduce the heat to medium-low, and simmer until tender, whisking occasionally. This will take between 15 to 40 minutes, depending on the coarseness of the grain used. Remove the bay leaf.
8. To serve, spread the polenta on a plate. Top with a warm chile relleno, and garnish with tomatillo sauce. A cold beer on the side doesn’t hurt things one bit.

Oh, it’s one of my favorite times of year. I’ll admit it, I just love Christmas. The weather isn’t too bad yet, there’s sparkly lights everywhere, and the Chicago Transit Authority runs a holiday train with a Santa and tinsel and candy canes and everything! Everybody – but everybody – on that train has a big, fat smile on his face.
It’s to the point that somewhere around September (or whenever the weather starts getting cold), I begin to get a little itchy to put up the Christmas tree. In my house, the day after Thanksgiving is dedicated to eggnog, Christmas music, Christmas movies, and trimming the tree. It beats going to the mall by about fifty miles.
But I know that some people out there don’t particularly love this holiday season. Too much stress, travel arrangements, gifts to buy, family drama… it can all get a bit overwhelming. I understand.
So, in order to help you find a little of the Christmas cheer that fills me every December, I’ve written a little guide. For one day, at least, forget the drama, forget the travel, forget the stress, and make some gifts from the heart instead of buying some overpriced tat.
It’s just a few easy steps to follow; and if you’re not a little happier at the end of it all, then you weren’t trying hard enough.
Ahem.
First, take a walk. Preferably through a Winter Wonderland, but if it’s merely chilly, that’ll do just as well.
Take a long walk, and clear your head of any pesky thoughts.
Just walk for a while, and see what you see, smell what you smell, hear what you hear. Walk.
Come home. Turn on the tree. Place it by a window so everyone else can see it too. (Bonus points for putting it next to a mirror, for twice the sparkles.) If you don’t have a tree, maybe light some candles.
Hang some stockings, either on a chimney, or just something that looks like a chimney.
Turn on the fireplace. Or, you know, whatever you’ve got.
Play some Christmas music; or, if you’re absolutely sick of that stuff by now, play your favorite upbeat album.
Next, chop some chocolate.
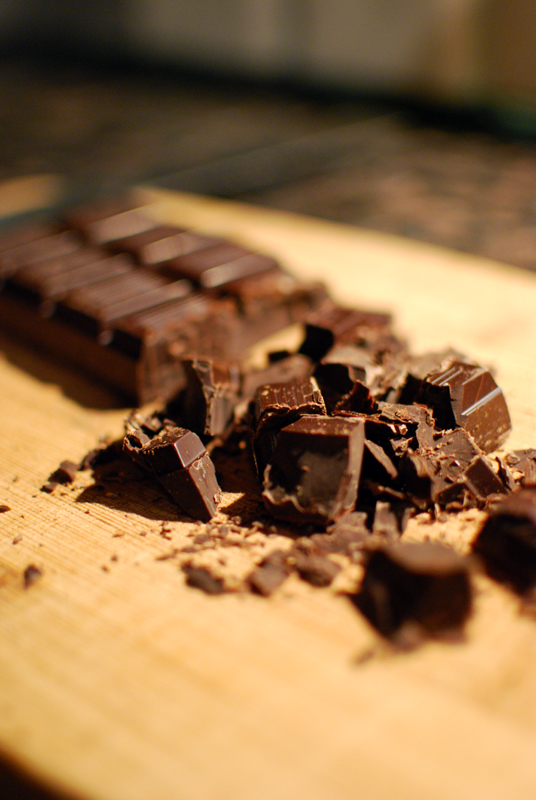
Melt it.
Add peppermint oil.
Stir in Rice Krispies (generic store brand is just as good).
Spoon out onto wax paper.
Let cool.
Give them away, but keep a few for yourself. Count your blessings. Send your loved ones, past and present, some good thoughts. Send yourself a few, too.
If you’re not smiling a little after doing all this, then rinse and repeat. For me, it never fails. This is Christmas.
Crispy Chocolate-Mint Guys
Makes about 50
These could not be simpler. They’re a fantastic way to use up any leftover melted chocolate, if you ever have any. Take care when adding the peppermint oil, as one drop too much can make them taste unbearably minty. (Famed chocolatier Jacques Torres makes something similar, but without peppermint flavor and using cornflakes instead, and I understand he can barely keep them in stock. If it’s good enough for Jacques, it’s good enough for me.)
10 ounces good-quality chocolate
1/8 to 1/4 teaspoon peppermint oil (not extract)
2 cups (about 4 ounces) puffed rice cereal (aka: Rice Krispies), or as much as needed
1. Chop the chocolate, leaving about 1/3 in larger pieces (which will help temper the chocolate). Place it in a medium to large microwave-safe bowl.
2. Heat the chocolate in the microwave on high for 45 seconds. Remove and stir (it will not be very melty yet). Continue microwaving in 10 to 15 second increments, stirring after each one, until the chocolate is mostly melted, but a few large lumps remain (this is important; do not fully melt it in the microwave).
3. When chocolate is heated enough, remove from microwave and stir gently until all lumps melt. This may take a minute or two.
4. Add peppermint oil in 1/16 teaspoon increments, tasting after each addition, until chocolate has a noticeably minty flavor.
5. Stir in rice cereal until fully coated, adding more if necessary. Spoon out onto a wax-paper-lined sheet tray in bite-sized mounds.
6. Let sit briefly, about 15 minutes. If properly tempered, the chocolate will begin to firm up. If not, place in refrigerator until set. Even if they don’t look perfect, they’ll still taste the same.
Well, it finally happened. Our creaky, wheezing, seven-year-old PC finally bit the dust — taking with it the photo-editing software I use. Of course.
So while I’m sorting out logistics, I thought you might like to simply hear what I’ve been cooking lately. In no particular order, and with a few notes here and there:
Homemade pizzas (with this crust): one topped with poblano, mascarpone, chopped walnuts, zucchini, and bacon; the other topped with Comté, pesto, ricotta, anchovies, and green apple. I liked the poblano one best, but the other was pretty killer too.
Warm and thick red lentil soup. Fantastic with a dollop of mascarpone. When fully chilled, you can actually stand a spoon upright in it, which is only disconcerting until you taste it.
Cashew butter granola. (Helped to use up a jar of cashew butter left over from making canapés of pumpernickel cocktail toasts, cashew butter mixed with a touch of molasses, shredded smoked duck, celery-apple salad, and hot pepper jelly. To. Die. For.)
Salsa verde, cobbled together from this brief description. Tangy, floral, green, incredible. My new favorite thing. Like a vinegary pesto, sans oil.
Whole wheat puff pastry, from David Lebovitz’s showstopping latest book, but made with this brilliant method. Nutty, buttery, light as a feather, a complete revelation. Made into a gorgeous pithivier-style pie, with spiced winter squash filling. Who needs a pie dish?
Butter flavored with squash seeds. Let me repeat, it’s butter. Flavored with squash seeds. It’s life-changing. Browning it is next to heaven. Had I had it earlier, I might’ve made that puff pastry with some (!).
The best spiced cocktail nut and pretzel mix. Don’t be shy with the cayenne; it seems like too much, but it’s just perfect.
Furikake. Totally hooked. I’ll eat it straight from the container.
Multi-grain granola, rife for variations. Beautifully crunchy.
I didn’t cook it, but my uncle hosted his annual Lobster Boil the weekend before Thanksgiving. In Eastern Kentucky. This year was the best lobster he’s ever had. We took down about 85 of the succulently briny things, plus beef tenderloins, sides, appetizers, desserts, about 60 bottles of wine, a few bottles of Bourbon, and who-knows-how-many beers. Oh, yes.
And last, but certainly not least, the Birthday Cake of walnut dacquoise, brown-butter sponge, apple cider syrup, and rum buttercream frosting. Used an ungodly amount of butter, and worth every single calorie.
Hungry yet? What have you been up to in the kitchen?
I neglected to post these pictures with the first cranberry bean post, but I couldn’t resist sharing them. This is what you can do with a little leftover Warm Cranberry Bean Salad, a poached egg or two, and some toast.
I love that.
As mentioned in my last post, I recently brought home a couple of pounds of fresh cranberry beans. But, having never prepared cranberry beans before (or any fresh beans, for that matter), I turned to my cookbooks and to the internets for help.
In looking through recipes, one in particular stood out like a sore thumb. From Dennis Cotter’s book Wild Garlic, Gooseberries, and Me came something (via 101 Cookbooks) that looked healthful, fresh, and completely unique: a baked cranberry bean and winter squash mole.
I’m familiar with mole sauces served with meat, or most commonly chicken; but I don’t think I’ve ever seen a mole with vegetables. And here, of all fantastic things to combine, were cranberry beans, winter squash, chilies, nuts, and chocolate.
Yes, please.
As luck would have it, I just so happened to have a small butternut squash sitting on my counter, though any similar winter squash would certainly work here. And just because I’m indulgent like that, and because I had some, I used a bit of rendered bacon fat to sauté the onion, celery, chilies, and garlic that became the base of the sauce. It lent a gorgeous hint of smoke to the robust dish, as did the spot of Bourbon I deglazed the pan with.
I didn’t have any of the 70% chocolate specified in the original recipe, but the block of unsweetened chocolate in my pantry seemed close enough. The resulting sauce was just a touch too bitter, too earthy for my tastes. A squeeze of honey, however, and the sauce snapped into harmonious balance.
My only problem with this dish is one that I commonly have: my understanding of the heat level of chilies and other spices can sometimes be off the mark. Way off. Yes, I thought the red jalapeños weren’t quite enough, so a rogue Aurora chili pepper got minced in as well. And then I decided to use the hot paprika instead of the sweet. And I tossed in a cavalier pinch of cayenne for good measure.
The result was a fantastically complex and building heat that might actually have been perfect, were it turned down about two notches. As it was, a small bowl of cooling yogurt was a necessary condiment to even make it through one plate. It was that spicy. I loved it.
But, being kind to the others in my household meant that the mole couldn’t be served in that form again. (The recipe has also been amended to give a more reasonable heat.) Leftover mole, then, was whizzed in the food processor into a sort of spicy, dark pesto that was simply outstanding on penne and gemelli pasta. Yogurt may have also been necessary here, for some; unnecessary though I found it, I used it all the same for the creaminess it gave the dish.
The truly remarkable thing about the dish was how long we ate at it before it disappeared. The original mole served three or four meals, and the resurrected “pesto” served at least six meals. It really was a loaves-and-fishes kind of situation.

In both iterations, though, the mole was hugely flavorful, bold and full of the rich tones achieved only through slow cooking. Chocolatey, too, but not in a saccharine brownie-fudge-cake way; only the deep savory notes shone through. The next day, it was even better after the flavors had properly melded (though still extremely spicy).
These fantastic dishes are part of the reason I love treating myself to new produce, to stepping outside of my culinary comfort zone from time to time. No, I’m probably not about to start making moles every night, or even cooking fresh beans every day; but now I understand them a little more, and I’ll probably jump at the chance to buy fresh beans whenever I see them in the store. My world is now a little bigger, a little more flavorful, a little more adventurous.
And all from a few simple beans.
Baked Cranberry Bean and Butternut Squash Mole
Makes between 4 and 5000 servings
Adapted from Wild Garlic, Gooseberries, and Me, by Dennis Cotter, via 101 Cookbooks
If you’re preparing the Basic Cooked Cranberry Beans (see below) for this recipe, you’ll have the white bits of the leeks left over. You should absolutely use those, washed well and chopped, in this sauce, either in lieu of or in addition to the onion. If you want to make the “pesto” with any leftovers, you may want to thin the purée with a bit of liquid, such as the water an accompanying pasta is cooked in.
1 small butternut squash (about 1 1/2 pounds), peeled, seeded, and chopped into 1/2 inch cubes
1 tablespoon olive oil
1 tablespoon rendered bacon fat (or butter, or olive oil)
1 medium onion, chopped
2 stalks celery, chopped
2 jalapeño peppers, preferably red, seeds removed, minced
4 cloves garlic, minced
1 splash Bourbon (or white wine)
1 tablespoon tomato paste
1 tablespoon sweet paprika
1 bay leaf
2 cups vegetable or chicken broth
1 1/2 ounces pecans, chopped finely or ground in a food processor
1 1/2 to 2 ounces unsweetened chocolate, chopped
1 tablespoon honey
1/2 recipe (about 8 ounces) Basic Cooked Cranberry Beans, recipe below (or 8 ounces canned cannellini beans)
Salt and pepper, as needed
Goat cheese, for serving (optional)
Chopped fresh parsley, for serving (optional)
1. Preheat oven to 400º F. Prepare the butternut squash. Toss the cubes with the olive oil, and season lightly with salt and pepper. Spread into a single layer, and roast for 15 minutes, or until softened and beginning to color. Remove from oven and let cool slightly. Reduce heat to 325º F.
2. While squash roasts, heat the bacon fat in a medium pan over medium-high heat. Add the onion and celery, and cook for 5 minutes, or until softened. Reduce heat to medium-low, add the jalapeños, and cook until lightly caramelized, 20 to 30 minutes, stirring often.
3. Add the minced garlic and cook until fragrant, 1 to 2 minutes. Increase heat to medium. Deglaze the pan with the Bourbon, scraping the pan to release any brown bits. Add the tomato paste, paprika, and bay leaf, stirring to combine. Sprinkle with a bit of salt and pepper. Add the broth, and bring to a simmer.
4. When broth is hot, add the ground pecans, chocolate, and honey, stirring until chocolate melts. Add the cooked beans and the roasted squash. Remove from heat. Taste, and correct seasoning as needed with salt, pepper, and honey.
5. Pour mole into a ceramic baking dish, and cover. Bake for about 1 1/2 hours. Let cool briefly before serving, with rice, polenta, tortillas, potatoes, or similar. Top with crumbled goat cheese and chopped fresh parsley, if desired. Yogurt is good on top as well.
Basic Cooked Cranberry Beans
Makes about 1 pound (or 3 cups) cooked beans
I don’t specify in this particular recipe what may be done with either the broth or the beans, but both are so flavorful that I don’t think you’ll have many problems finding uses. Use the broth in most places you would use chicken or vegetable stock (it will be rather cloudy); see above for a recipe for the beans.
5 or so stems fresh parsley
2 to 3 stalks fresh thyme
2 bay leaves
1/2 teaspoon whole black peppercorns
5 dried pequin peppers (optional, also may substitute other small dried chili peppers)
5 whole juniper berries (optional)
3 whole allspice berries
1 onion, peeled and quartered
2 stalks celery, chopped roughly
Green tops from 1 bunch leeks (save whites for another use), washed well
2 pounds fresh cranberry beans in pods, shelled and rinsed
1. In a triple-thick layer of cheesecloth, tie up the parsley, thyme, bay leaves, peppercorns, peppers, juniper, and allspice into a bouquet garni. Twine may be used, or simply tie the corners of the cheesecloth together.
2. Place bouquet garni and all remaining ingredients into a 5 to 6 quart pot, and cover with cold water. Bring just to the boiling point over high or medium-high heat, then reduce heat to maintain a simmer, over medium-low or low.
3. Simmer uncovered for about 15 minutes, or until beans are fully cooked. If unsure, cut a bean in half. If the center looks chalky and white, continue cooking another 5 minutes or so, until beans are done.
4. Using a strainer, lift out leek tops, onion, celery, and bouquet garni. Discard. Strain beans from broth with either a colander or strainer, reserving both.