My Old Kentucky Derby Party

When I was young, my mom used to decorate our front door and our dining room table for each season and important holiday.  Down from the sweltering attic came boxes full of trappings: the box of pastel Easter eggs and bunnies, and the two papier-mâché baskets shaped like chickens (blue for me, pink for my sister); the spooky Halloween box with cheesecloth ghosts and tiny black kitten finger puppets; the purple, green, and gold box for Mardi Gras with a million plastic king cake babies and only the shiniest of beads, caught in the previous year’s parades.

But one of my favorite boxes contained a decidedly unusual decoration: the miniature Churchill Downs racetrack.  There were miniature horses and jockeys, and a few little ceramic ducks to swim in the infield pond.  What pony-obsessed little girl wouldn’t love it?  This singular tabletop decoration was for a holiday that no one else I knew celebrated, the Kentucky Derby.

Though I was born and raised in New Orleans, my parents are both originally from near Louisville.  As I would come to fully realize years later, when I myself lived in Louisville, the Kentucky Derby is far more than a two-minute race on the first Saturday in May.  The best equivalent I can give is that Derby is for Louisville what Mardi Gras is for New Orleans.  It’s far more than one party, one day, one event.  It’s a season.

The party kicks off two weeks in advance, with the largest fireworks show in North America, Thunder Over Louisville.  Attended usually by around three-quarters of a million people, it’s the sign for Louisvillians to start polishing their mint julep cups and finish selecting the perfect hat, whether or not the race itself is actually attended.

Despite having lived in Louisville for a few years, I have never actually been to the Kentucky Derby itself.  You see, I worked in the service industry; for us, Derby was a series of forced-smile 14 hour days spent in constant frenetic motion, punctuated only by the mandatory after-work Bourbon and then falling into the deepest sleep imaginable.

These days, living in Chicago, I am determined to enjoy Derby in a way I was denied during my time in Louisville.  My party starts about an hour before post time, so that all my guests can settle into a drink or two before the excitement of the race, which is over in a flash.  Pre-race hors d’oeuvres whet appetites for the more substantial food served after the horses run, and individually-sized Bourbon pecan chocolate pies wait for those with a taste for something sweet (recipe here).

Though I don’t have a miniature tabletop racetrack, I do have a hat or two in my closet,  and I can lay out a spread of classic Kentuckian foods.  And I can mix a mean mint julep.  I think my mom would approve.

***********

MENU

Pre-Race Hors d’Oeuvres

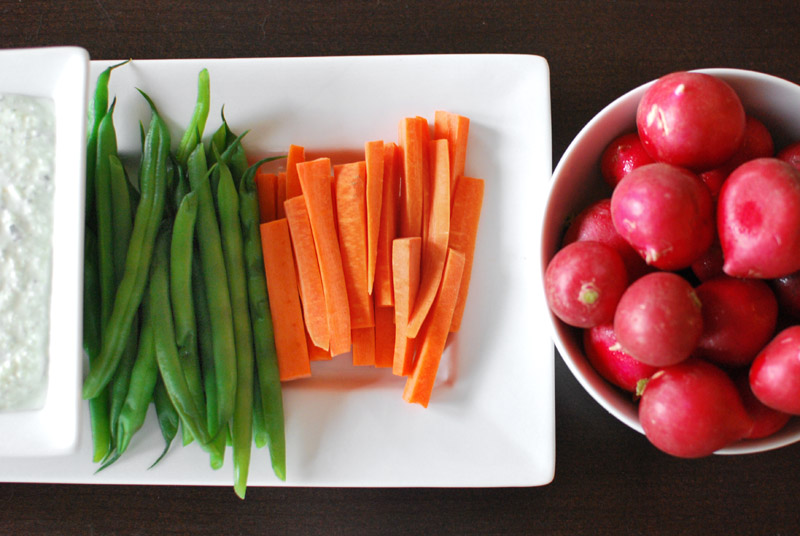
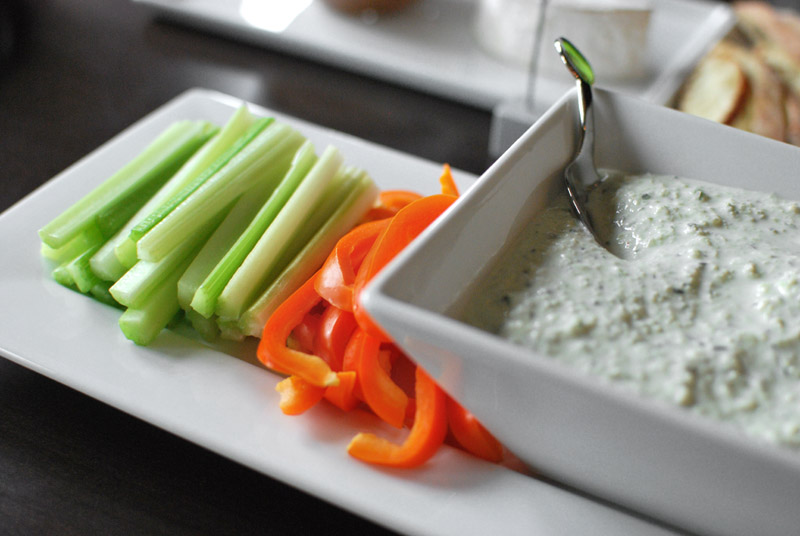
Crudités with Benedictine Dip
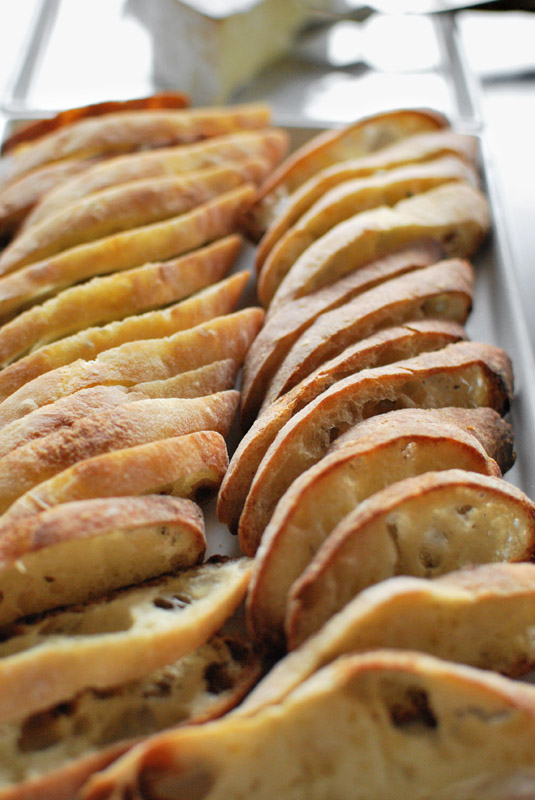
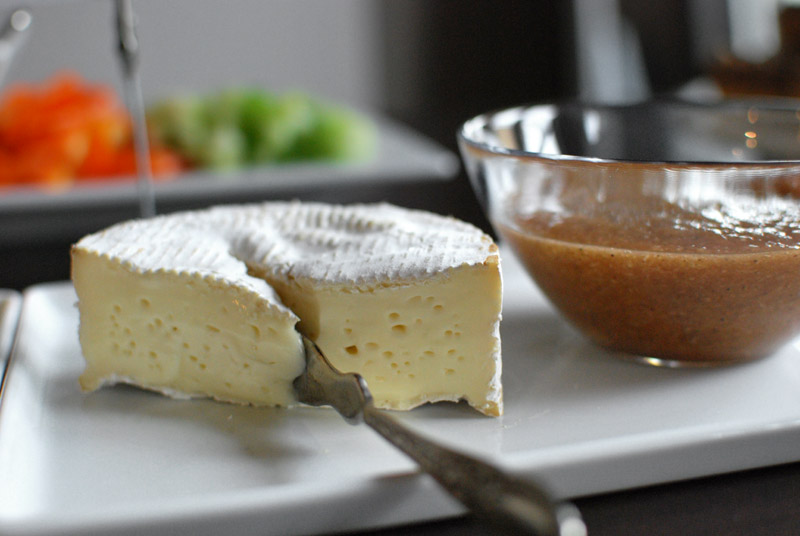
Camembert with Jezebel Sauce and Sliced Baguette
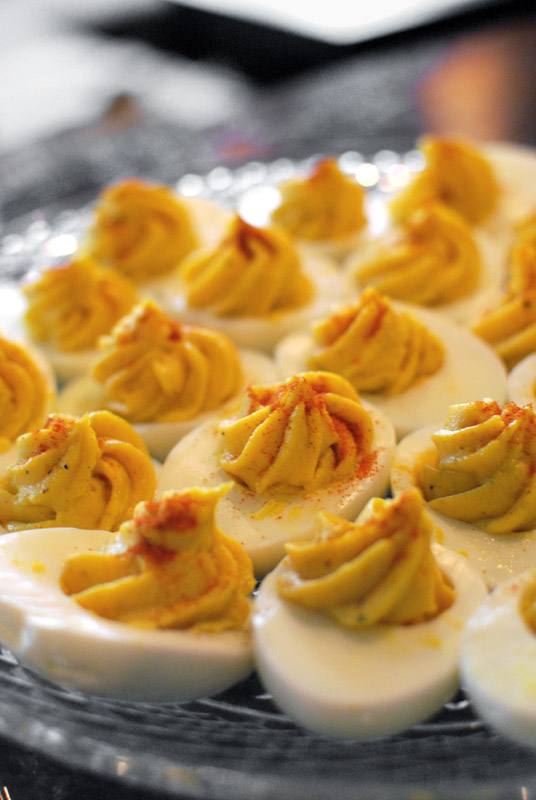
Deviled Eggs

Entrée

Braised Beef Shoulder with Henry Bain Sauce
Biscuits
Celery Root Rémoulade

Dessert

Strawberries with Rebecca Sauce
Bourbon Pecan Chocolate Pies

Mint Juleps
Iced Mint Tea

***********

Benedictine Dip
Adapted heavily from Jennie Benedictine’s original recipe
Makes about 3 cups

Benedictine is a cream cheese based spread, typically used in finger sandwiches (white bread with crusts cut off, please).  Here, I’ve re-imagined it as a slightly softer dip for crudités.  Usually a few drops of green food coloring are added to Benedictine, but I never saw the point.  Serve with whatever vegetables strike your fancy; I used carrots, celery, bell peppers, blanched green beans, and radishes.

8 ounces (1 box) cream cheese, well-softened at room temperature
1/4 cup sour cream
1 large cucumber (seeded, if desired)
1 small yellow onion
1 teaspoon kosher salt, or to taste
1 large pinch cayenne pepper

1.  In a bowl, beat the softened cream cheese until smooth (either by hand or with an electric mixer).  Beat in the sour cream.

2.  If you have a food processor, roughly chop the cucumber and onion, add to the processor, and pulse until chopped finely.  Add, juice and all, into the bowl of cream cheese.  (Otherwise, grate the cucumber and onion directly into the bowl of cream cheese.)

3.  Stir until combined, and add salt and cayenne pepper to taste.  Benedictine will keep for several days in the refrigerator.

Jezebel Sauce
Adapted from Proof on Main, Louisville
Makes 2 to 3 cups

Jezebel Sauce is an appropriately-named sauce, sweet with fruit and spicy with horseradish.  This is no shrinking violet here; this brash sauce will make you sit up and salute.  I love the combination with a soft, good cheese, spread on a slice of baguette; but it’s just as at home on a bit of grilled chicken or meat.  At the estimable Proof on Main in Louisville, it’s served on their locally-raised bison burger, where it also pairs beautifully with the side of hand-cut fries.

3/4 cup pear jam or preserves
3/4 cup apricot jam or preserves
1/2 cup prepared horseradish
1 teaspoon kosher salt
1/2 teaspoon freshly-ground black pepper
1/2 teaspoon ground coriander
1/2 teaspoon ground cinnamon
1/2 teaspoon ground mustard
1/2 scant teaspoon ground nutmeg
1/8 teaspoon ground cloves

1.  Combine all ingredients in a bowl; mix until smooth.  If the jam or preserves have whole chunks of fruit, you may want to purée the sauce in a food processor, or simply chop the fruit by hand.  Jezebel sauce will keep for several weeks in the refrigerator.

Deviled Eggs
Makes 30, which will never be enough

This is one of those recipes that is endlessly adaptable to however your personal tastes run, or whatever you happen to have in your pantry.  Throw in a little of this, and a little of that, until the filling tastes right to you.  This filling is a little spicy, but not overly so, and has a fantastically creamy texture; these eggs were gone almost immediately after serving.  I specify the use of older eggs, as they will peel far easier than will fresh eggs.  If you use large eggs, increase the cooking time to about 10 minutes.

15 medium eggs (the older the better)
1/4 cup mayonnaise, plus extra as needed
1/4 cup dijon mustard
1 tablespoon prepared horseradish
2 teaspoons Pickapeppa sauce, or to taste
1 teaspoon sherry vinegar
2 teaspoons ground mustard
1/2 teaspoon curry powder
1 teaspoon kosher salt, or to taste
1/2 teaspoon freshly-ground black pepper
Paprika, for garnish

1.  Place the eggs in a saucepan, and cover with cold water by 1 inch.  Bring to a boil, and immediately remove from heat.  Cover pan, and let sit for 8 minutes.  Meanwhile, prepare a bowl of ice water.  After 8 minutes (or 10 minutes if using large eggs), drain and transfer eggs to the ice bath to stop cooking.  Let sit for 10 minutes, or until cool.  Cooked eggs may be refrigerated at this point for up to several days.

2.  Knock eggs against a flat surface until the shell is cracked all over.  Peel, running under cool water to help wash away errant bits of shell that may stick.  Set eggs aside to dry.

3.  Cut eggs in half lengthwise, and gently remove yolks, taking care not to damage the whites.  Place yolks in a bowl, and mash with a fork.  Add remaining ingredients (except paprika), and combine with fork until thoroughly mixed.  The mixture should not be too stiff, but not runny, just firm enough to hold soft peaks.  Add additional mayonnaise by spoonfuls to thin, if required, and correct seasoning as needed.

4.  Either spoon or pipe filling back into the whites, and dust with paprika to garnish.  Serve immediately, or refrigerate for up to 4 hours (cover dish with a large upside-down bowl to preserve the look of the pretty filling).
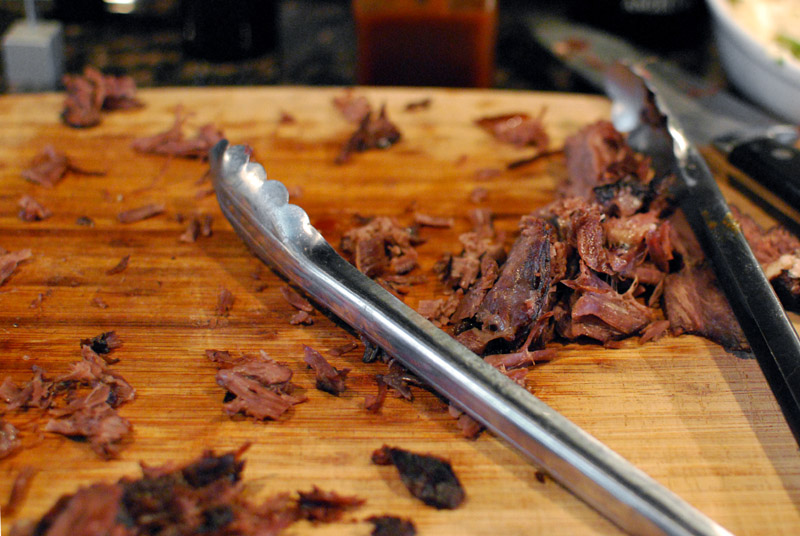
you may need two roasts

Braised Beef Shoulder
Adapted from The Zuni Café Cookbook, by Judy Rodgers
Makes 6 to 8 servings

A beef roast might not seem like a very traditional Derby entrée, especially when you consider the famous Hot Brown sandwich which was invented in Louisville, but smart hostesses in Kentucky know far better than to chain themselves to the kitchen with such a fussy and time-consuming dish.  Most will serve either a simple beef roast with Henry Bain sauce, or a sliced ham with biscuits.  I’ve combined the two, pairing a beef shoulder with Henry Bain sauce and biscuits.  David Lebovitz’s celery root remoulade is not a traditional side dish, but there’s enough mayonnaise in it to make any Southern lady proud.

1 beef shoulder chuck roast (preferably an eye roast), about 4 pounds
1 tablespoon kosher salt, approximately
1 bottle full-flavored red wine (such as Syrah, Cabernet Sauvignon, or Zinfandel)
1 tablespoon olive oil
1 carrot, peeled and cut into 2 inch pieces
1 yellow onion, peeled and cut into 8 wedges
3 stalks celery, cut into 2 inch pieces
1 large baking potato, cut into 2 inch pieces
8 to 10 cloves garlic, separated and unpeeled
2 to 3 bay leaves
2 to 3 sprigs fresh thyme
Black peppercorns, lightly crushed
1 to 2 cups beef or chicken stock, warmed
Henry Bain sauce for serving, recipe follows

1.  At least 24 hours and up to 3 days in advance (the earlier, the better), sprinkle the roast with about 1 tablespoon kosher salt, and rub to evenly coat.  Be sure to get salt into any crevices in the meat.  Place in a non-reactive bowl, cover with plastic wrap, and refrigerate until ready to roast.

2. In a saucepan over medium-high heat, reduce the bottle of wine to 1/2 cup, 20 to 25 minutes.  Wine reduction can be refrigerated for several days.

3.  When ready to cook the roast, remove meat from the refrigerator and let it sit in the bowl at room temperature for 1 to 2 hours.

4.  Preheat the broiler.  Meanwhile, trim roast of excess fat, and tie with kitchen twine to hold its shape as it cooks.  Place roast on a rimmed baking sheet, rub with olive oil, and broil 5 inches away from the broiler until just golden brown, a few minutes on each side.  Do not let burn.  Set roast aside, and preheat oven to 325º F.  Meanwhile, prepare the vegetables.

5.  Transfer browned meat to a large roasting dish, along with any accumulated juices on the baking sheet, and surround with the carrot, onion, celery, potato, garlic, bay leaves, thyme, and peppercorns.  Add all the wine reduction and enough stock to come 1 inch up the side of the meat.  Cover tightly with aluminum foil, shiny side in to avoid reflecting heat, and transfer to oven.

6.  Roast covered for 2 hours.  Quickly remove from oven, and turn meat over.  Re-cover pan, and continue roasting for 1 1/2 to 2 hours.  (When in doubt as to doneness, turn oven off, and leave dish in oven for 30 minutes.)

7.  Remove meat from the pan, place on a rimmed baking sheet to catch any juices, and let stand for at least 20 minutes, and up to 45 minutes.  The meat should readily fall apart when cutting is attempted, though you should try to slice the roast across the grain as much as possible.  Serve with Henry Bain sauce and biscuits.  (Save roasting jus and vegetables for yourself to make les restes for breakfast [or dinner] the next day.)
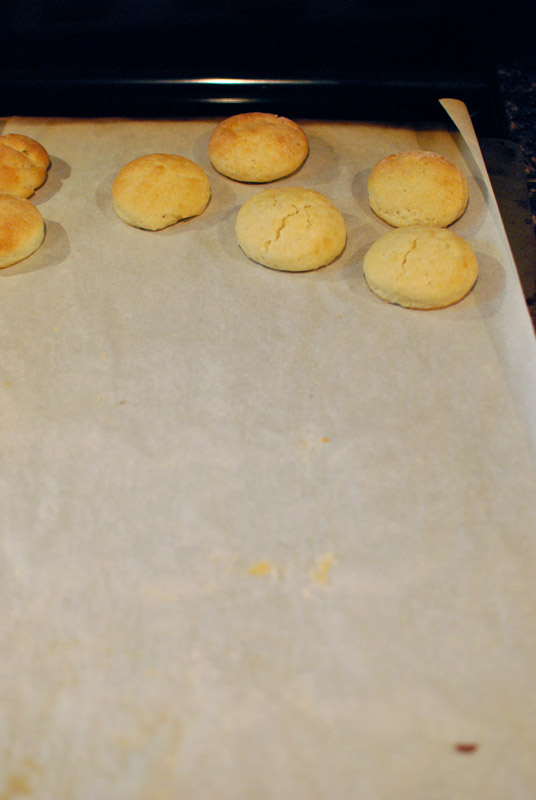
...and two trays of biscuits

Henry Bain Sauce
Adapted from Henry Bain’s original recipe
Makes more than you’ll ever need

1 (8 ounce) jar Major Grey’s chutney
6 ounces (about 3/4 cup) ketchup
6 ounces (about 3/4 cup) chili sauce
1 (5 ounce) bottle A-1 steak sauce
1 (5 ounce) bottle Worcestershire sauce
2 tablespoons Pickapeppa sauce
2 tablespoons mild hot pepper sauce (such as Crystal brand; not Tabasco)

1.  Combine all ingredients in a blender or food processor, and purée until smooth.  Henry Bain sauce will keep for several weeks in the refrigerator.

plenty of celery root remoulade in a double recipe, though

Rebecca Sauce
Inspired by the Courier-Journal
Makes about 2 cups

Rebecca sauce is typically served with, and pairs gorgeously, with strawberries, which usually come into season around Derby time.  This accounts for its ubiquity at Derby parties across Louisville.

1 1/2 cups thick Greek-style plain yogurt
1/2 cup sour cream
2 tablespoons brown sugar
1 1/2 tablespoons Bourbon
1 1/2 teaspoons vanilla extract

1.  Combine all ingredients until smooth.  Rebecca sauce will keep in the refrigerator for up to 2 days.  If liquid pools on the surface, either blot off with a paper towel, or stir back into the sauce.  Serve with strawberries, or other fresh berries.


Mint Juleps for a Crowd

This is less of a recipe and more of a drink station for guests to help themselves.  Set out as many bottles of Bourbon as you have or can procure, a bottle of mint simple syrup, a shot glass or jigger, swizzle sticks or spoons, fresh mint sprigs in a glass of water, ice, and plenty of glasses.  Print out the directions, place in a spill-resistant picture frame, and let everyone play mixologist.  True, this isn’t a classic mint julep, as there is no muddling, but it’s much faster, and no one will get green flecks of crushed mint in their teeth.  Southerners always were known for their hospitality.

To make mint simple syrup:
1/2 cup granulated sugar
1/2 cup water
1 large bunch mint, leaves picked from stems and crushed slightly

1.  In a small saucepan, combine sugar and water.  Bring to a boil over high heat, stirring just until all sugar is dissolved.  Remove from heat, add mint leaves, cover, and let steep at least 1 hour or up to 8 hours.  Strain mint leaves out, and use syrup as directed.

To make 1 mint julep:
1 jigger Bourbon
1/4 jigger mint simple syrup
3 to 4 large ice cubes, or enough crushed ice to fill a short glass
Fresh mint sprig for garnish

1.  In a glass, combine Bourbon with simple syrup.  Add ice, and stir well to dilute drink slightly and chill.  Add a sprig of mint to garnish.

Five Minute Photo Shoot: Bowl of Vegetables

This marks the first lunch of the week that consisted of real food, rather than an energy bar or hummus.  (Being busy has its ups and downs.)  There wasn’t much in the fridge to choose from, but the freezer helped me out.  It’s a bit of a mess, but there’s edamame, peas, and onions, all sautéed with an egg and herbes de Provence.  Leftover roasted asparagus and a pretzel roll filled out the meal.

Energy Bars

There’s something incredibly appealing about the whole idea of an energy bar: it’s a discrete unit of food, carefully packaged in its own colorful wrapper, just the right size for a snack or, with a piece of fruit, breakfast or a light lunch.  It’s like a little food present, just for you.

There are also, of course, more so-called “energy bars” on the market than you can shake a stick at.  On the more virtuous side, an energy bar is an easy way to get some whole grains and fruits (in dried form) into the diet.  But on the other end of the spectrum, you’ll find the line between “energy bar” and “candy bar” very fine indeed.  Determining which category any given energy bar falls into can be rather tricky, if not downright impossible.

Even if your chosen bar contains nothing more offensive than soy protein isolate (also known as soy protein powder), the long list of ingredients can be a little off-putting.  My all-time favorite energy bars boast an ingredient list of as little as two items (seriously!), and both are real food; but I rarely buy them, because at $1.50 a pop, those suckers can add up fast.

So for the last couple of years, I have been making my own energy bars.  I started after I realized with slight horror that my boyfriend had been breakfasting on an instant powder drink.  In my book, anything powdered cannot be called breakfast, so I convinced him to start packing a banana and a homemade energy bar.  (It didn’t take much convincing.)

With batches of homemade energy bars around, I soon adopted a new afternoon snack.  But, as I tend towards hypoglycemia, I had to be wary of recipes with more than a slight amount of added sugar.  (This problem becomes more apparent for me with energy bars, as they tend to replace meals for me, rather than come at the end of one, as a cookie might.)  One sugary recipe sent me into a confused daze for half a day, during which I was utterly useless.

My most often made recipe is Alton Brown’s protein bars, mostly because I made them once, found them to be good, and decided that I shouldn’t try to fix what wasn’t broke.  But as good as they are, even those can be a bit boring after two years; so I recently decided to branch out a bit and try some new recipes.

This recipe, from Food Network’s Ellie Krieger, appealed to me initially because of the ingredient list.  The only sweetener, apart from a plethora of dried fruit, is from a scant amount of maple syrup.  The remainder of the bulk is made from whole grains and nuts, and can easily be made into a gluten-free version.  There’s nothing strange in there, just a pile of healthy and real food.

Upon closer inspection, the method appealed to me almost more than the ingredient list: it’s primarily made in the food processor.  I understand that this might be a deal-breaker for those of you who don’t have one; but for those of you who do, you’ll be hard-pressed to find an easier energy bar recipe.  It’s just blend, mix, pan, bake.  Slice.  Savor.

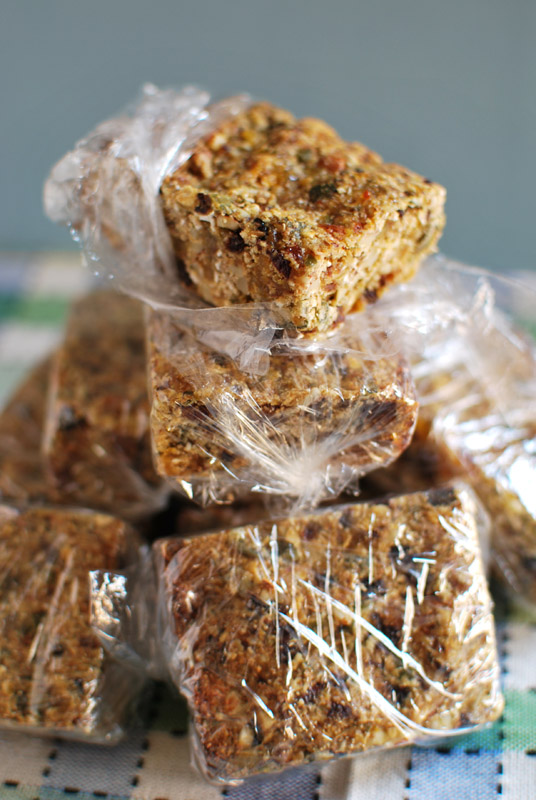
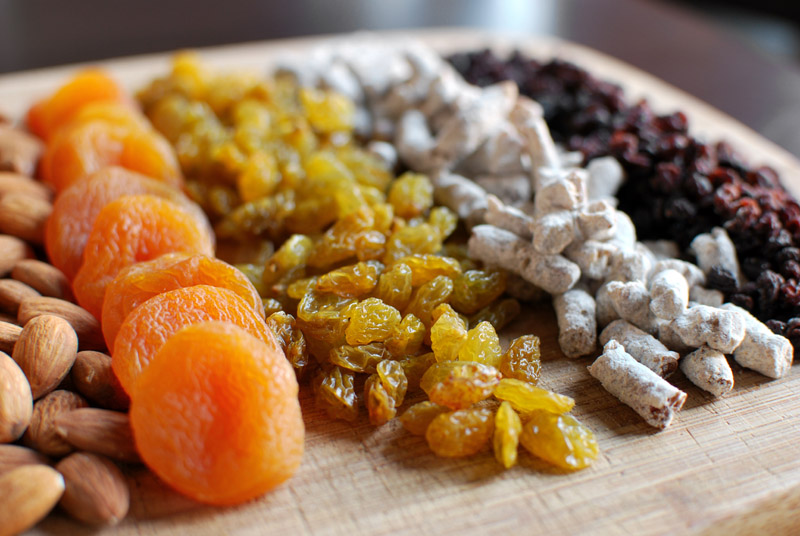
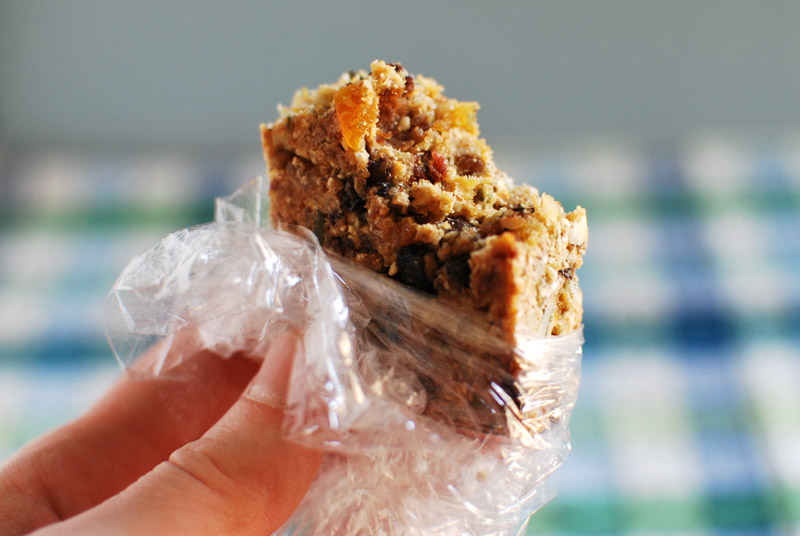
But the thing that’s cementing this recipe’s inclusion in my permanent file is the end result.  These bars taste like the healthiest cookie you’ve ever eaten.  They are firm-textured, nutty, loaded with dried fruit, and have a pleasantly grainy chew.  Surprisingly filling, one of these will give you the sustained sort of energy you wish all energy bars would.  And so pretty!  The variety of fruits and nuts make for a lovely mosaic look, each bite speckled through with orange apricots, crimson currants, and green pepitas.

Best of all, there was no blood sugar spike and crash for me with this recipe.  The sugar level looks rather high in the nutritional data, but it’s mostly natural fruit sugar, which isn’t nearly as bad as refined sugars.  However, the next time I make these – and there will be a next time – I think I’ll use some protein powder to offset the sugar level a bit.

My only regret is that I waited so long to break out of my energy bar rut.  I’m not giving up Alton’s recipe; but I tell you what, if there are other recipes like this one in the world, I’m going to have to start making more energy bars.

Energy Bars
Adapted from Ellie Krieger
Makes 12

Try to find dried fruits that don’t have sugar added; the fruit is sweet enough on its own, and the extra sugar will only add unnecessary calories with no nutritional benefit.  For a gluten-free version, substitute the rye flour for any gluten-free flour (such as quinoa, buckwheat, or amaranth), swap the wheat germ for ground flaxseed, and be sure to use gluten-free oats.

3 1/2 ounces (about 1 cup) rolled oats (either quick or old-fashioned)
3 ounces (about 2/3 cup) dried apricots, roughly chopped
2 1/2 ounces (about 1/2 cup) raw almonds (preferably whole)
2 1/2 ounces (about 1/2 cup) golden raisins
2 ounces (about 1/2 cup) raw pumpkin seeds (pepitas)
2 ounces (about 2/3 cup) dried dates, pre-chopped or whole pitted
2 ounces (about 1/2 cup) dried currants
2 ounces (about 1/2 cup) wheat germ (toasted or raw)
1 1/2 ounces (about 1/2 cup) dry nonfat milk
1 ounce (about 1/4 cup) whole-grain rye flour
1/2 teaspoon kosher salt
1/2 teaspoon cinnamon
2 ounces (about 1/3 cup) maple syrup
2 large eggs
2 tablespoons water, as needed

1.  Preheat the oven to 350º F.  Lightly oil an 8 inch square pan, line with parchment paper, and lightly oil the parchment.

2.  In a large bowl, loosely mix together the first 7 ingredients (oats through currants).  Process (in batches, if necessary) in a food processor until the mixture is finely chopped.

3.  Meanwhile, in the large bowl, whisk together the wheat germ, dry milk, rye flour, salt, and cinnamon.  Add the chopped oat and fruit mixture, and mix until evenly blended.

4.  In a bowl, whisk together the maple syrup and eggs.  Add to the dry ingredients, and stir until all dry ingredients are moistened (mixture will be very stiff).  Add the water by tablespoons as needed to fully moisten.

5.  Transfer the mixture to the prepared baking dish.  Using a nonstick spatula or moistened hands, press the mixture firmly and evenly into the pan.  Bake at 350º F for about 25 minutes, or until lightly browned on the edges and just set in the middle.  Let cool before slicing into 12 bars.  Bars can be individually wrapped, and frozen or refrigerated.

Nutrition (per bar):
220 calories
7 g fat (1 g saturated)
36 mg cholesterol
133 g sodium
34 g carbohydrate
4 g dietary fiber
20 g sugar
8 g protein

Note:
1.  For a higher-protein bar, you can substitute the powdered milk for an equal amount of soy protein powder (1/2 cup, or 2 ounces).  This increases the protein to 11 g, increases the dietary fiber to 5 g, and reduces the sugar to 18 g; all other nutritional data remains virtually unchanged.  Soy protein powder is readily found at specialty stores such as Whole Foods.

Chewy Chocolate Chip and Walnut Cookies

Here, we have a plate of cookies.

And here, we have a second plate of cookies.

Take a look at these two pictures.  The cookies look remarkably similar, don’t they?  Can you spot any major difference?  Because I can’t.

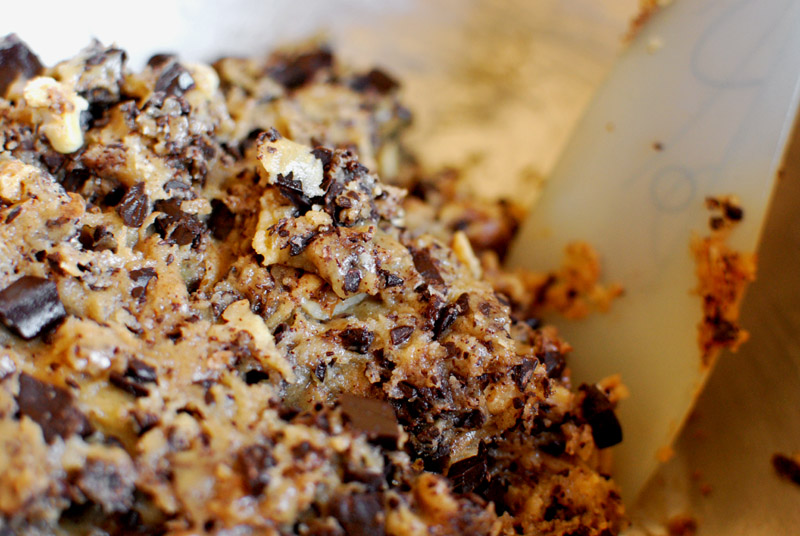
To provide a little context, I had recently been struck with a severe longing for a chocolate chip cookie.  The morning was progressing along nicely, my plans were underway and getting accomplished, when suddenly, I needed a cookie.  This sort of craving happens to me rarely, but when it does, I might as well just give in immediately, because there will be no respite from its dogged pursuit.

From where I was sitting (in my pajamas, it’s important to add), the fastest way from “not having a cookie” to “having a cookie” was to make some myself.  If there was no time for a shower, then there certainly was no time for butter to soften.  Luckily, the fantastic editors of Cook’s Illustrated helped me out, with a recipe that called for melted butter instead.  If there’s one thing that moves a cookie recipe to the top of my “to make” pile, it’s not requiring softened butter.  Or overnight chilling.  Or, really, anything that puts more than an hour between me and a cookie.

But to go back to the photographs: those two batches were made from the same dough, but shaped differently.  One batch (the top picture) was shaped by dropping the dough onto the sheet pan, using a small portion scoop (a.k.a. an ice cream scoop).  As is, you know, standard for such cookies.

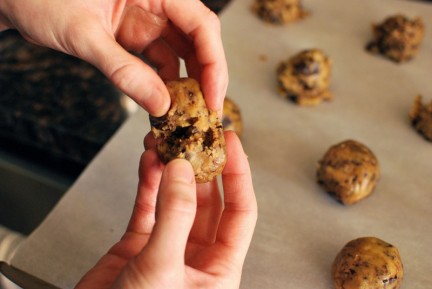
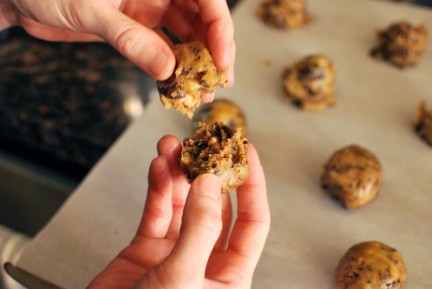
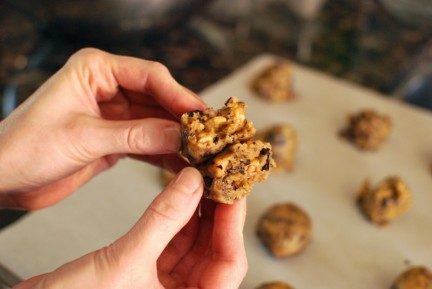
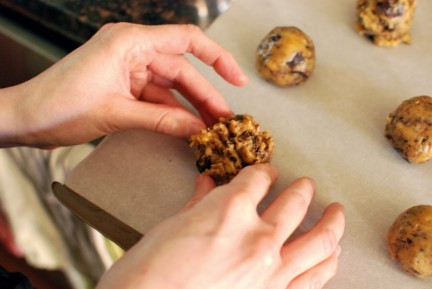
The other batch was shaped using a slightly convoluted method suggested by the original recipe, one that promised a picture-perfect craggly top.  It involves rolling the dough into a ball, pulling it apart into two halves, then sticking the two halves together, with the rough edges facing up:

like so

And man, when you don’t even want to take the time to let butter soften, you certainly don’t want to take the time to shape two or three dozen cookies by hand.  Impatience got the better of me, and I quickly decided that scooping the dough would be just fine, thank you very much.
When I pulled them from the oven, the cookies shaped with the drop method looked nearly indistinguishable from the more painstakingly hand-shaped ones.  But then, I used far less dough in each cookie than the original recipe directed (a full 1/4 cup! what!?), as I prefer cookies that are manageably small; so perhaps the size difference had much to do with the similar appearance of the two shaping methods.

If you like cookies that are as big as dinner plates, however, give this method a shot.  It might just work.  Me, I’ll stick with the drop method.  You can have some of my warm cookies while you’re waiting for your bigger ones to finish baking.

As for the taste, these are some killer cookies.  I’ve increased the salt slightly, and used the coarse kosher type; this brings an occasional burst of savory salt that is just fantastic, especially with the toasted walnuts.  A pinch of cloves deepens the flavor, bringing a more robust note to the chocolate and matching the earthy walnuts beautifully, while a splash of Bourbon (that I couldn’t resist adding) adds a similarly rich, but smoky, note.  These are, unfortunately, the sort of cookie that I cannot stop eating.

Chewy Chocolate Chip and Walnut Cookies
Adapted from The Best Recipe, by the Editors of Cook’s Illustrated
Makes about thirty 2 1/2 inch cookies

I like to use good-quality chopped chocolate in my chocolate chip cookies, rather than chocolate chips, because of the way its stays melty and slightly gooey for ages.  Chocolate chips have additional ingredients that make them hold their shape, which also prevents them from melting smoothly and having that incomparable melting texture.  That’s just me, though; use whatever you prefer, or have on hand.  They’ll still be excellent.

9 1/2 ounces (2 cups plus 2 tablespoons) unbleached all-purpose flour
3/4 teaspoon coarse salt (such as kosher)
1/2 teaspoon baking soda
1/4 teaspoon ground cloves
12 tablespoons (1 1/2 sticks) unsalted butter, melted and cooled slightly
1 cup brown sugar, packed
1/2 cup granulated sugar
1 large egg plus 1 egg yolk
1 teaspoon vanilla extract
1 teaspoon Bourbon
7 1/2 ounces (about 1 1/4 cups) good quality chocolate, chopped
3 ounces (about 3/4 cup) walnuts, toasted, chopped, and cooled slightly

1.  Preheat the oven to 325º F, and position racks in the upper and lower thirds of the oven.  (While the oven heats, melt the butter.  When the oven has heated, toast the walnuts while preparing the other ingredients.)  Line two large baking sheets with parchment paper.

2.  In a medium bowl, whisk together the flour, salt, baking soda, and cloves.  Set aside.

3.  In a large bowl, whisk together the butter and sugars until smooth.  Add the egg, egg yolk, vanilla, and Bourbon.  Whisk until smooth.

4.  Add the dry ingredients to the wet ingredients, and gently mix together with a spatula until mostly combined (some large streaks of flour are okay here).  Add the chopped chocolate and walnuts, and fold together until just incorporated, or until no more streaks of flour remain.  Do not overmix.

5.  Drop the dough by heaping tablespoons onto the prepared baking sheets, leaving about 2 inches between cookies.  Bake at 325º F for 12 to 14 minutes, or until the edges are just set and lightly browned.  Let cool on the sheets briefly, about 5 minutes, before removing to a rack to cool thoroughly.  When cooled, store in an airtight container at room temperature.

Spice Rack

I’m sure this is highly uninteresting to most people, but this is one of the things that’s been keeping me busy lately.  We built a new spice rack!  I am almost embarrassingly excited about it.

For years, my spice collection has been growing as such things will: slowly and imperceptibly.  You buy a little of this and a little of that for various recipes, until one day you realize that half your spices are being stored in the cabinet above the oven, dying inglorious deaths in the heat therein.  I had long known that the tiny, two-tier lazy Susan that had laughably served as the primary storage location was no match for my collection; but it was only after a tally that I realized exactly what I was up against.  Yes, for my fifty-seven (!) spices, I needed something serious.

I’d seen wall-mounted spice racks, which I liked the look of, and it seemed like that solution would easily accommodate the largest number of containers with a minimum amount of real estate taken up, a real concern in our 500 square feet.  It had to hang on one particular wall, right behind the back door, across from the stove.  Complicating things, the breaker box is on that wall, so we couldn’t install anything permanent or that couldn’t be easily removed.

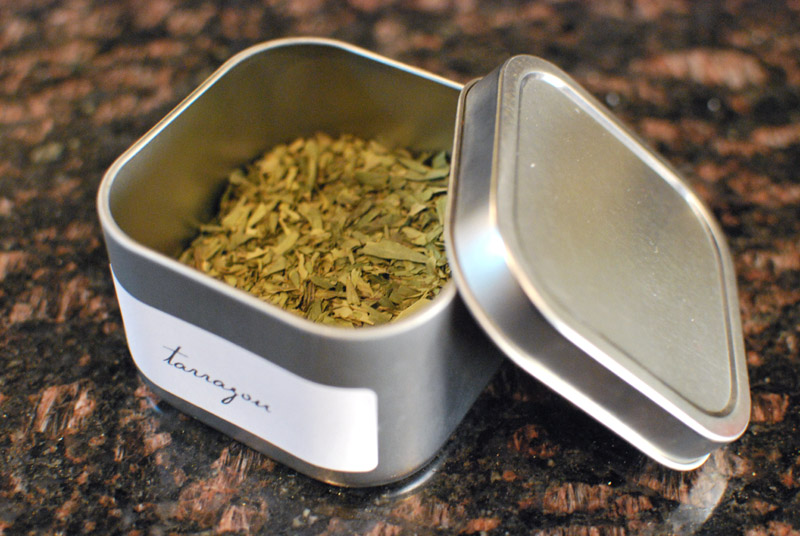
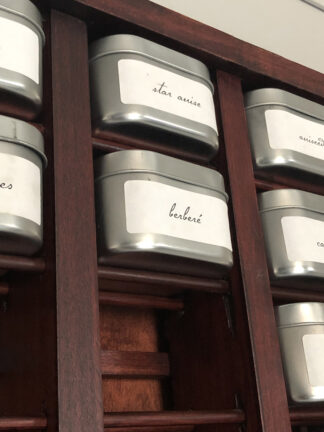
We built a simple frame from poplar boards and dowels, stained dark, and designed it specifically to accommodate a tin that I found for reasonably cheap online.  The tins are big enough to hold a ridiculous amount of any given spice, somewhere around 1 cup or so.

The tins are fairly air-tight, but more importantly, keep light away from the fragile spices.  A printed label unifies the look, and prevents any mix-ups, as can happen when your unlabeled bag of aniseed looks dangerously similar to the unlabeled bag of celery seed.  (Turns out those two are not interchangeable in the slightest, and your coleslaw will be ruined.  Do not think you are impervious to such mistakes, either; it is hubris, and you will be punished for it.)

As an added bonus, I now have plenty of breathing room in the cabinet for my oils, vinegars, and other liquid seasonings.  Who knew I had tarragon vinegar?

With all my spices carefully labeled and organized (alphabetically, of course), and knowing exactly what I have on hand, I feel absolutely inspired to get back in the kitchen and (ahem) spice things up.  It’s hard to believe that I went for so long with such a crucial part of my culinary arsenal in such disarray.  You may notice there’s a few empty spots towards the bottom of the rack; obviously, I had to leave room for the collection to grow.  At least now, I won’t feel bad about bringing home a new spicy friend, since I won’t have to store him over the stove anymore.

Here are some unglamorous before and after shots:

before
after
before, no hope of shoving anything else in
after, plenty of room!
above the stove before, spices in unlabeled bags shoved into tins
before, all the bags of spices from above the stove; those tins are crammed full
above the stove after, the tins are empty!
after, all my pretty spices in their new home

JULY 2021 UPDATE:

This is by far my most popular post, and so! many! people! have asked about the construction to replicate their own spice racks. Flattering!  So here are some more detailed pictures of the inner construction. Hope these are helpful.

so spice

Yes! This photo is awful! HOWEVER, it shows the nasty inner bits. The board on the very left is the left vertical side of the entire rack. You can see the tins rest on two thin dowels, run through  holes drilled in the inner vertical boards. We clearly didn’t give a shit if the wood split when drilling, because you’ll never see it. The dowels are not affixed in any way, and can rotate freely if they so choose. Free range dowels.

so spice

Behind the tins are 1/2″ square dowels. Pretty sure we nailed those to the back of the inner vertical boards, but WHO KNOWS. We made this literally 11 years ago, and I can’t even remember last week. These square dowels are intended to push the tins forward slightly, to make them easy to grab. And so they are.

so spice

Another angle.

so spice

But oh shit! If you look at the top, you’ll see the inner vertical boards don’t quite match up with the outer frame! WHAT’S UP WITH THAT.

so spice

The inner vertical boards are 2 1/2″ inches deep. And they don’t touch the plywood backer that covers the whole back, because of the aforementioned 1/2″ square dowels.

so spice

So from the plywood backer, the leading edge of the inner vertical boards sticks out 3 1/8″.

If you need any further measurements, they’re all in the comments. It’s a goldmine of info in the comments. Hope that helps!

Five Minute Photo Shoot: Radish and Butter Sandwich

For lunch yesterday: an open face sandwich on homemade rye bread, with fancy-pants cultured butter, sliced radishes, and a sprinkling of fleur de sel.  On the side are the radish tops, quickly tossed in a hot sauté with olive oil, salt, and pepper.  They turned gorgeously crisp and were slightly bitter, like arugula.

Orecchiette With Roasted Root Vegetables and Tahini

You will please forgive my tardiness with this post; this last week or so, I’ve been blindsided by a messy and slightly incapacitating pile of anxiety, the likes of which I haven’t seen in ages.  So while I continue to sticky-tape my brain back together, here is a recipe that I’ve been unproductively mulling over for days.

I originally saw a recipe for warm butternut squash and chickpea salad on Orangette – or was it Smitten Kitchen? – and was hooked.  Canned chickpeas are a secret pantry weapon of mine, and I love every opportunity to use them in new ways.  But recently, I had all the ingredients to make this knockout dish, with one exception: the chickpeas.

Argh.

Luckily, though, I happened to have a bag of homemade orecchiette in the freezer, leftovers from a previous day’s kitchen adventure.  Making one’s own pasta is one of those things that seems quite fussy on the surface, but ends up being worth every second and mote of effort spent.  Whether that’s because it actually tastes better than store-bought, or whether the pride of such an accomplishment is the best seasoning of all, is anyone’s guess.

The best thing about making orecchiette is that you get all the benefits of homemade pasta without having to invest in a pasta roller, which homemade fettucini or linguini would require.  Shaped with only your hands, these “little ears” (the literal translation of the name) are as individual as their creator.  They can be plump and thick, akin to dumplings, or they can be thin and almost shell-shaped, with a more traditional “pasta” texture.  However you prefer to make them, or however they happen to turn out in your hands, the results are equally good.

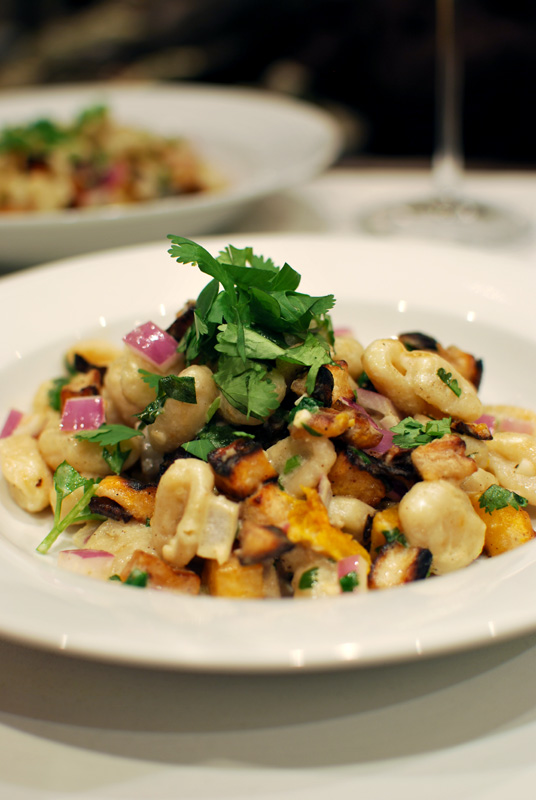
My hands are on the smaller side, so my orecchiette end up being a bit thick, which makes them a perfect substitute for the starchy chickpeas in the aforementioned recipe.  The mild flavor of the pasta might be a little less earthy than the chickpeas, but that allows the tahini sauce to really shine in all its well-balanced glory.  The red onions taste a little more pungent, the cilantro a little more vibrant, and the roasted root vegetables a little more caramelized.

As delightful as the original recipe is, I think I’ve made a fitting variation.  The original is sophisticated enough to serve to company, but simple enough to make on a weeknight; this variation is glamorous enough to make a weeknight dinner feel like a special occasion dinner.  The orecchiette does take a bit of time to make, but it goes quickly if you can get many hands involved.  And with such satisfaction as comes with making one’s own pasta from scratch, who wouldn’t want to join in?

Orecchiette With Roasted Root Vegetables and Tahini
Adapted from Casa Moro, via Orangette
Makes 4 to 6 servings

The beauty of this recipe is its versatility.  You could use any winter squash or root vegetable you like, from sweet potato to delicata squash to sugar pumpkin, and everything in between.  I used an even mixture of butternut squash, turnips, and rutabagas.  While the vegetables roast, mix up the sauce and cook the pasta; they should all be done around the same time.  It’s best served at once, but leftovers will reheat nicely with a splash of chicken broth, water, beer, or any other liquid.

2 to 2 1/2 pounds mixed root vegetables (such as butternut squash or turnips), peeled, seeded as needed, and cut into 1 inch pieces
1/2 teaspoon ground allspice
2 tablespoons olive oil
3 cloves garlic, very finely minced
1/4 cup fresh lemon juice
1/4 cup well-stirred tahini
3 tablespoons water
3 tablespoons olive oil (plus additional to taste)
1 1/2 pounds fresh orecchiette (recipe below), or 1 pound dried purchased orecchiette
1/2 cup red onion, finely chopped
1/2 cup coarsely chopped cilantro leaves
Salt and pepper to taste

1.  Preheat the oven to 425º F.

2.  In a roasting pan, toss the root vegetables with the allspice, olive oil, and a good pinch or two of salt and black pepper, until evenly coated.  Spread in a single layer, and bake for 15 to 25 minutes, or until soft and browned. Remove from the oven and cool slightly.

3.  While the root vegetables roast, bring a large stock pot of water to a boil for the orecchiette.  Meanwhile, make the tahini sauce. In a bowl, whisk together the minced garlic, lemon juice, and tahini, until blended.  Add the water and olive oil, whisk until smooth, and taste for seasoning.  The sauce should have plenty of nutty tahini flavor, but also a little kick of lemon.  If bitter, add additional olive oil until balanced, thinning with additional water if needed.  Season with salt and pepper to taste.  Let stand while preparing the remaining ingredients, to let the flavors marry.

4.  Liberally salt the water (which should be boiling by now), and add the orecchiette.  Cook until just al dente, about 5 minutes for fresh or 7 minutes for dried, or until done.  Reserve 1/2 cup of the pasta water.  Drain orecchiette and return to pot.  Add the tahini sauce and toss.

5.  Chop the red onion and cilantro.  Add to the orecchiette, along with the roasted root vegetables.  Toss until combined.  Serve warm, or at room temperature.

Orecchiette
Adapted from Gourmet Magazine
Makes about 1 1/2 pounds

This recipe produces (in my hands) plump, almost dumpling-like orecchiette.  For a thinner pasta, cut the ropes of dough into smaller pieces, or shape them with hands equipped with bigger thumbs than mine.

11 1/2 ounces (about 2 cups) semolina, plus extra for dusting
9 ounces (about 2 cups) unbleached all-purpose flour
1/2 teaspoon kosher salt
1 cup water, at warm room temperature

1.  In a large bowl, whisk together the semolina, flour, and salt.  Add the water.  Mix together with a fork or spatula until a rough dough forms.  Add additional water or semolina by spoonfuls as needed to correct the consistency.

2.  Turn dough out onto a work surface.  Knead until smooth and elastic, about 8 minutes, discarding any hard lumps that may have formed.  Cover tightly with plastic wrap, and let rest at room temperature for at least 30 minutes.

3.  Divide the dough into 8 even pieces.  Cover or wrap each piece with plastic wrap.  Line a large rimmed baking sheet with a dry kitchen towel (not terry cloth) and dust lightly with a little extra semolina.  Remove plastic wrap from 1 piece of dough.  With lightly floured hands, roll into a rope about 3 to 4 feet long and 1/2 inch thick.  Cut crossways into 1/2-inch pieces, with a knife or bench scraper, separating pieces as cut so they are no longer touching.  Lightly toss cut pieces with a little semolina.

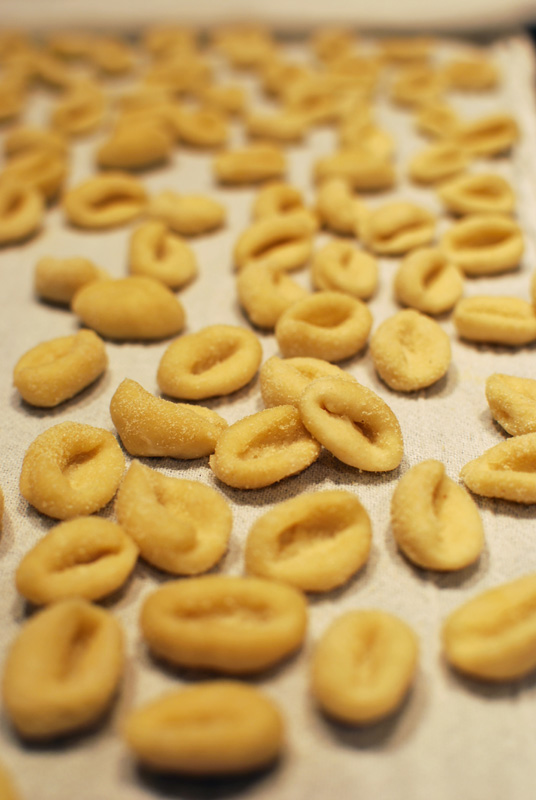
4.  Put each cut piece of dough, one cut side down, in palm of hand and form a depression by pressing thumb of other hand into dough and twisting slightly.

like so

Arrange orecchiette on the lined tray so they don’t touch.  Repeat with remaining 7 pieces of dough in same manner.  Orecchiette may sit at room temperature for up to a couple of hours, loosely covered with plastic wrap or a kitchen towel, or may be made up to 2 days ahead and chilled on towel-lined trays, covered with plastic wrap.  Orecchiette will also freeze well, in a freezer zip-top bag; thaw at room temperature before using in a recipe.

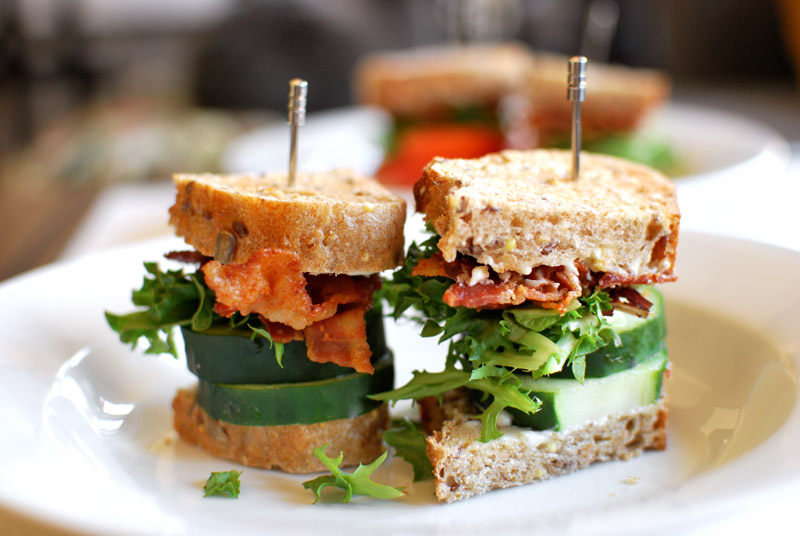
Five Minute Photo Shoot: BLT and BLC

For lunch today, I had BLTs planned.  But for some reason, the tomato tasted funny to me, with a faint chemical flavor.  It tasted fine to my sous chef, however, so he was perfectly content to have it all to himself.  For him, then, a standard BLT, with mesclun standing in for the lettuce.

For me, a BLC (bacon, lettuce, and cucumber) was an adequate and crunchy substitute.

I couldn’t possibly serve a BLT (or a BLC) without a smear of mayonnaise on one piece of bread, but I did gussy it up a bit with a little mascarpone on the other piece.  It was buttery and creamy, a luxurious complement to the crisp bacon and rustic multi-grain bread.