New Orleans, Part I: IFBC

Well.  That was certainly a trip.

I’m back home, after eleven days in New Orleans.  It’s not a very long time on paper, but time can be quite subjective, especially when returning to one’s hometown after a long absence.

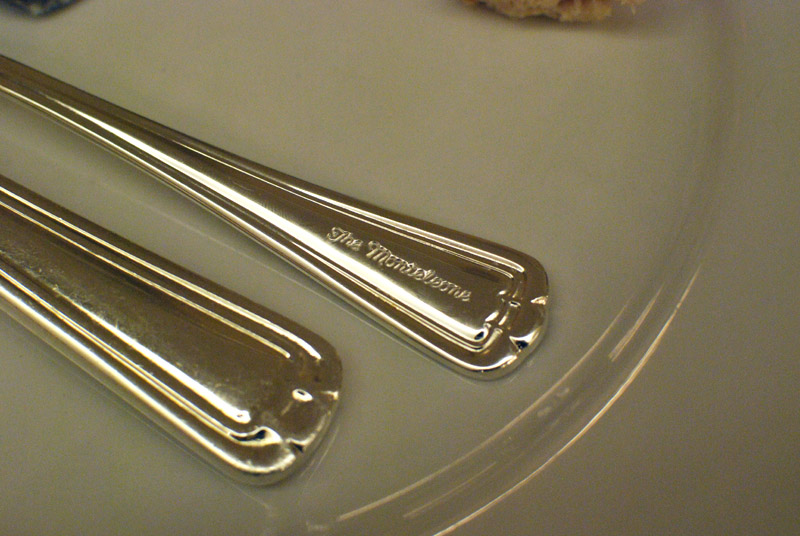
The first weekend was spent attending the International Food Blogger Conference, or, affectionately, IFBC NOLA, at the Hotel Monteleone.  I met about a million wonderful, kind, talented people, people I wish lived close to me so that we could become better friends in real life.  I learned loads about ways to improve my blog, my photography, my writing, and, yes, my life online and off.

I hope you don’t mind if I bore you with details about the food, rather than rehashing the nitty-gritty educational part of the conference.  I think that might be what you’re here to see anyway.

The organizers of IFBC managed to get fourteen local restaurants to showcase samples of their menus for us, at receptions on both Friday and Saturday.  And, like any good food blogger, I shot first and ate later.

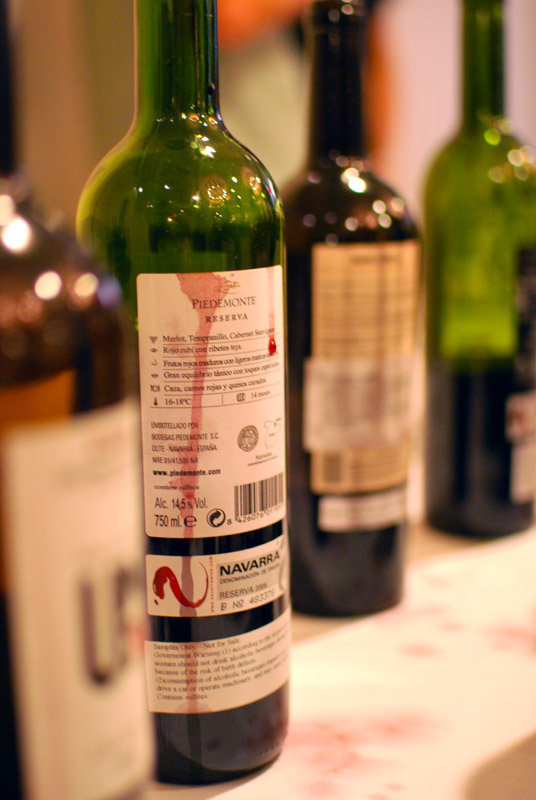
The good people at Wines of Navarra provided a couple of bottles of wine for us to taste on Friday night.

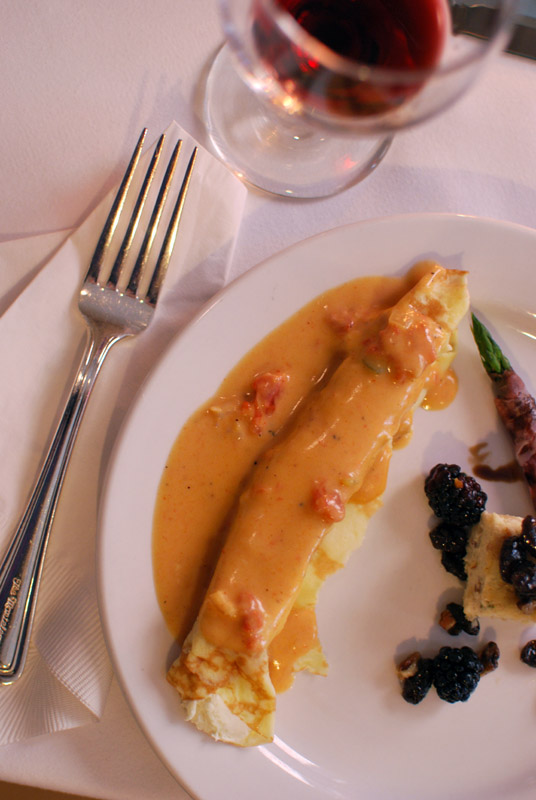
Accompanying the wine, Muriel’s restaurant provided us with their signature shrimp and goat cheese crêpes, a gorgonzola tart with berries and pecans, and proscuitto-wrapped asparagus.

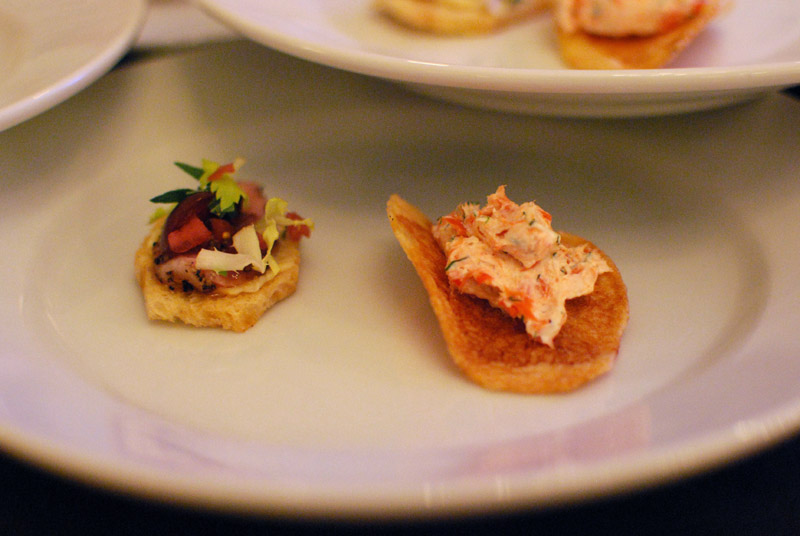
Following the wine tasting, I embarrassed myself a little when I saw Chef Susan Spicer standing basically alone (alone!) next to a full table of canapés: one of smoked salmon mousse, and the other of duck prosciutto with a pickled cherry.

I made sure she knew my mom is her biggest fan, especially of her sweetbreads.  (My mother cannot eat a sweetbread without appending, “…but Susan Spicer still makes the best in the world.”)  I promptly took a picture with her on my phone, texted it to my mom, and forgot to mention to Chef that I have garnered much accolade using recipes from her cookbook for clients of my own.

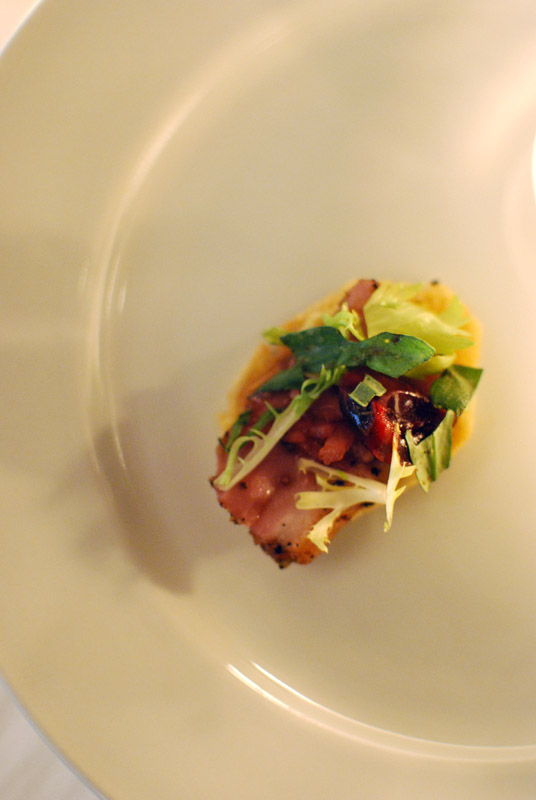
This shot of the duck prosciutto features the assistance of Andrew Scrivani, who set up the lighting.  No effort or expense was spared in the preparation of this shot; all three votives on the table were used.

Eating my way around the room, I enjoyed the following:

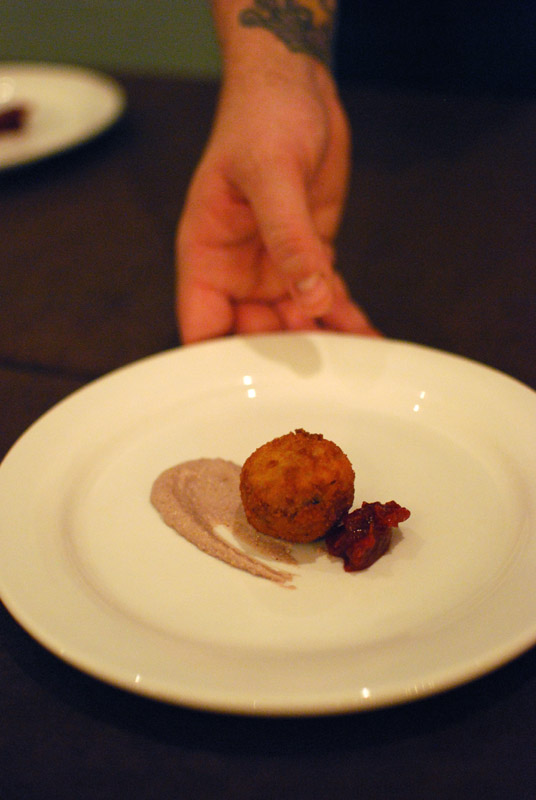
Kurobuta pork cheeks with tomato jam and black eyed pea purée, from La Petite Grocery.  The pork was just out of the fryer, crisp and hot, the interior full-flavored and rich.

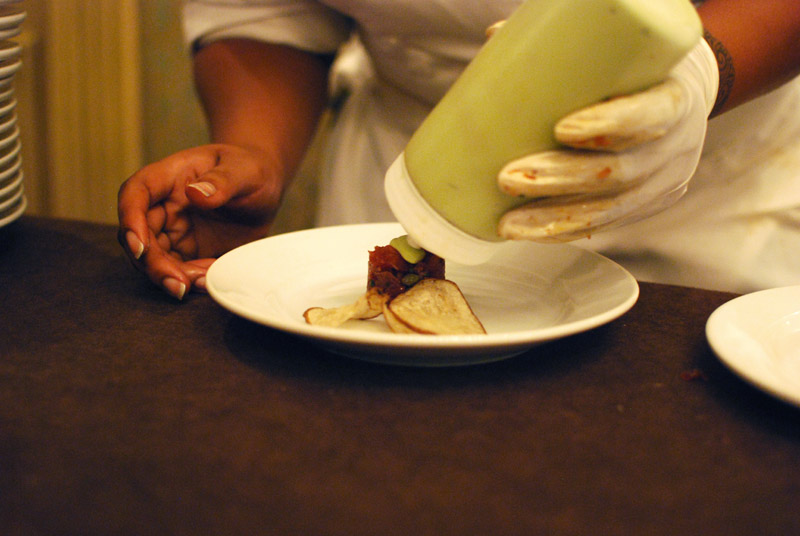
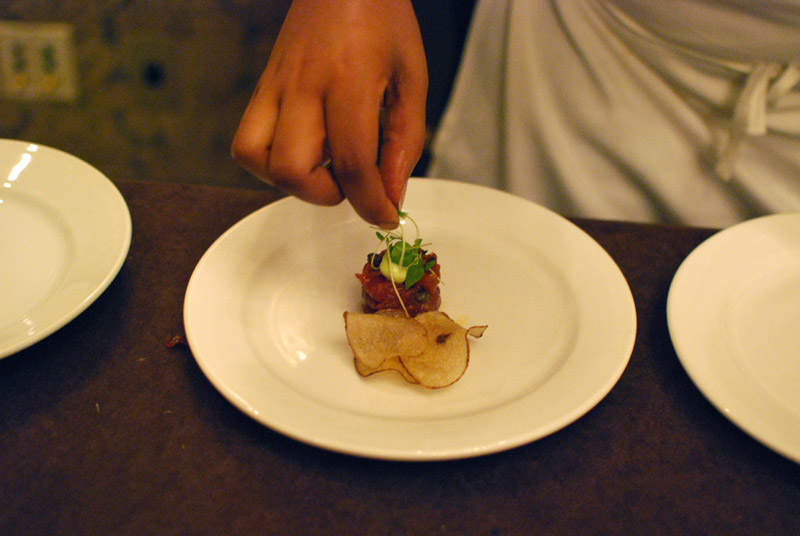
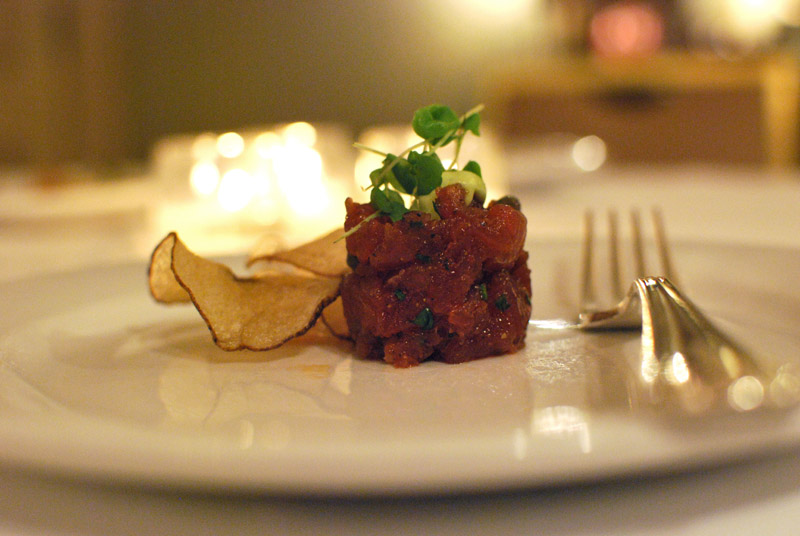
Spicy tuna tartare with avocado and microgreens, from Ste. Marie, a new restaurant that I’m going to have to try properly the next time I’m in town.  I appreciate it when something described as “spicy” is legitimately spicy; this tuna certainly was.  They also served an excellent pappardelle with rabbit ragu that I neglected to photograph.

And then, I left to go to dinner with my parents.

Because, you know, there wasn’t enough food.

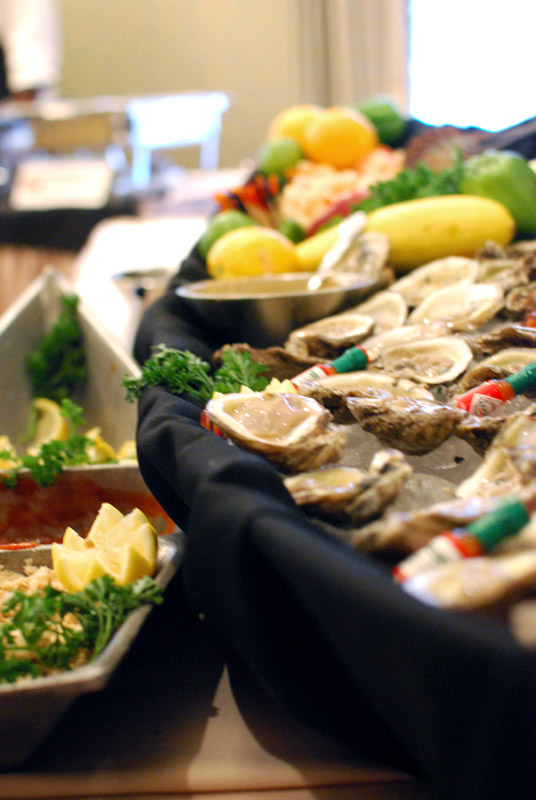
Friday morning came maybe a little too bright and early, and morning sessions were followed by a lunch reception.  The first thing to catch my eye were the oysters.

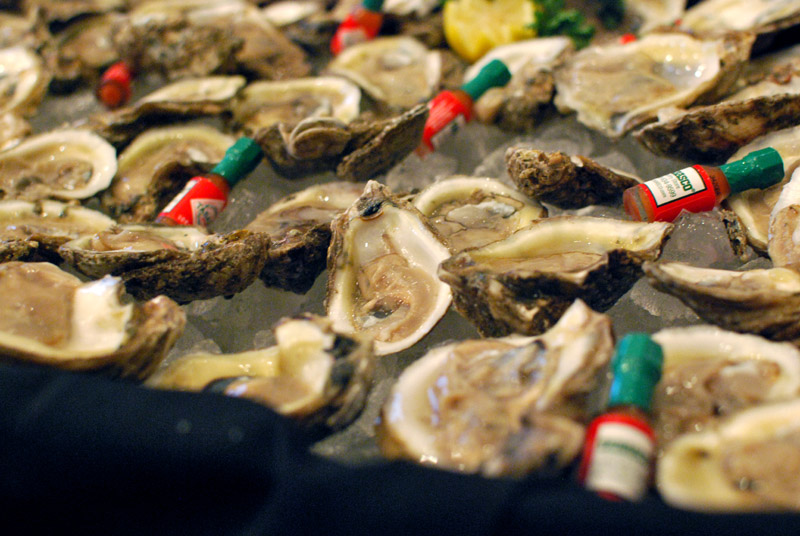
A boat full of Gulf shrimp and Gulf oysters, glistening and briny, shucked by the good people at Royal House.

I prefer to not exercise restraint around oysters, particularly Gulf oysters, when I have been without them for a long time.
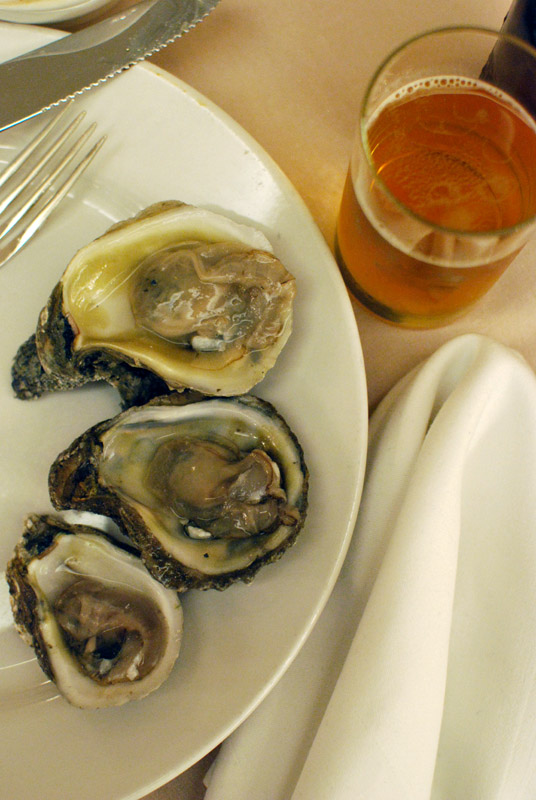
this was part of round two

I wanted to put that little boat on wheels and drag it around with me for the rest of my trip.  Later that day, the inimitable and delightful Poppy Tooker urged us, in a talk about sustainability: “Eat it to save it.”  Well, last week, I saved the hell out of some oysters.

conservation in action

There were po-boys, too, in fried oyster and shrimp, on proper Leidenheimer po-boy bread.  Sandwich shops of the nation, take note: without this bread, it is never a po-boy.  No substitutes for this bread are acceptable.  And “dressed” means only mayonnaise (preferably Blue Plate), lettuce (shredded iceberg), and tomato (Creole, ideally).  Pickles are occasionally allowed, but you’d better know what you’re doing.
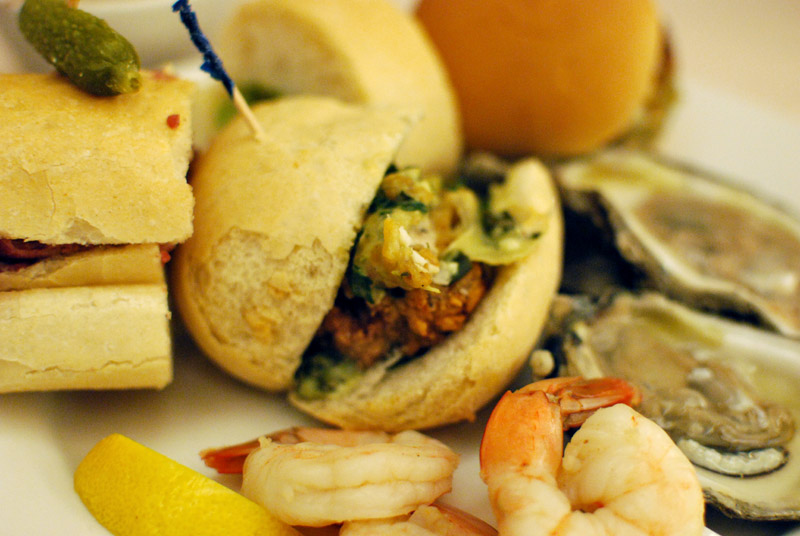
po-boys from three different restaurants. all use the same bread, as god intended.

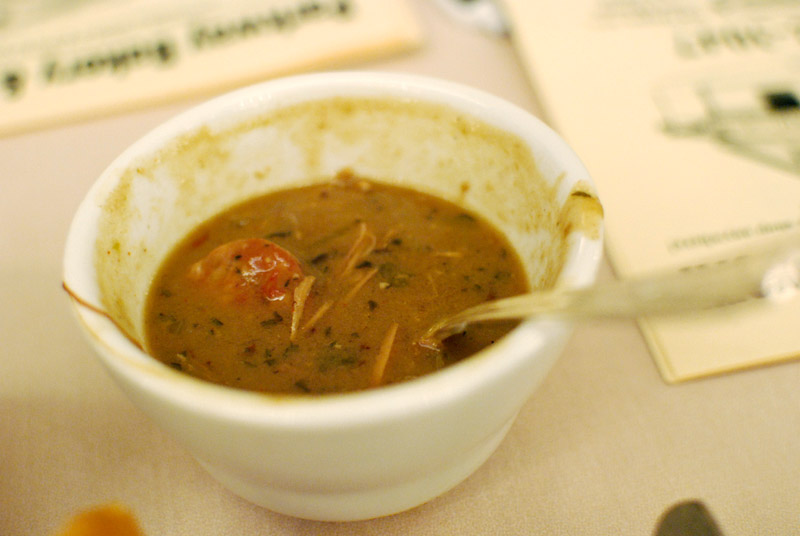
This was alligator and andouille gumbo, from the classic Parkway Bakery.
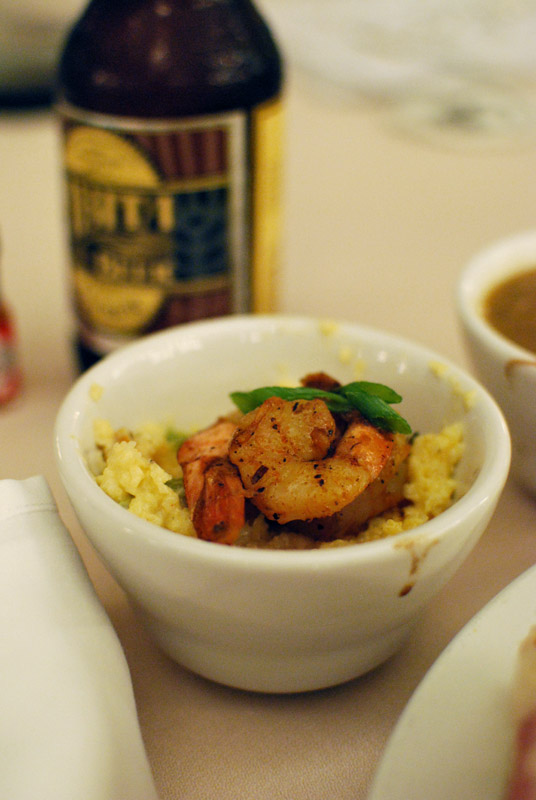
i don't recall who served these shrimp and grits; they were not memorable, but they look pretty

The fine gentlemen from Abita Beer made sure our glasses never ran dry, with pours of their flagship Amber, and SOS, a nicely bitter and refreshing pilsner that generates 75 cents per bottle for the restoration of the Gulf coast following last year’s BP oil spill.  And if you’ve never visited the brewery itself, I highly recommend it.  You’re handed a go-cup when you walk in, and are promptly shown where the open taps are.  Oh, yes.

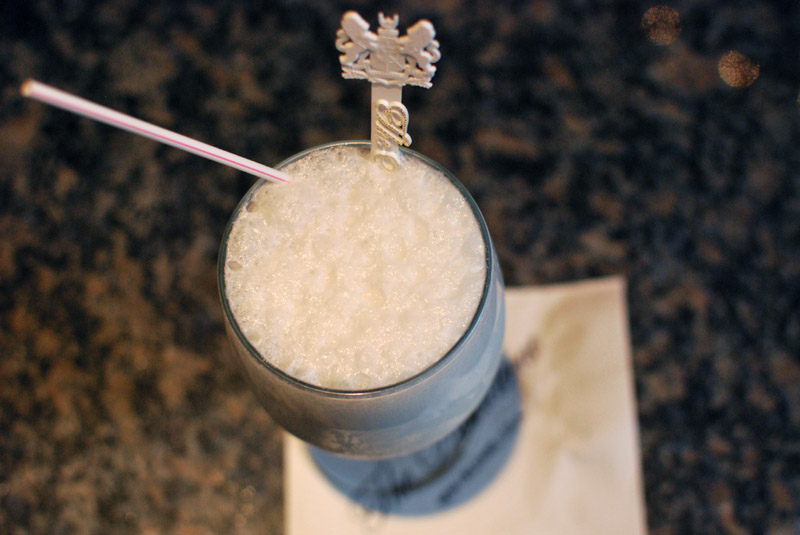
Later that afternoon, I sampled what I’m still shocked was my first ever Ramos Gin Fizz, from the famous Carousel Bar downstairs.  It was… frothy.

I switched back to Abita Amber after, half wishing I had ordered the more lusty Sazerac instead of the fizz.
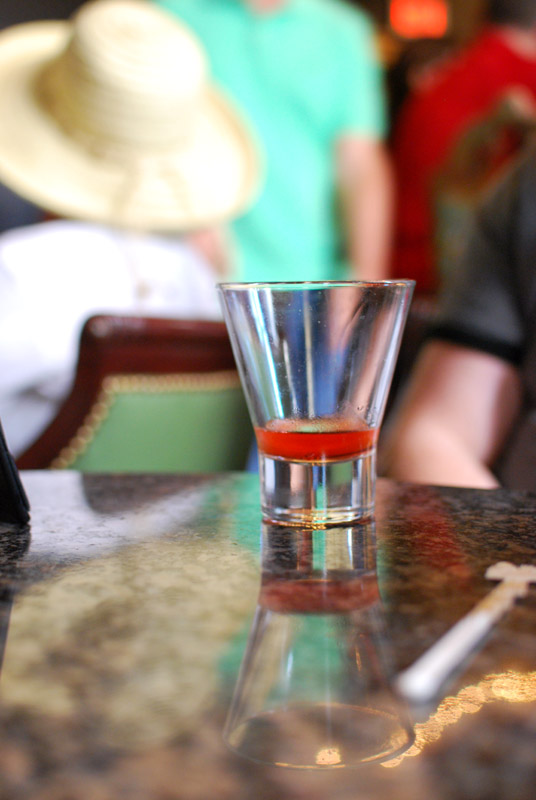
like so

That night, the Monteleone prepared us an extravagant wine pairing dinner, with ingredients one doesn’t usually see in menus for over a hundred people.
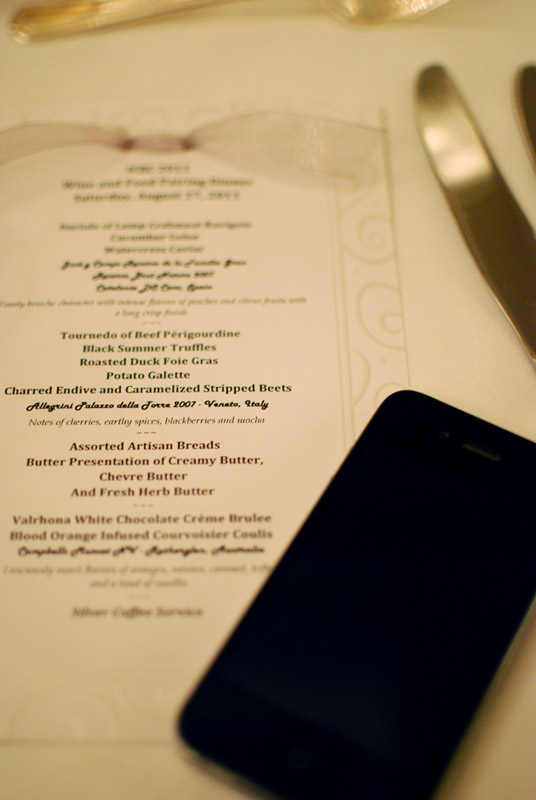
all a food blogger needs: a menu and a smart phone

The first course: crabmeat ravigote, on cucumber gelée, topped with shrimp and rémoulade sauce, paired with a vintage Spanish cava.  The crab was sweet and wonderfully lumpy, and the gelée was full-flavored, though perhaps it had a bit too much gelatin.  Crab and champagne are a natural pair, no exception here.

The entrée: beef tournedo (tenderloin), topped with foie gras and black truffle, served with endive and beets, paired with a red blend from Italy.  It was a lily guilded thrice.  I don’t really understand stacking up three luxury items, when the textures don’t necessarily go well together, even though it’s a classic dish.  All the ingredients were delicious, but the beets were my favorite part of this plate.

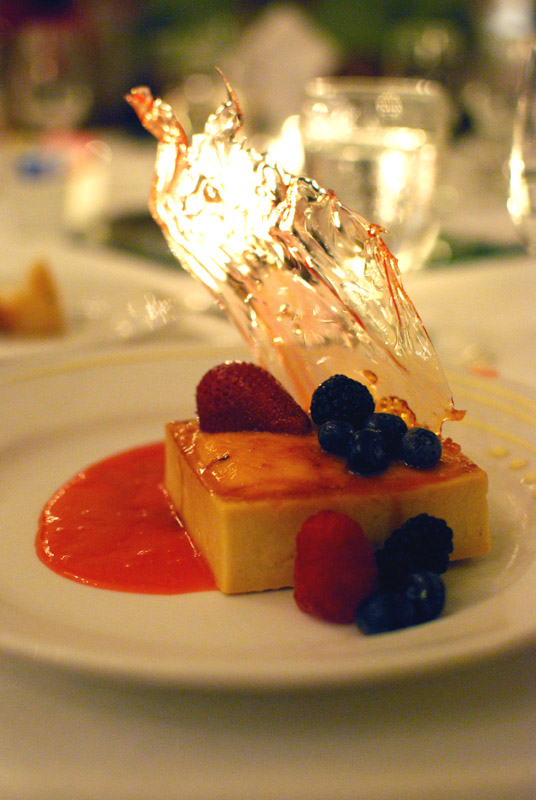
The dessert: white chocolate crème brûlée, with berries and pulled sugar garnish, paired with an incredible Muscat from Australia.  The crème brûlée was set in a sort of tart crust, not something you typically see, but it was really lovely.  Unfortunately, the pretty pulled sugar was a sticky reminder why those garnishes do not work well in areas of high humidity.  Muscat is my favorite dessert wine; this one was complex, and caramel-thick in the best possible way.

Oh, and after all this wonderful food?  Chef John Besh delivered the keynote speech of the weekend.  I adore his restaurants, and cannot commend the man enough for his ambassadorship in promoting New Orleans and Louisiana.  I have a professional crush on this guy.

The remaining sessions on Sunday went by too fast, and IFBC NOLA was over.

And then, the rest of my trip back home began.  More on that later.  Stay tuned!

Two Generous Salads

I don’t typically travel a heck of a lot.  Most of the time, you’ll find me within a five-mile radius of my kitchen.

But tomorrow (Thursday), I’m jetting off to my hometown, New Orleans.  First I’ll be attending the International Food Blogger Conference (and if you’re going too, I’d love to meet up with you!).  After that, I’ll be helping my family through one surgery (which I’m trying to not worry about obsessively).  I’m going away for eleven days, which isn’t very long, but it’s long enough that I couldn’t leave my sweetheart behind without some home-cooked food.

I have dug my own grave on this one, and absolutely crippled my boyfriend in the kitchen.  Not that he can’t or won’t cook, it’s just that… well, we have an unspoken understanding that dinner is probably going to be better if, you know, the professional chef cooks it.  He does help.

Also, I was only slightly afraid that he might subsist purely on cereal and take-out for eleven days if I hadn’t made a little something nutritious to tuck in the fridge.

Okay, fine.  If I’m honest, this was all a fine excuse for a blog post.

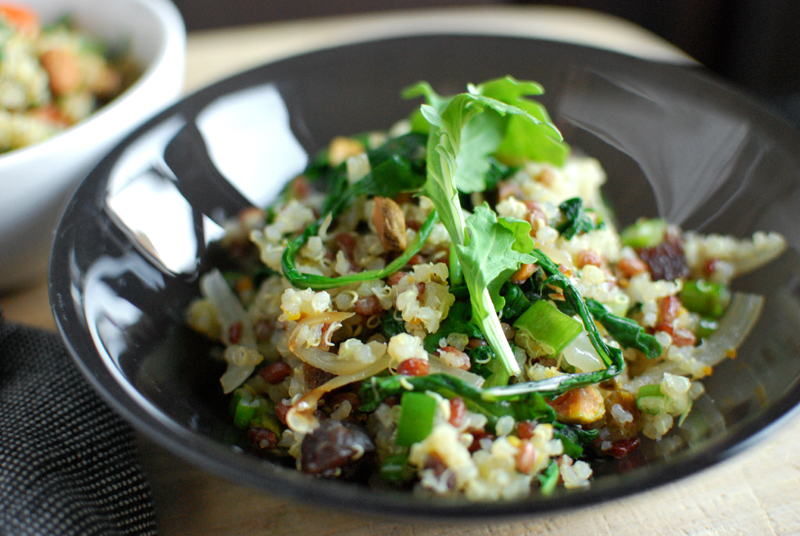
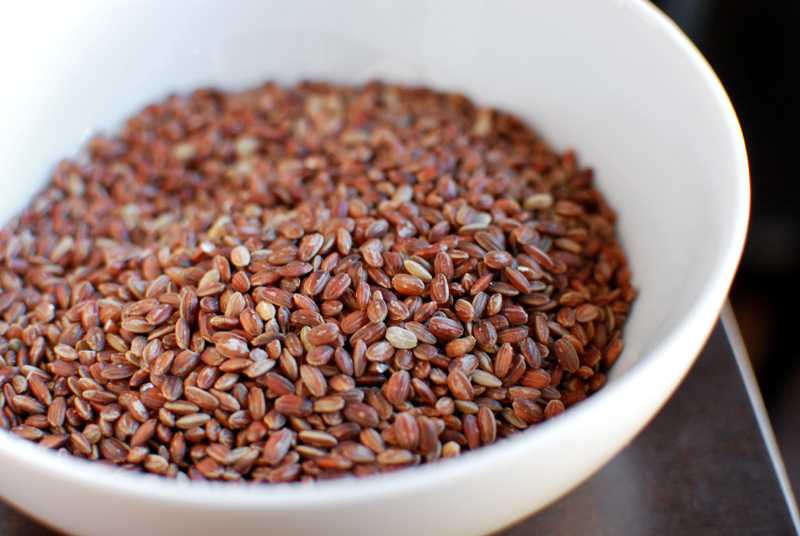
Drawing inspiration from my latest favorite cookbook and chef, Plenty, by Yotam Ottolenghi, I made for him two grain-based and vegetable-heavy salads, one with carrots, quinoa, lime, and cilantro, the other with quinoa, red rice, pistachios, and dried apricots.  These two dishes are exactly the kind of thing I could eat quite happily for the rest of my life, day in, day out.

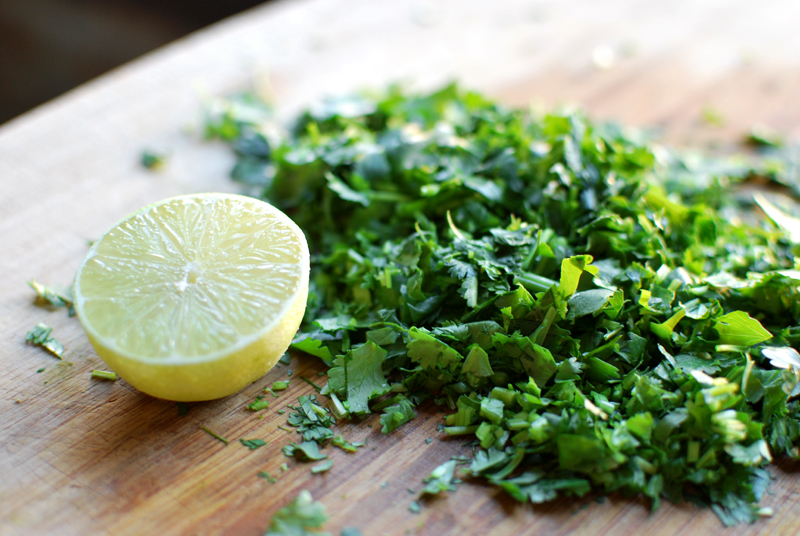
The one word that comes to mind when I think about Chef Ottolenghi’s food is “generosity”.  Often, there isn’t just one type of grain, but two.  Or, occasionally, more.  (Shock!  Eyes widen!)  Flavors aren’t delicate or precious, but bold and effluent.  Herbs, in particular, are used with a hand so heavy it borders on leaden.  It just feels downright generous to pile mounds of herbs onto big heaps of vegetables and grains, and mix it all up in your largest bowl, using your entire arm to stir.
this is actually only half the cilantro

This is the sort of thing that’s been heavily influencing my cooking of late.  In-season vegetables, fresh herbs, whole grains, unrestrained flavors, always a hit of citrus.  This is also the sort of thing that is ridiculously good for you, which is great, because I could eat buckets of it.

I hope to see you at IFBC, but if I don’t, maybe one of these salads will make your weekend a little more generous.  Even if you just make it for your blog.


Carrot and Quinoa Salad with Almonds, Lime, and Cilantro
Inspired by Richard Blais, via Food & Wine Magazine
Makes 6 to 8 servings

I neglected to note how many pounds of carrots I used, but I know there were 10 of them, and they were on the smaller side.  If you love carrots, use more.  If you don’t, use less.  Either way, use your judgement.

3/4 cup whole almonds, toasted
1 cup quinoa
2 cups water
1 teaspoon kosher salt, plus additional as needed
10 medium-sized carrots
1 tablespoon olive oil, plus additional as needed
1 tablespoon minced or grated fresh ginger
1 clove garlic, minced or grated
Pinch of cinnamon
1/2 cup chicken stock
1 tablespoon unsalted butter
1/2 teaspoon Sriracha, or to taste
1 lime
1 bunch cilantro (yes, a whole bunch), chopped
1 can water chestnuts, drained and chopped
1 tablespoon furikake (optional; see this post for a recipe), or black sesame seeds
Salt and black pepper to taste

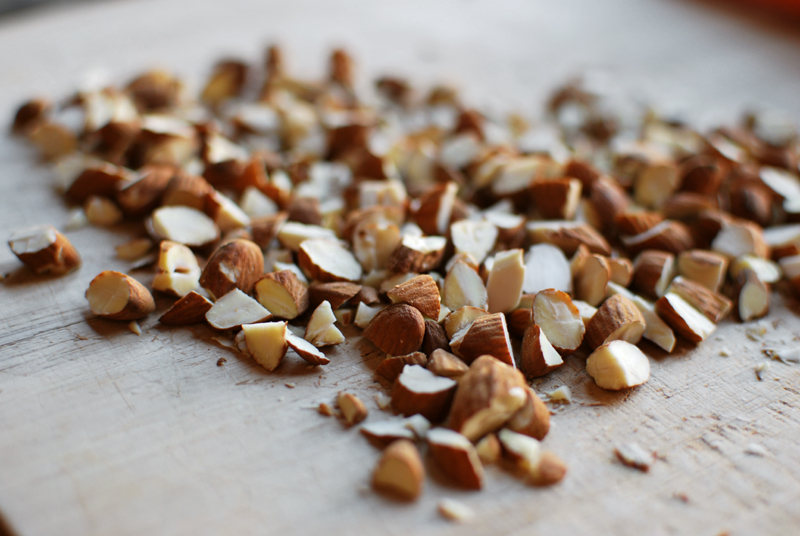
1.   To toast almonds, heat oven to 350º F.  Spread in an even layer on a sheet pan, and bake for 7 to 10 minutes, or until fragrant.  Chop roughly while still warm, and set aside.

2.  Meanwhile, rinse the quinoa in a fine mesh sieve until the water runs clear, swirling with fingers to help agitate the grains.  (This rinses off a natural coating that, when cooked, tastes bitter.)  Let drain a bit.

like so

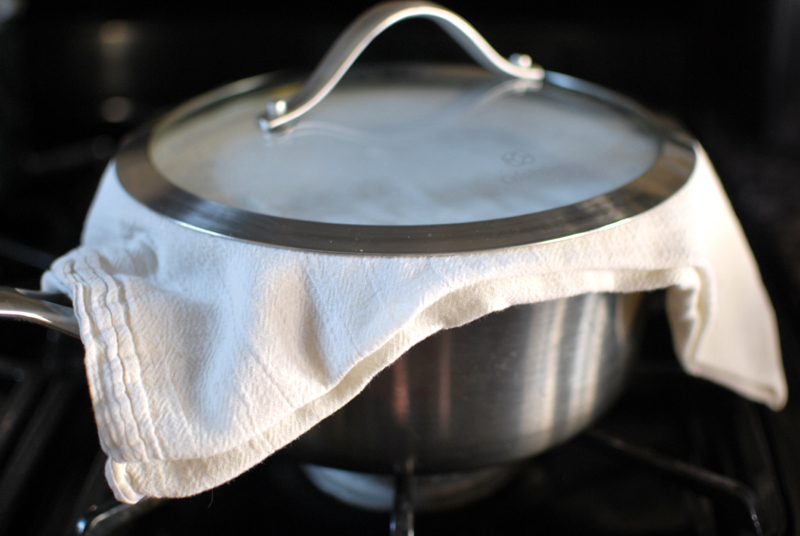
3.  Place the quinoa in a medium saucepan, over medium-high heat.  Stirring constantly to prevent burning, toast the quinoa until fragrant, and grains dry and separate, about 3 minutes.  You should not hear any sizzling when the water has fully evaporated.  Add the water and salt, and bring to a boil.  Cover, reduce heat to low, and simmer for 12 minutes.  Remove from heat.  Place a clean towel between pan and lid (to help absorb excess moisture), and let stand 5 to 10 minutes before fluffing with a fork.

like so

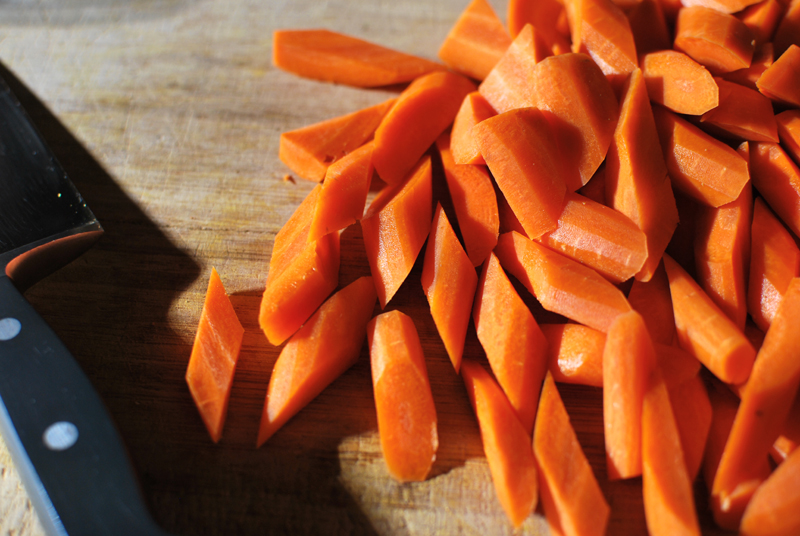
3.  While quinoa cooks, prepare the carrots.  Peel, halve lengthwise, and chop into roughly 1 inch lengths (on a bias if you want to be fancy).  Mince or grate the ginger and garlic.

4.  In a large skillet with a lid, heat the olive oil over medium heat.  Add the carrots, ginger, garlic, cinnamon, and a pinch of salt.  Toss to combine, and cook until fragrant, about 3 minutes.  Do not brown.  Add the chicken stock, and cover the pan.  Cook until the carrots are just tender, 3 to 5 more minutes.  Remove the lid, and let any remaining liquid reduce until thick.  Remove from the heat.  Stir in the butter and Sriracha.  Let cool briefly.

5.  Zest and juice the lime into a large bowl.  Add the carrots, and toss.  Mix in the cooked quinoa, toasted almonds, cilantro, water chestnuts, and furikake (if using).  Taste, and adjust seasoning as needed with salt, black pepper, and olive oil.  Serve warm, at room temperature, or cold.

Red Rice and Quinoa Salad with Orange and Pistachio
Yotam Ottolenghi
Makes 6 servings 

Recipe can be found here.  I changed (practically) nothing, aside from wilting the arugula slightly so it would keep longer, and mixing it in.  Don’t be hesitant to use two grains in one salad; the variance in texture is delightful, and it’s scarcely any more trouble.

Also, I took some pictures of the ingredients, and I’m darn well going to use them.

Five Minute Photo Shoot: Squash Blossoms and Shrimp

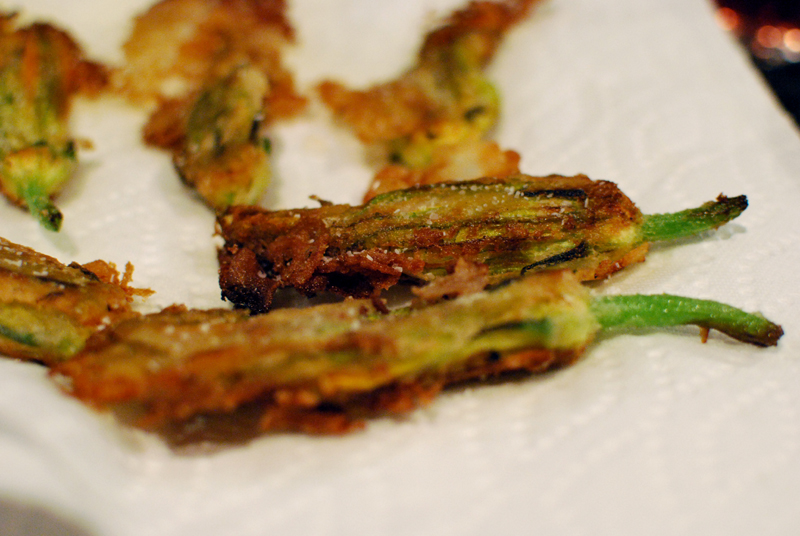
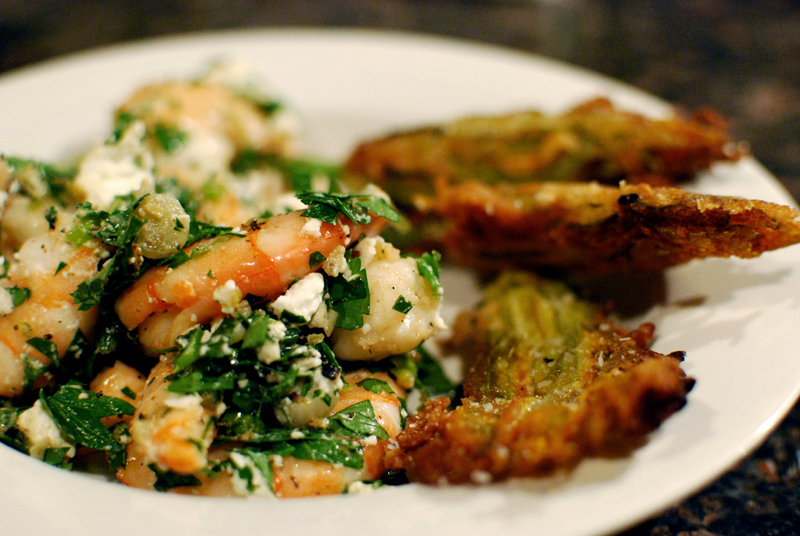
For dinner the other night: squash blossoms, fried in a thin batter made with rosé wine, served alongside some Gulf shrimp that was poached and tossed with feta, parsley, garlic, and scallions.  Delicious.

One trick to ultra-crispy squash blossoms (or any fried food, really) is to use rice flour in the batter.  These guys stayed impeccably crisp for somewhere close to an hour.

Brown Rice Onigiri; or, How I Learned to Stop Worrying and Make My Lunch

I love cooking.  That’s probably quite apparent, what with the food blog and all; and it’s even more apparent when you consider that I cook for a living, too.

So why, then, can I never be bothered to make myself lunch?  In the middle of the day, if it takes longer than about two minutes to prepare, it isn’t happening.  This from a girl who spends entire days preparing totally-from-scratch meals for others, and loves it dearly.

Most often, my lunch ends up being a bowl of brown rice and edamame, two things I make sure to always have on hand.  If, by some misfortune, there is no cooked brown rice in the fridge, I consider myself ess-oh-el.  Much hand-wringing ensues, followed by apples and cereal, or the rare sighting of a fried egg.

I’ve gotten into the bad habit of only bringing basically a Lärabar and an apple to work, which is simple, delicious, and portable, but it’s not really enough to keep my energy up during a day of cooking.  This explains why I sometimes feel exhausted at the end of the day, with only enough left in me to haul myself home and onto the couch.  Add beer or wine, and internet.  Stir.  Serve chilled.

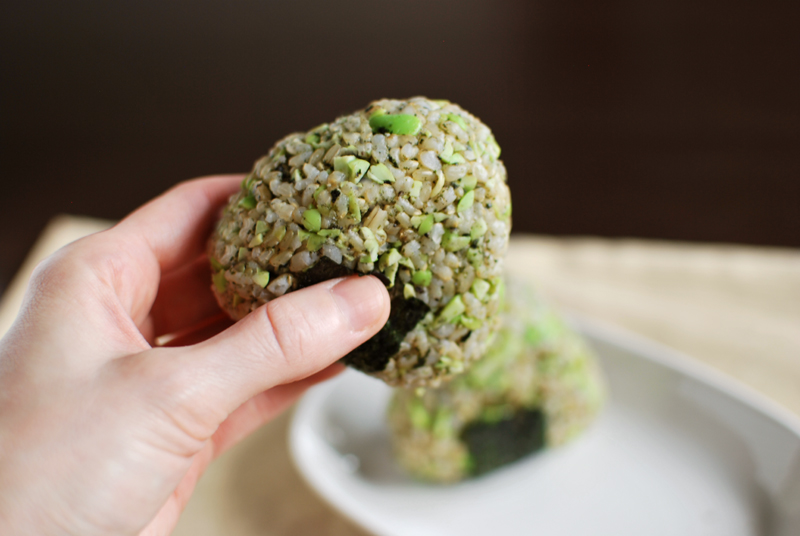
Trying to come up with a way to reformat my go-to lunch into a work-friendly snack, I had the idea long ago to make onigiri, the famous Japanese comfort food that was designed to be a traveling snack.  I knew it was, at its most basic, just a ball of rice, but I had assumed it was made of sushi rice (i.e., seasoned with salt, sugar, and vinegar), so I dismissed the thought.  I hadn’t ever had luck with making good brown sushi rice; further, neither I nor my hypoglycemic tendencies wanted to resort to white rice, or any kind of rice with sugar.

But in recently looking up recipes for furikake to jazz up my plain rice and edamame, I found I had been wrong.  Onigiri is, in fact, never made with sushi rice, but rather with plain rice.  The sky opened, and angels sang; my dream of onigiri was reborn.

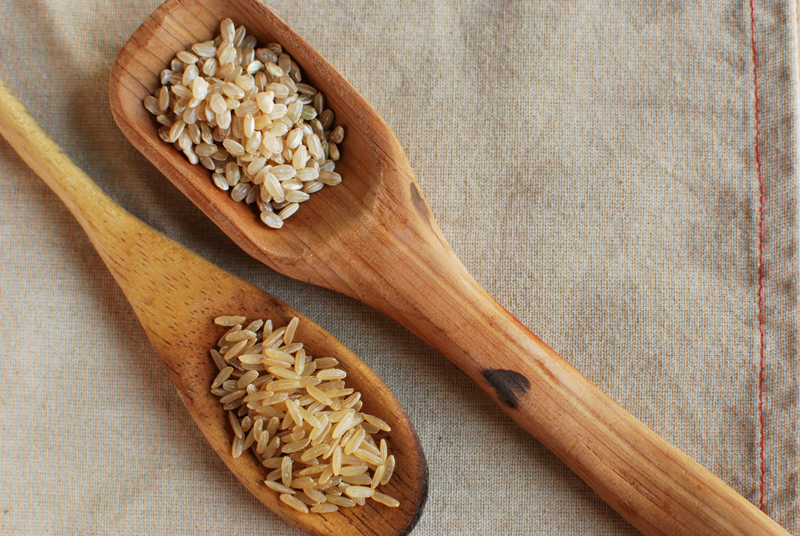
There are ten million different ways to make onigiri, depending on how the rice is seasoned, whether or not it’s filled, what sort of filling, how it’s shaped, and so on.  There is but one requirement: short grain rice is mandatory.  Long grain rice will never stick together properly, and medium grain is iffy at best.  Do not use jasmine, do not use basmati, do not use Uncle Ben’s.  Do not use Minute (ever, not just for onigiri).  Do not pass GO.  Do not collect $200.

short grain on top, long grain on bottom. see the difference? use the one on top.

I decided to use the following method to make my onigiri (learned from the delightful Just Hungry) not only because it works particularly well with brown rice, which will always have a harder time sticking together than white rice, but also because it automatically packages the onigiri in the process.  It’s ideal for my particular amalgam of laziness and snobbishness.

This is about 2 cups of cooked short grain brown rice.  It will make four smallish onigiri.  I want to keep them small, so I can eat one easily and quickly while sautéing or whisking or what-have-you.  There is no sitting down or stopping to eat at work.

did i mention this is short grain rice? use short grain rice.

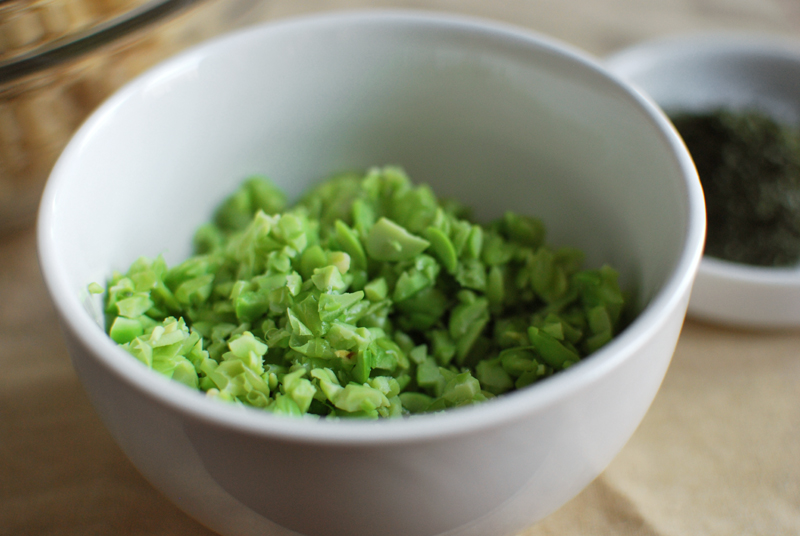
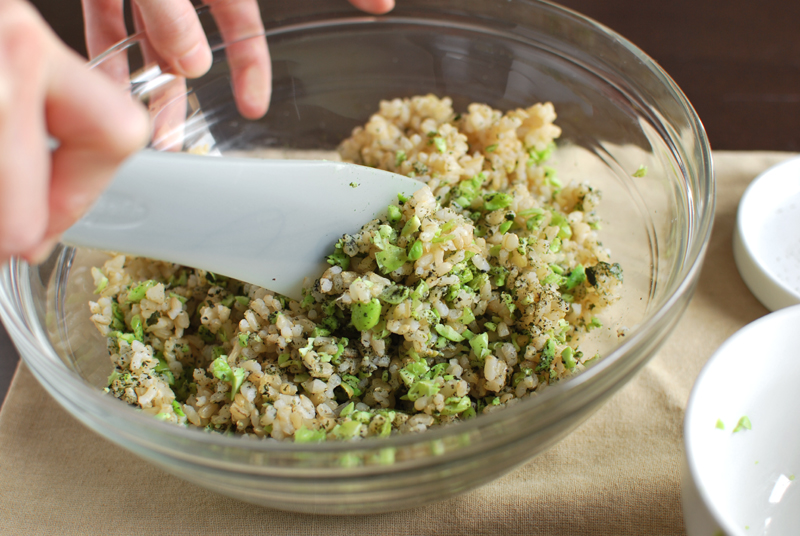
It gets mixed with about 1 cup of frozen shelled edamame, which was thawed in the microwave and pulsed a few times in a food processor.

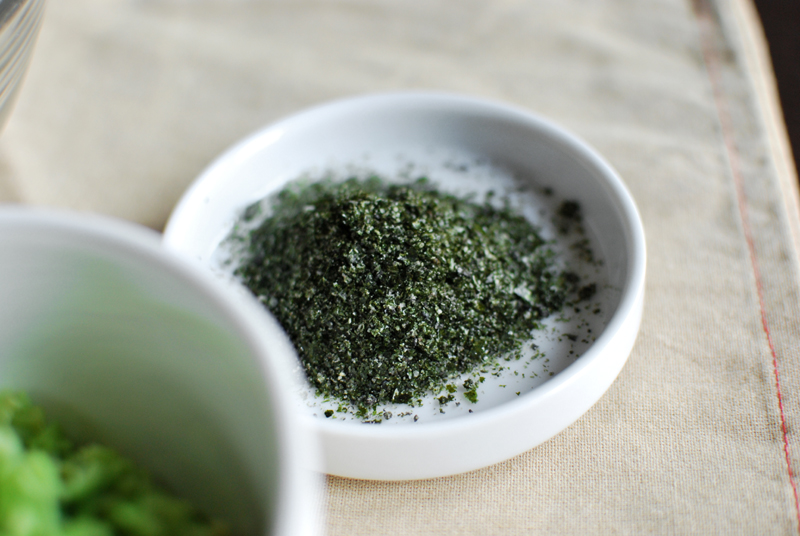
To season, about 2 tablespoons of black sesame and nori furikake, more or less.  This mixture has enough salt in it to adequately season the rice, which can taste a little bland if too little is used.

Mix it all together.

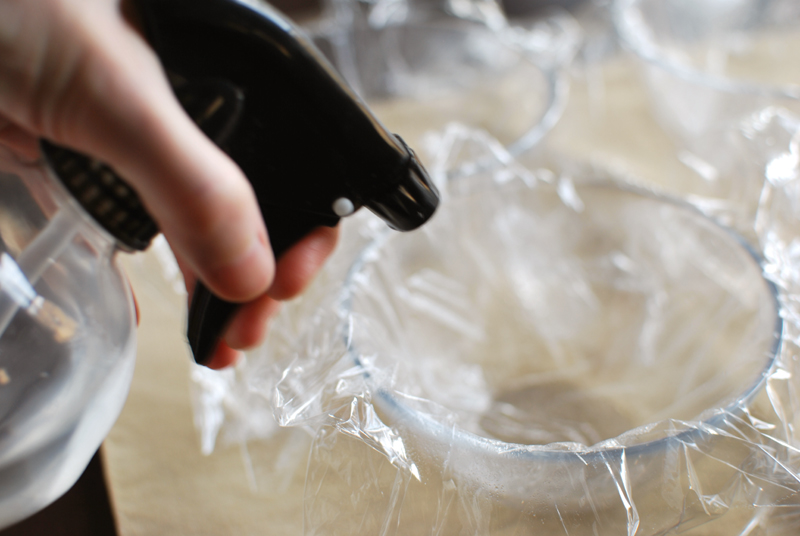
Line four small bowls with plastic wrap, or line one bowl four times.  Whatever works.  Try to press it in evenly, with no big wrinkles.

Either spray or drizzle in water, just enough to moisten the plastic without pooling.  A spray bottle works wonders here;  this is a cheap one I picked up god-knows-where for no more than a couple of dollars.  It’s useful to have around, especially when the cats misbehave.

A light misting of moisture keeps the rice from sticking to the plastic.  I haven’t tried omitting this step; maybe it’s unnecessary, but I don’t mind doing it and my rice hasn’t stuck yet.

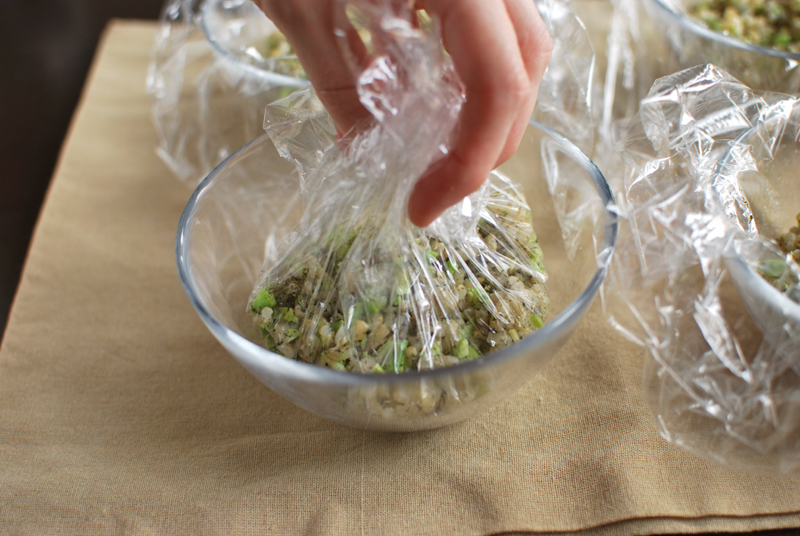
Divide the rice evenly between the four bowls.

Gather up the plastic wrap around the rice.

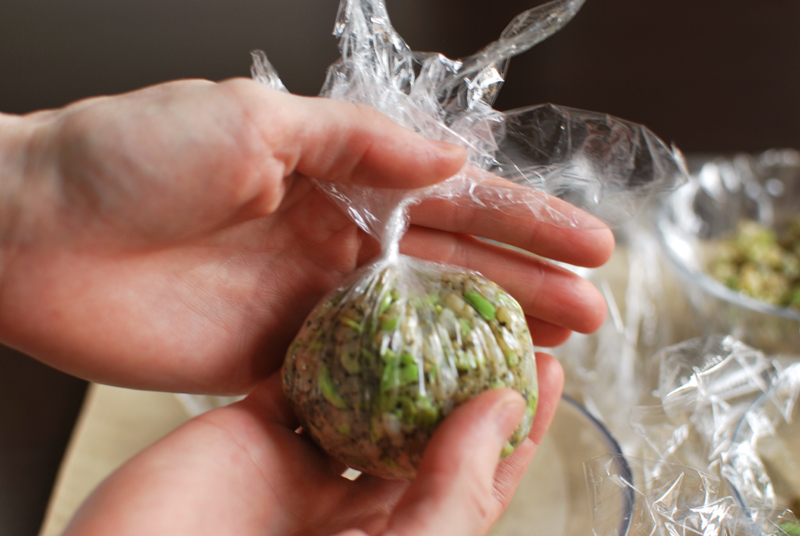
Press the rice together and squeeze out as much air as possible.  Don’t crush it, but compress it well.  Twist the plastic to hold it all together.

This is basically the end of the process (thanks again to Just Hungry for the technique), but if you want the traditional triangle shape, now’s the time to make it: just squeeze the ball into a triangle shape.  These wrapped-up rice balls can be eaten immediately, or after a few hours at room temperature, or refrigerated for a few days.  They also freeze beautifully, which is what mine are doing now.

On my way to work in the morning, I grab a couple and leave them at room temperature.  By the time I want to eat them, they’re appropriately thawed.  If you’re ambitious, wrap a little nori strip around the bottom, just before serving so it doesn’t get too soft.  Mine already have nori in them from the furikake, so I only did this for looks.  I do not give my onigiri little nori pants at work.

Baked Brown Rice for Onigiri
Adapted from Alton Brown
Makes about 4 cups cooked rice

This method has never, ever, ever failed me.  It turns out perfect brown rice, every single time.  It works for any type of brown rice, but for onigiri, be sure to use short grain rice.  Rice labeled as “sushi rice” is ideal.  If in doubt, um, look at the grains of rice.  If they’re short and round, then you’re good to go.  If they’re long and thin, then don’t bother; it won’t be starchy enough to hold together in a ball.

If you like, you can add some seasoning other than salt before cooking the rice, such as bay leaf, cumin, sesame seeds, cloves, turmeric, star anise, dried herbs, furikake (recipe below), or even a garlic clove.  It will season the rice deeply and aromatically.

2 1/2 cups water
1 1/2 cups short grain brown rice
1 teaspoon kosher salt

1.  Turn oven to 375º F.  No need to fully preheat, just turn it on.  Bring the water to a boil, using whatever method is preferable (microwave, stovetop, whatever; me, I use a tea kettle).

2.  While water heats, measure out the rice into a baking dish of suitable size.  (Mr. Brown recommends an 8 inch square glass dish, which I happen to have, so that’s what I use.  I’m sure ceramic is fine, but maybe not metal, which will heat less evenly and probably crisp the outside edges of the rice.)  Add the salt.  If your dish doesn’t have a tight-fitting cover, pull out a piece of aluminum foil and fit it to the dish (to make covering it later go quickly and easily), then set the foil aside.

3.  When the water boils, pour it over the rice and salt.  Give it a little stir, and cover tightly with the foil.  (See?  If you hadn’t fitted the foil to the dish already, you’d be handling that over a dish full of boiling water.  I care about your hands.)  Immediately place the dish in the oven, and bake at 375º F for 1 hour.

4.  Remove the dish from the oven.  I like to let it stand for about 10 minutes before uncovering and fluffing the rice with a fork, both to let the dish cool and to give the rice a little extra steaming time.  Cooked rice can be stored in the fridge or freezer.

Black Sesame and Nori Furikake (Rice Seasoning)
Adapted from The Kitchn
Makes about 1/2 cup, which will last forever

Furikake is really anything you sprinkle over plain rice to season it.  It’s usually fairly potent, so a little goes a long way.  The nori here doesn’t give a seaweed flavor so much as an umami richness; with the salt, it has a faint brininess that I particularly love with black sesame.  Nori can be found in the “international” section of many grocery stores, but Asian markets will have a wider selection.  I found some pre-toasted nori that was already cut into strips, for exactly such an application as this.

1/4 cup black sesame seeds
1 teaspoon kosher salt
1 cup nori (toasted), cut into small strips

1.  Place the sesame seeds and salt in a spice grinder, or mortar and pestle.  Pulse or grind a few times until the sesame seeds are lightly ground, with some remaining whole.  At this point, you can add the nori and grind it all together, or simply mix the ground sesame-salt in with the strips.  Store in an airtight container in the freezer, or in the fridge if you’ll use it all within a few days.

Five Minute Photo Shoot: Twice the Fun

I couldn’t decide which of these to feature, so I’m posting them both.  These meals were both tossed together in less than 15 minutes with things I had banging about in the kitchen, so no recipes or amounts, as everything was eyeballed.

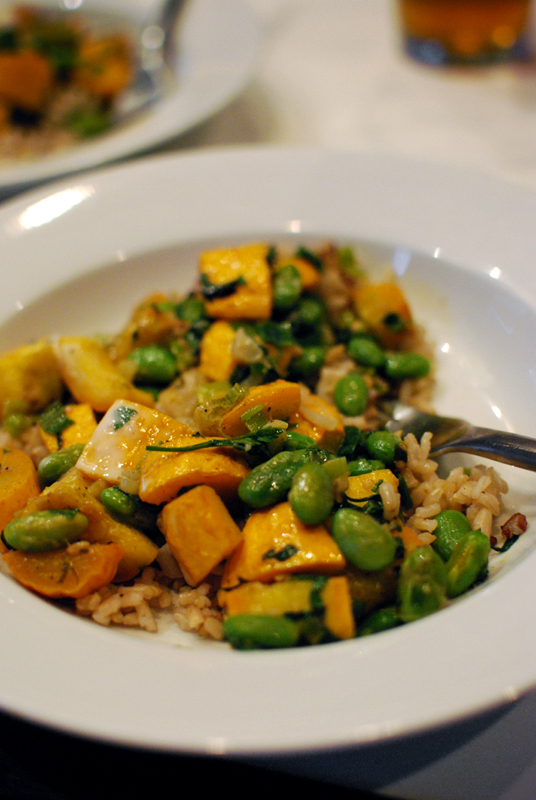
This first one was a quick sauté of gorgeous yellow squash (orange, really) from my Old Kentucky Grandmother’s house, edamame, mint, parsley, garlic, green onions, and possibly something else I’m forgetting.  Served over brown rice, topped with a bit of crème fraîche that melted instantly and tied the whole thing together with tangy lusciousness.  Luscious, truly; no other word for it.

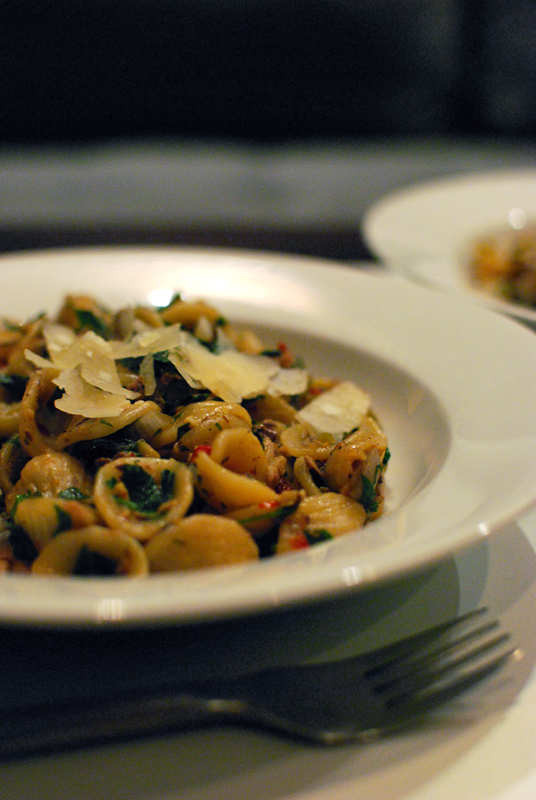
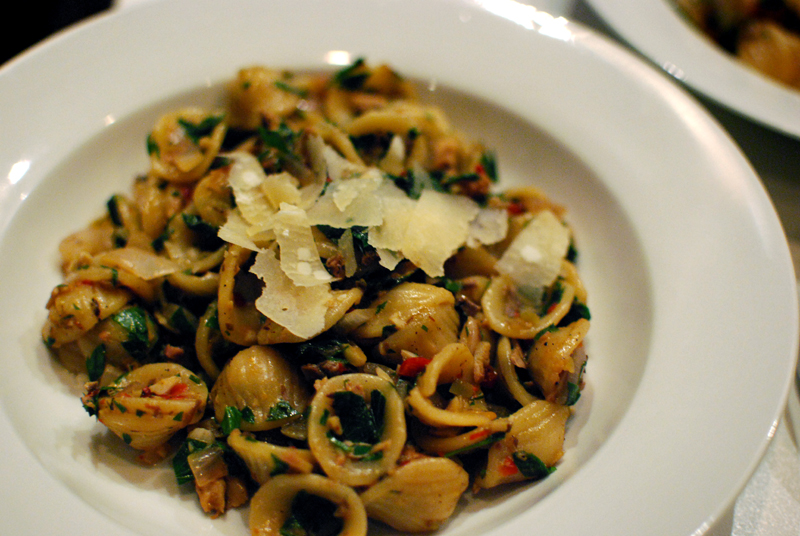
And this was last night’s orecchiette with sardines, red onion, garlic, minced green olives, piquillo peppers, white wine, parsley, and dried red pepper.  On top are shavings of Parmesan.

Wow, two posts in one week?  It’s like I’m taking this seriously.

Five Minute Photo Shoot: Soba, Hijiki, Radishes, and Red Pepper

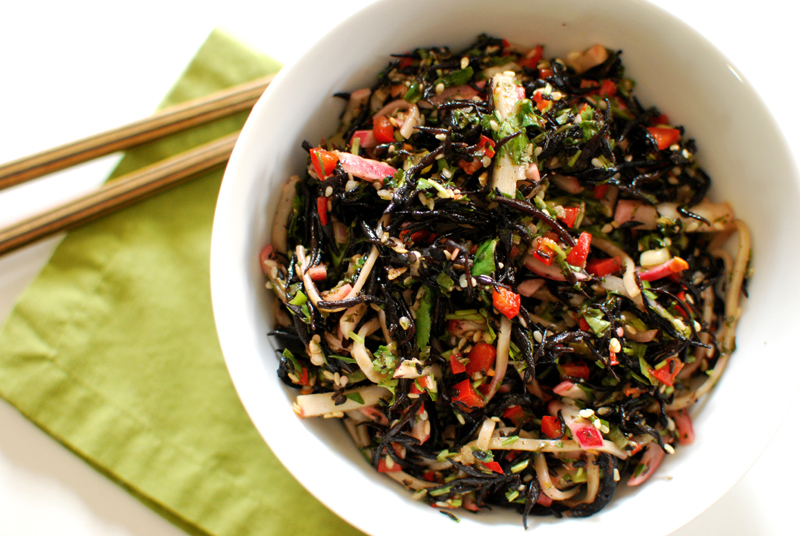
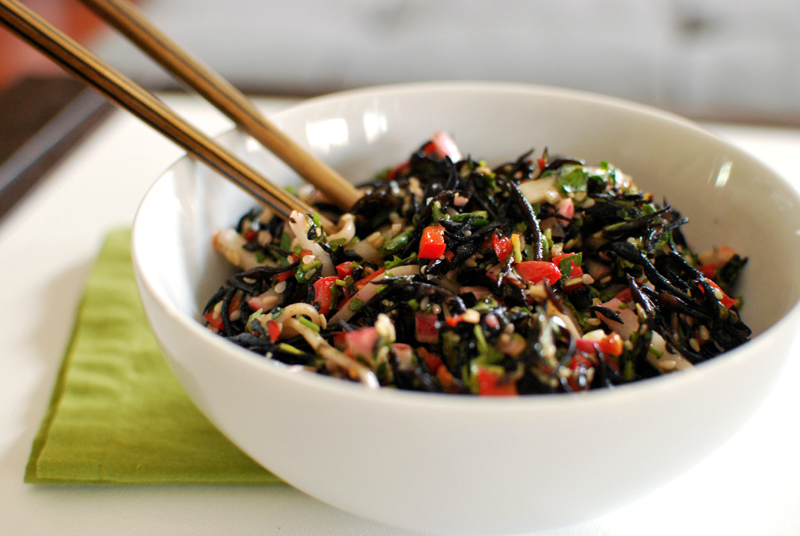
Leftovers for lunch: soba noodles obscured in an ocean of hijiki (seaweed), radishes, red bell pepper, red jalapeño, mint, cilantro, parsley, lime, sesame seeds, and sesame oil.  I made it for a client last week, sans seaweed, and got so hungry for it that I came home and made it again for myself.  Recipe is (adapted) from my latest obsession, Yotam Ottolenghi’s Plenty.


Soba and sesame oil together are one of the world’s most amazing flavor pairings.  It’s almost better than tomato and basil.

Yes, I may have made the same recipe recently.  This is how I cook: rarely the same dish twice, even from the same recipe.  It makes me smile.

NYC Part III: …And All the Rest

(In which our narrator concludes her tale of a trip to New York City.)

I know it’s dreadfully dull to look at other people’s vacation pictures, but I had a few remaining photos of my (not so) recent trip to New York, and thought I’d share them anyway.  It’s my blog, and I’ll be dull if I want.

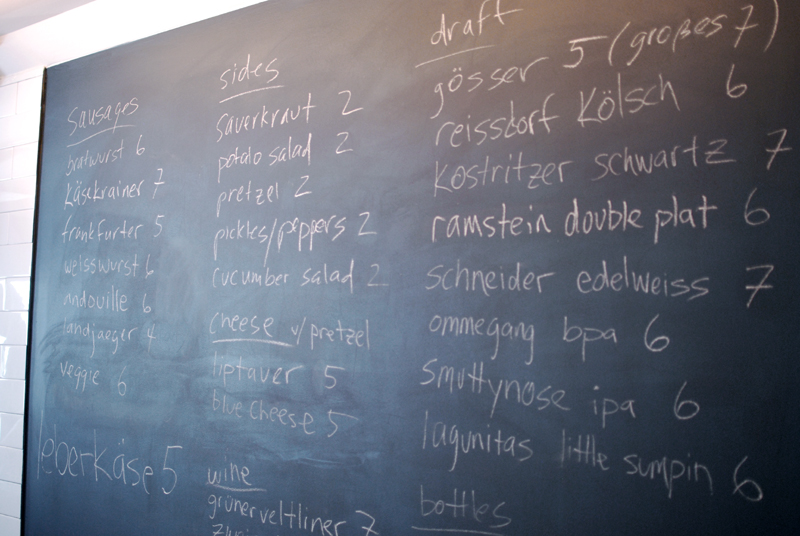
After stopping in at the Breuckelen Distillery, we were all feeling a little peckish.  But with big plans to smash together later that evening in a tiny NYC kitchen and cook dinner, we didn’t want to spoil our appetites.  We were guided to nearby Der Kommissar, probably the best bar value in the city, for a quick snack.

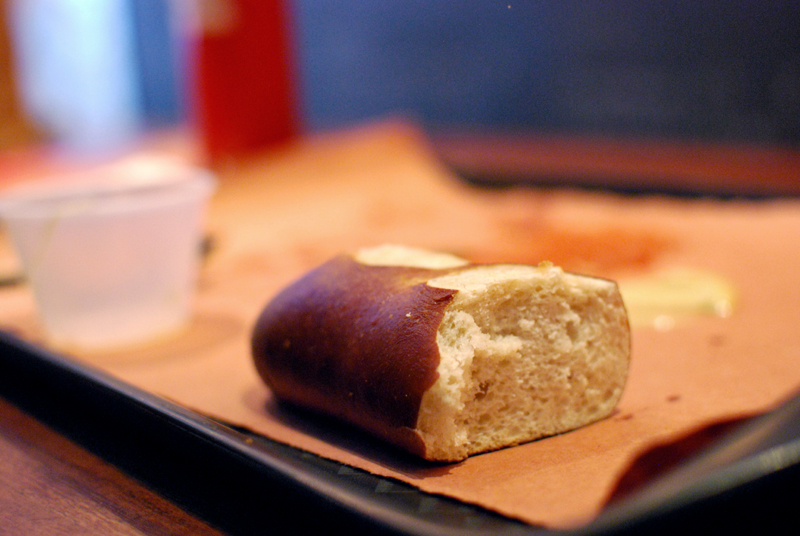
Our light repast consisted of expertly-crafted sausages and mustards, pretzels served with various dips and spreads, and a representative sampling of the well-curated beer menu.  The level of excellence-per-dollar here is quite high.  No single item on the menu was over $7, which made it dangerously easy to keep on sampling.

and sample we did

Other than eating, we tooled around the city a bit, avoiding any tourist destinations like the plague.  Mostly, we just hung out and enjoyed friendly friend time.

our host, in his natural setting. yes, that is a 5x5. his solve time is measured in seconds rather than minutes. amazing.

Making our way around consisted of a little of this:

trains are slow

…but quite a lot more of this:

cabs are a necessity

We spent our last night in town in grand style, which meant that I had to leave the camera behind for the evening, so no photos, I’m afraid.  It started with bar hopping at (among others) the comfortably gloomy and überdistressed 124 Rabbit Club, where we ordered beers I’d only dreamed to find someday.  Situated underground and with a barely marked entrance, the speakeasy-style place couldn’t have been more hip if it was taking Polaroids of itself.  I loved it.

Afterwards, we staggered made our way in an orderly fashion to dinner at Blue Hill, where the five of us ordered pretty much everything on the menu without duplicates, and proceeded to make a small spectacle of ourselves by passing our plates after a couple of bites from each plate.  We had it down to a science by the end.  I don’t recall exactly what we ordered, but I remember dying a little over some asparagus and the unabashedly rosy pork tenderloin (before the recent safe cooking temperature adjustment, mind).  Wine happened, and all the elements came together in that exquisite breathlessness of impeccable food, rich conversation, and the camaraderie you wish you could always keep near you.  It was easily one of the top meals of my life.

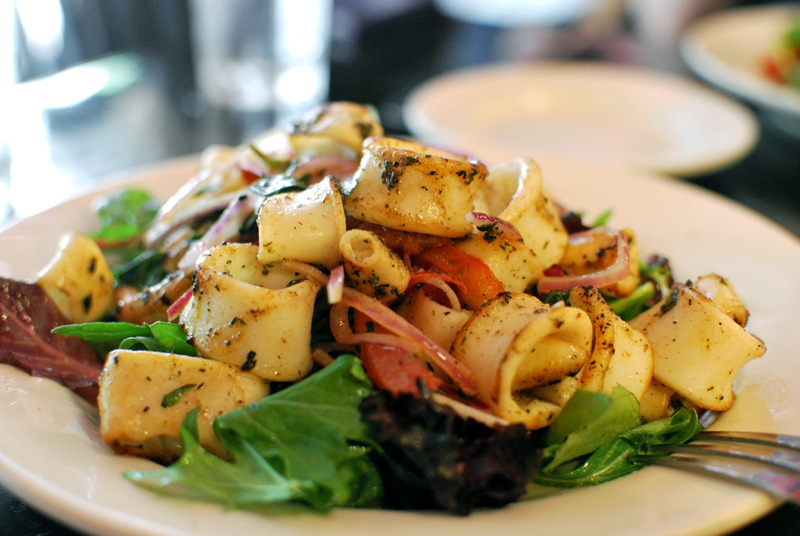
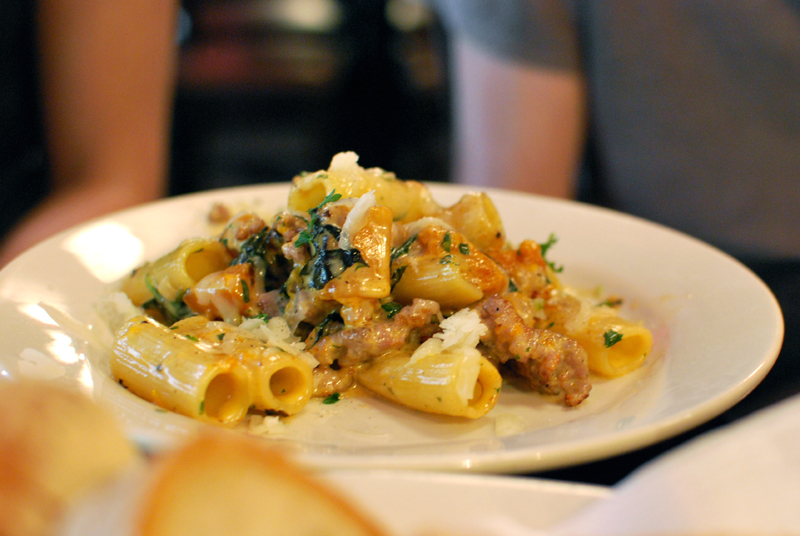
And the next day, plates of charred squid salad and butternut squash pasta refreshed us before the suddenly arduous flight home.

I think I’ll end with this image.  It makes me smile.

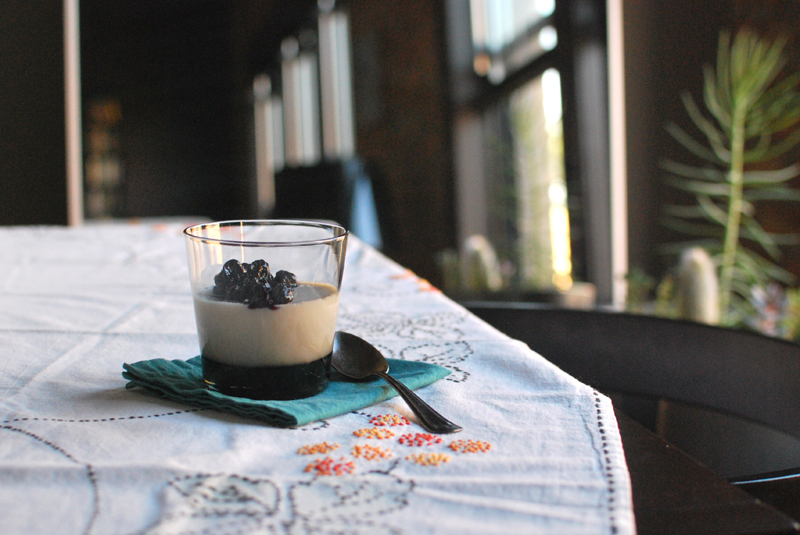
Almond Milk Panna Cotta; Or, Vegan Dessert Win

We recently invited a dear friend over for dinner, a dear friend who is going a-courtin’ with a sweet new fellow.  This fellow happens to be vegan, which isn’t an issue until you invite him over for your annual Kentucky Derby party and realize three hours and a few mint juleps into the party that absolutely everything you’ve served has some sort of non-vegan ingredient in it so you have to improvise some off-the-cuff guacamole with one avocado (and no tomatoes, red onions, or cilantro around) before the poor guy passes out.

Luckily, he didn’t hold that against me, and agreed to return for a proper dinner.  Little did he know that I had never prepared an entirely vegan three-course meal before.  I do love a menu-planning challenge.

The appetizer and entrée were simple enough: a creamy dip of roasted eggplant and tahini with pita wedges, followed by a dish of lentils, hazelnuts, celeriac, and herbs, both recipes from my new favorite cookbook, Yotam Ottolenghi’s Plenty.  But dessert… ah, dessert was a conundrum all on its own.  Complicating the issue, our oven had obstinately refused to turn on one morning a week or so earlier, and the repairs had not yet occurred.

So.  A dessert.  Vegan.  With no oven.  Hmmmm.  Obstinate myself, I refused to resort to a platter of cut-up fruit.  My pride was at stake here.  I could do better than a fig on a plate.

My first thought was chocolate mousse, my go-to recipe that uses olive oil (vegan!) and a soupçon of Bourbon (also vegan!).  It didn’t require an oven, always went over well, and could be made in advance.  I’d just get some nice cream and fold in the… ohhhhh.

Derp.

After chocolate mousse, I often turn to panna cotta for a sophisticated end to a dinner.  But panna cotta (literally, “cooked cream”) is about one of the least vegan desserts I can think of.  At its basest level, it’s just milk and/or cream, thickened with gelatin (it’s made of hooves, you know!).  Vegan panna cotta?  It sounds a little crazy.

But, inspired by an old post on Chez Pim that I recently came across, it occurred to me to swap the cow’s milk for almond milk, and the gelatin for agar agar.  Suddenly, the idea of a vegan panna cotta wasn’t so crazy.

Finding agar wasn’t tricky.  The only tricky thing was the lack of information on how to use it.  Even in pastry school, the extent of our education thereof consisted essentially of a footnote under “gelatin”.  (To paraphrase: “Agar is a weird thickener you can use, it’s made of seaweed.  Good luck.”)

Faced with recipes containing wildly varying proportions of agar-to-liquid, hazy descriptions (“pretty firm” doesn’t help), and the fact that agar is sold variously as powder, flakes, or strips, I ended up just testing it myself.  I boiled cups of water with increasing amounts of powdered agar until, when the mixture was chilled, the consistency was just right.  And trust me, if you overdo it, you can bounce the stuff like a rubber ball.  Kinda neat, but you do not want to eat that.

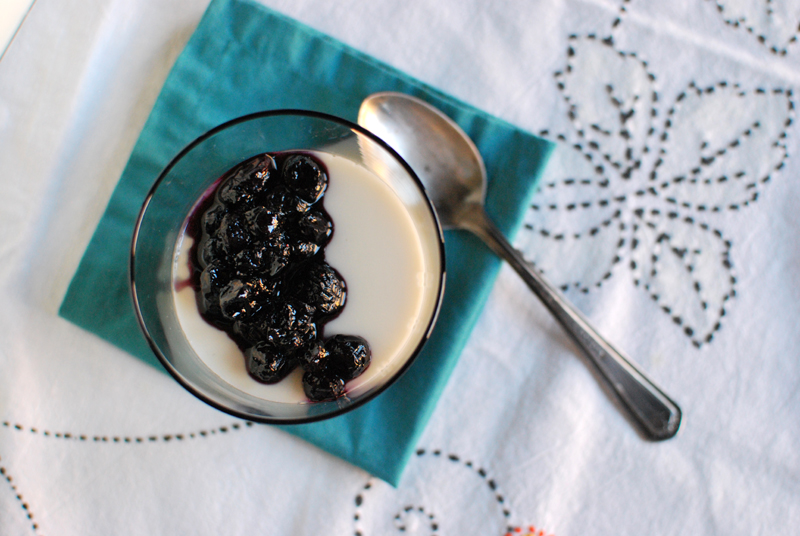
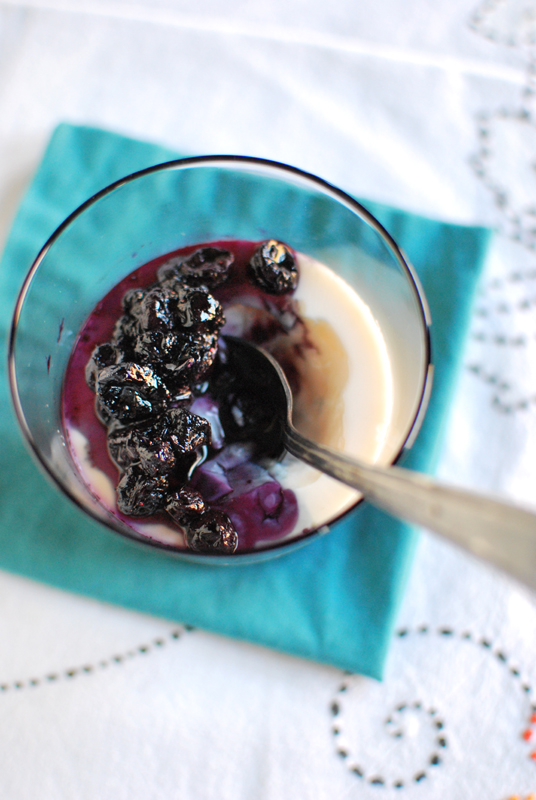
The rest of the recipe came together easily, especially after finding this dairy-free panna cotta on Tartelette.  Her idea of using non-dairy creamer to replicate the thickness of cream is head-slappingly obvious, but I wouldn’t have thought of it.  Planning to serve the verrines with a blueberry compote, I decreased the sugar for a less saccharine base, and tossed in a few drops of almond extract to boost the almond-y flavor.

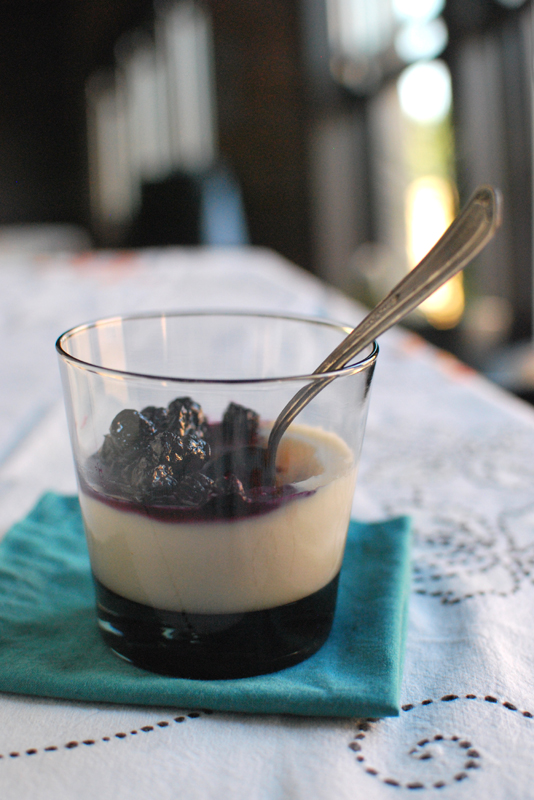
Already feeling pleased with myself, I was even happier when the “panna” cotta was greeted with rave reviews.  The almond and soy milks made for a lighter, slightly nuttier flavor than a traditional recipe, one that was ideal for a hot summer night.  As for the texture, it was exactly what I wanted: soft and yielding, just barely able to hold itself upright if one attempted to unmold it (though I never do).  Due to the nature of agar, you can never really achieve quite the same melting quality you can get with gelatin, but, used judiciously, you can get pretty darn close.

Judging by the scraped-clean glasses left after the dinner, I’d say everyone else thought it was darn close, too.

Almond Milk Panna Cotta
Adapted from Tartelette
Makes 4 servings

I prefer to refer to this as “Almond Milk Panna Cotta”, as it sounds more purposeful and enticing than “Vegan Panna Cotta”, which sounds like an exercise in futility, or a consolation prize.  Almond milk has a delight all its own; it just so happens that I made sure that the rest of the ingredients were vegan-friendly as well.

A word on agar: any sort (powdered, sheet, etc.) will of course work here.  If you’ve never used it, I suggest trying it out first.  To do so, place a small plate in the freezer, and measure out 1 cup of water.  Dissolve 1/4 teaspoon powdered agar (or equivalent) in a pan in a spoonful of the water.  Add remaining water, and bring to a boil for 30 seconds.  Cool slightly, and pour a little onto the frozen plate.  Chill the plate in the refrigerator.  It should gel within 5-10 minutes; if it doesn’t, use a little more agar and repeat.  If it’s too tough, decrease the amount of agar.  Repeat until you get a texture you like.  Sounds like a pain, I know, but it’s not as much of a pain as having your dessert turn out tough and rubbery, or not even set.

1/2 teaspoon powdered agar
1 cup unsweetened almond milk
1 cup non-dairy creamer of choice
1/4 cup sugar
1/16 – 1/8 teaspoon almond extract, depending on strength of extract and how much almond flavor you want
Optional: Blueberry Compote (recipe below)

1.  Place agar in a small saucepan.  Drizzle in a spoonful of almond milk, and stir to dissolve, adding more liquid if necessary.  Add remaining almond milk, non-dairy creamer, and sugar.  Bring to a boil over medium-high heat, stirring to dissolve the sugar.

2.  Boil for 30 seconds, stirring constantly, to make sure the agar will set.  The mixture will probably threaten to boil over; if it does, briefly remove it from the heat until the foam subsides.  After 30 seconds, remove from the heat and let cool to about room temperature.

3.  Add the almond extract, and divide evenly into 4 ramekins or glasses.  Let cool completely, if necessary, before covering with plastic wrap and refrigerating for at least 3 hours, or overnight.  Serve with Blueberry Compote spooned over the tops, if desired.

Blueberry Compote
Adapted from Ready for Dessert, by David Lebovitz
Makes about 1 cup

I adore this sauce, especially over panna cotta, as it is suggested in the cookbook.  The gin is the perfect “what IS that?” touch.  Taste your blueberries before adding the sugar.  If they’re very sweet, you might not need much sugar.  If they’re a little wan, use more.  Remember, after cooking, you can always add a little more sweetness if need be.

12 ounces blueberries, fresh or unthawed frozen
1-2 tablespoons sugar, depending on sweetness of berries, plus extra as needed
4 teaspoons gin
Zest of 1 lemon, plus a light squeeze of its juice
1 bay leaf
1 three-fingered pinch salt

1.  Combine all ingredients in a small pan.  Bring to a rapid simmer over medium heat, stirring to make sure sugar is dissolved.  Simmer until thickened slightly, 5 to 15 minutes, depending on how juicy the berries are.  (Compote will thicken further after chilling.)  Discard the bay leaf, and taste the compote.  Add additional sugar or splashes of lemon juice as needed.  Chill until ready to use.

Bulgur Wheat Salad with Sardines, Pomegranate, and Pistachios

This was going to be a Five Minute Photo Shoot, but it ended up being so good I had to share the recipe.  I recently threw this dinner together from bits and bobs hanging around the fridge and pantry, in one of those moments of desperation when you’ve got a packed larder but how is it there’s not a single thing to eat, so you start pulling ingredients out to see if anything happens to go together, and miracle of miracles, a common thread emerges.

Sprung from the places where things sometimes go to die: bulgur wheat, a tin of sardines, a handful of pistachios, some fainting mint, pomegranate seeds, and the omnipresent half of a zested lemon.  Sumac and cayenne rounded out the Middle Eastern vibe impeccably, and dinner was served.

Yes, I had pomegranate seeds sitting around in my fridge.  Yes, they’re desperately out of season.  *Gallic shrug*

Bulgur Wheat Salad with Sardines, Pomegranate, and Pistachios
Makes 2 servings

I know sumac isn’t a very common ingredient, but it made this dish.  The earthy, lemony spice really tied all the flavors together; so if you can find it, it’s worth the search.  If not, I understand.

1 cup water
1/2 cup bulgur wheat (medium to coarse)
1/4 teaspoon salt
2 tablespoons extra virgin olive oil (or to taste)
1 tablespoon lemon juice (from 1 lemon half)
1/2 teaspoon sumac, plus extra for garnish
Large pinch cayenne pepper
1 can sardines, packed in olive oil
1/3 cup pomegranate seeds
2 tablespoons toasted pistachios (chopped or left whole)
1 large sprig mint, leaves only, chopped
Salt and black pepper to taste

1.  Bring the water to a boil in a small saucepan.  Add the bulgur and salt, and stir.  Return to a boil.  Cover partially, and reduce heat to maintain a simmer.  Cook for 10 minutes, or until bulgur is tender.  Remove from heat, cover, and let stand for 5 minutes.

2.  Meanwhile, prepare remaining ingredients.  In a medium bowl, whisk together the olive oil, lemon juice, sumac, and cayenne.

3.  Lift the sardines from the oil, drain a bit on paper towels, and remove bones if necessary.  Using fingers, flake into large pieces into the bowl, and add remaining ingredients.

4.  Fluff bulgur with a fork, and stir lightly into the other ingredients.  Taste, and correct seasoning with salt, pepper, lemon juice, and olive oil as needed.  Serve warm, sprinkled with a generous pinch of sumac.

Five Minute Photo Shoot: Soba and Seaweed

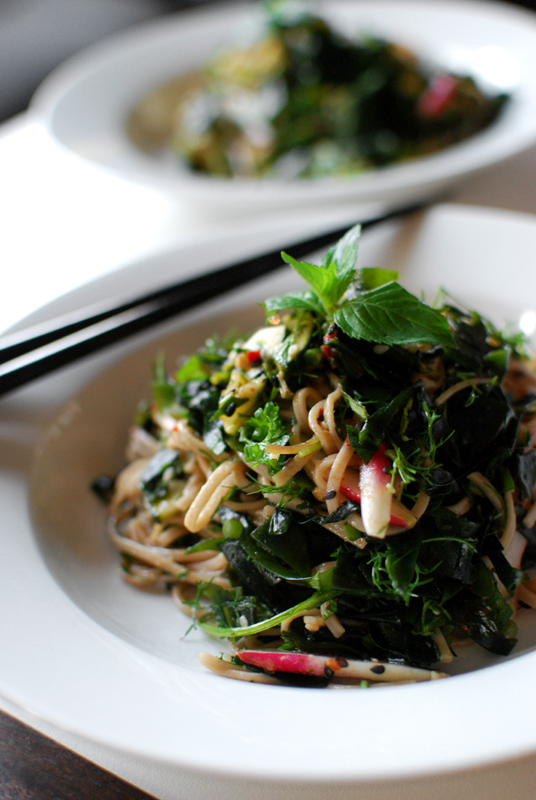
For dinner earlier this week: soba noodles, in the manner of Yotam Ottolenghi from his newest cookbook, Plenty, which is changing my life over here.  Included are wakame (the seaweed), sesame, red chilies, tiny French breakfast radishes, and tons of farmers market herbs, such as something called “crinkle cress”, a miniscule cress that tastes of wasabi.  Amazing stuff.