Chickpeas in Coconut Milk; or, Turmeric for Dummies

chickpeas in coconut milk

If there’s one food people should eat more of, it’s turmeric.

It’s one of those “aw geez how can this be so good for me” kinda foods.  It’s anti-inflammatory, antiseptic, and there’s research going on to study turmeric’s effects on loads of diseases, like: Alzheimer’s, arthritis, heart trouble, digestive problems, liver disease, and (most interestingly to me) cancer of all sorts.

onion

onion before
onion before

See, my sister and I are the next links in a maternal chain of breast cancer (three generations running! go team!), and I’d really rather avoid having to deal with that.  Sure, treatments have improved hugely between my grandmother’s first mastectomy and her second (forty-ish years apart), but holy crap does it still suck.

onion after
onion after

In pursuit of dodging that bullet, I’ve adopted a few habits, including pitching a little curry powder into my usual weird-ass lunch of brown rice, edamame, miso, gochugaru, and nori.  It’s not any kind of guarantee, but I’m so convinced of turmeric’s efficacy that I try to eat it more days than not.

garlic

Look, I’m not here to preach at you, or tell you how to live your life.  We’re all just here for the food.

I’m just saying it wouldn’t hurt to eat some turmeric now and again.

spicy onion
spicy onion

Obviously there’s no point eating something unless it tastes good.  Lucky for us, turmeric tastes awesome.  It’s a little bit like saffron, but it’s earthy where saffron is floral.

chickpeas in coconut milk
look at it go

And if you’re one of those weirdos who doesn’t like curry?  You can add turmeric into any number of dishes, like deviled eggs or chicken pot pie.  But it’s impossible to sneak.  Turmeric will stain the crap out of things.  Fair warning.

weird herbs
spicy globe basil

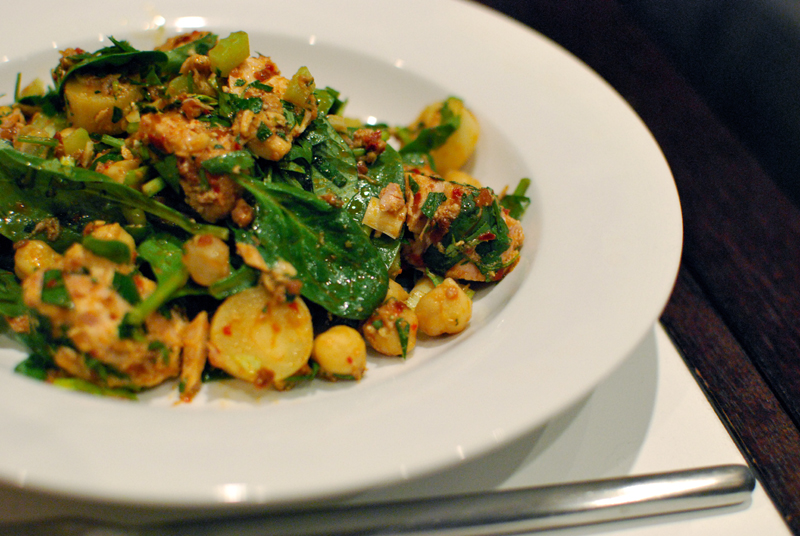
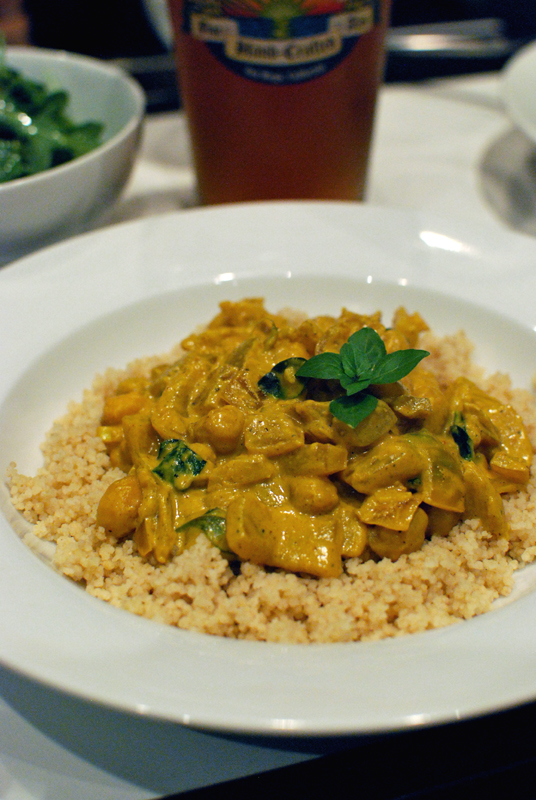
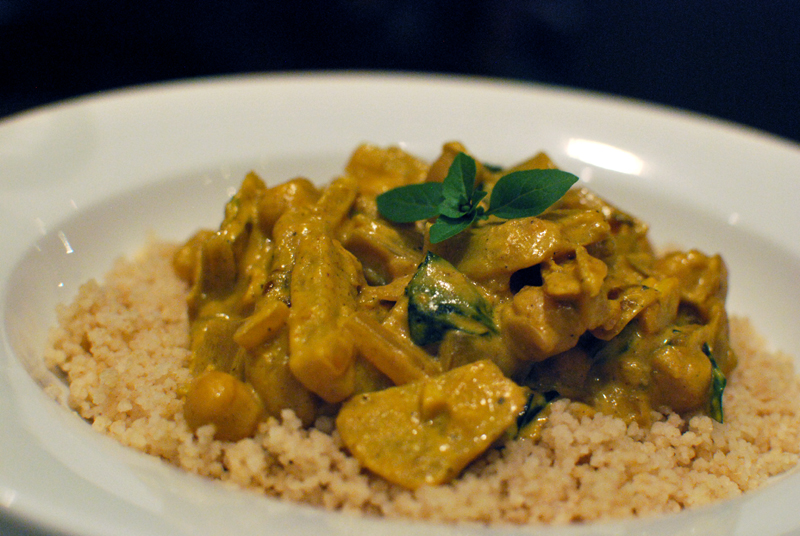
One of the simplest dishes involving turmeric I know of is Chickpeas in Coconut Milk, from an early Dinosaur Comics.  (If you aren’t familiar with DC, get to reading.  You’ve got over 10 years of awesome to catch up on.)  As far as I know, it’s the only recipe on the site???

chickpeas in coconut milk

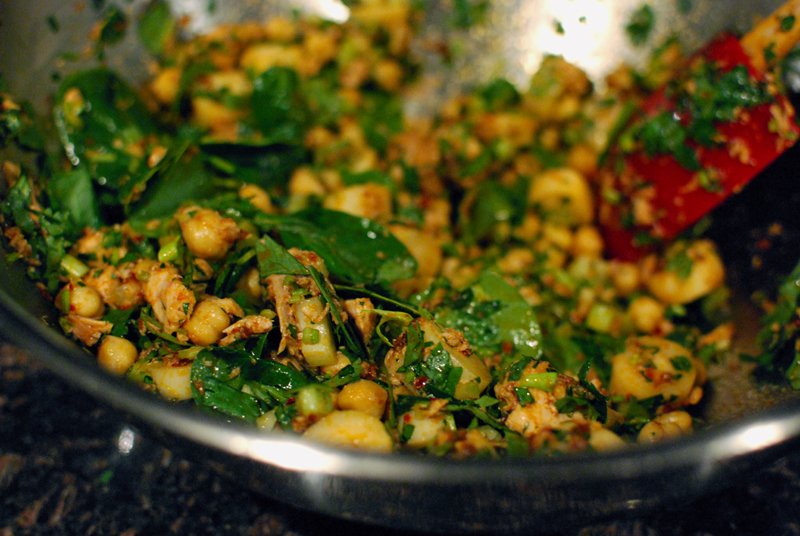
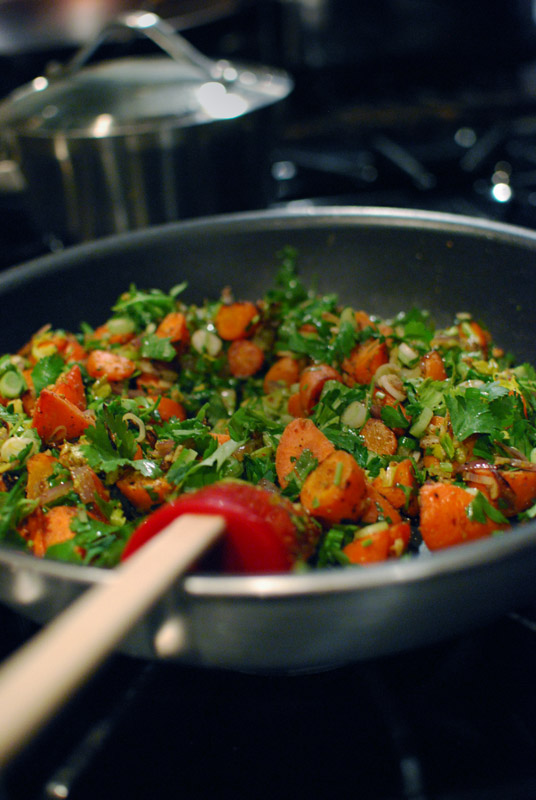
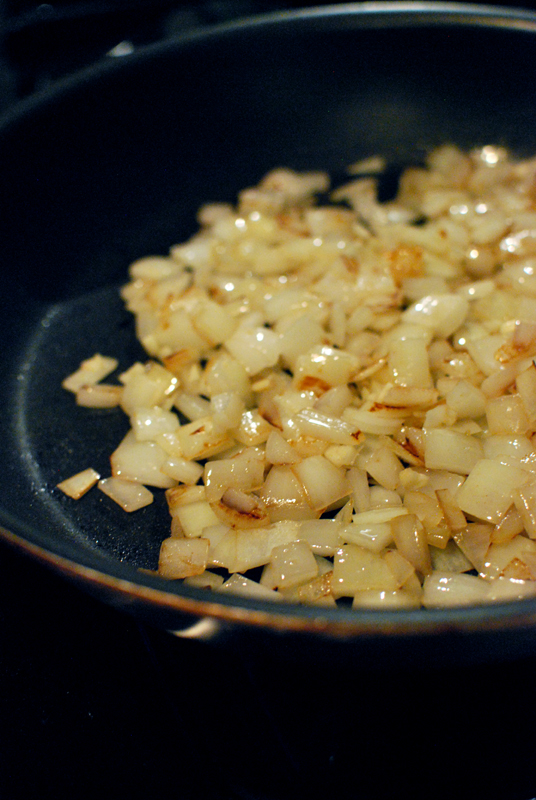
The original recipe is very simple: combine everything in a pan and cook it.  You can certainly do it that way.  Me, I like to build flavor.  Sauté the onions until they get a little color.  Bloom the spices in the oil.  Add some herbs.

couscous

Bonus: this dish isn’t so outrageously foreign that you have to make a special trip to the local International Specialty Market.  Other than the turmeric, you can find everything in your local grocery.

chickpeas in coconut milk

So there’s one way to get more turmeric into your life.  Easy, fast, delicious, healthy.  You’re out of excuses.

never forget
don’t forget the hipster ketchup

Chickpeas in Coconut Milk

Yield: 2-3 servings

Chickpeas in Coconut Milk

Adapted from Ryan North's Dinosaur Comics

I'ma say it again: turmeric stains. Don't drop this on the couch. Don't wear white while eating this. Don't use white plastic utensils to prepare this, and don't store this in anything plastic, unless you really like yellow plastic.

And hey, if you leave out the fish sauce, did y'all notice this recipe is vegan, dairy-free, and gluten-free? Of course you did.

Ingredients

  • 1 tablespoon neutral-flavored vegetable oil (or other fat of choice)
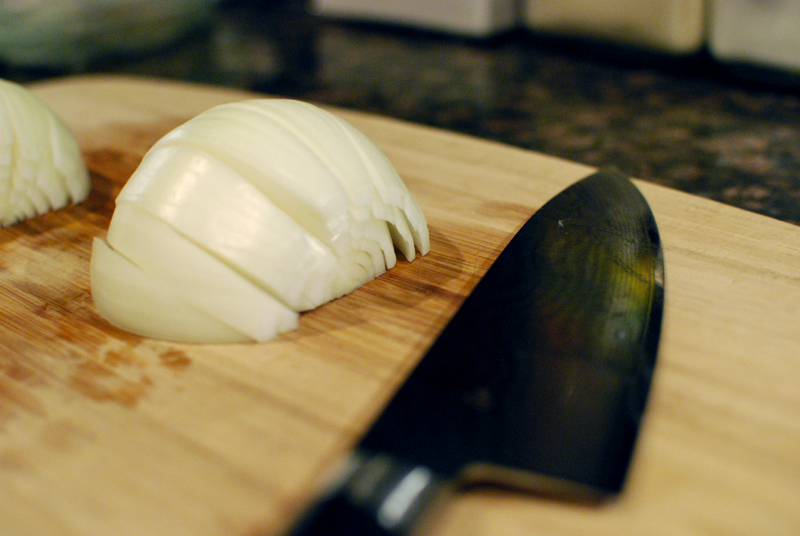
  • 1 onion, chopped
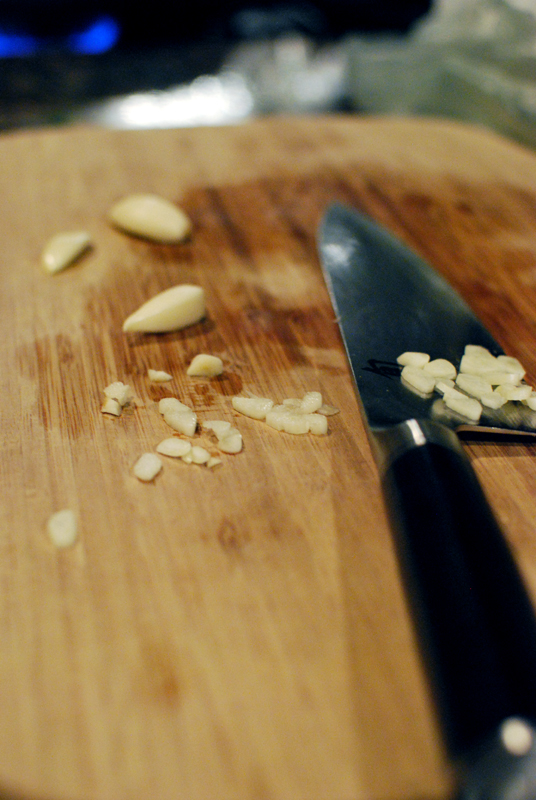
  • 4-5 cloves garlic, minced
  • 1 1/2 teaspoons turmeric
  • 1/4 teaspoon ground cloves
  • 1/4 teaspoon cayenne pepper
  • 1 tablespoon tomato paste
  • 2 cans chickpeas (15.5 oz each, or about 4 cups), rinsed and drained
  • 1 can coconut milk, well-shaken
  • 1-2 teaspoons fish sauce (optional, to taste)
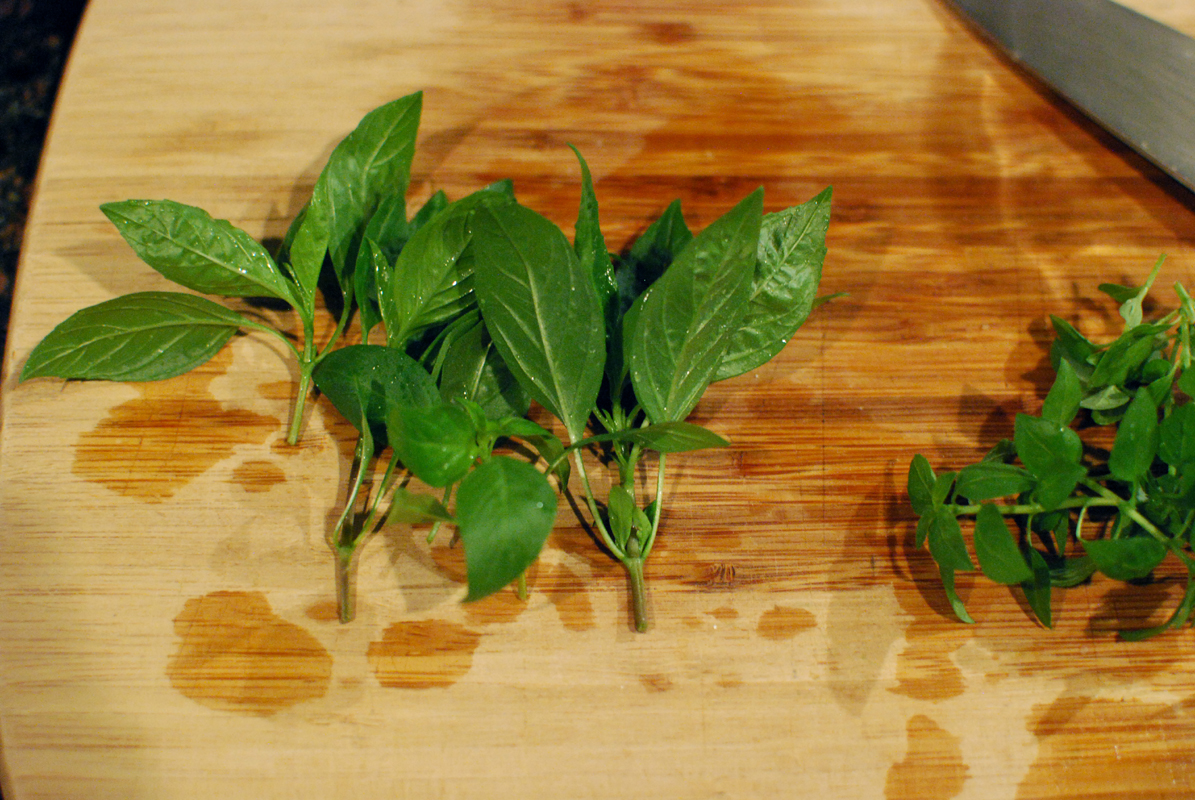
  • 2-3 tablespoons roughly chopped fresh herbs (such as cilantro, basil, mint, parsley, or a combination)
  • Salt & black pepper, as needed
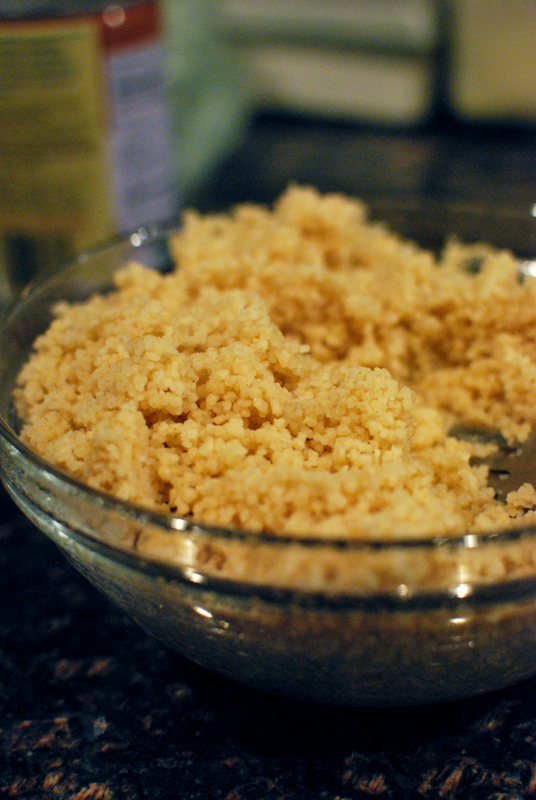
  • Cooked rice or couscous, to serve

Instructions

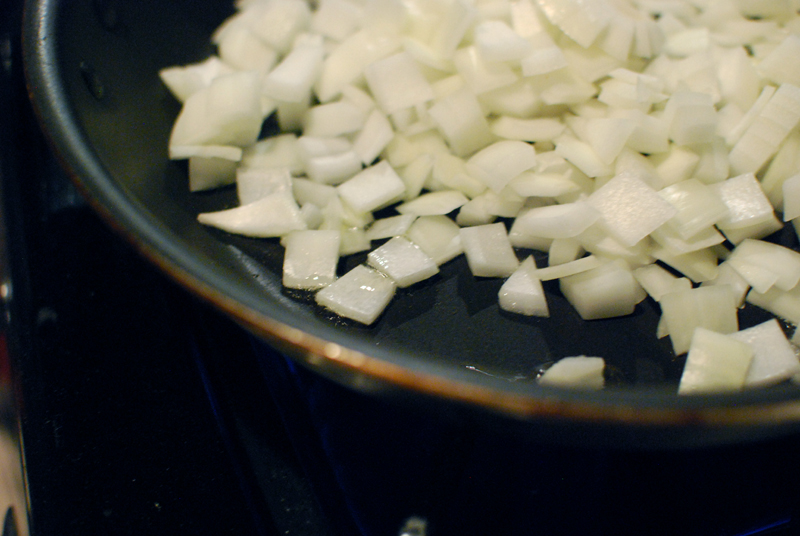
1. Heat oil in a large skillet over medium-high heat.

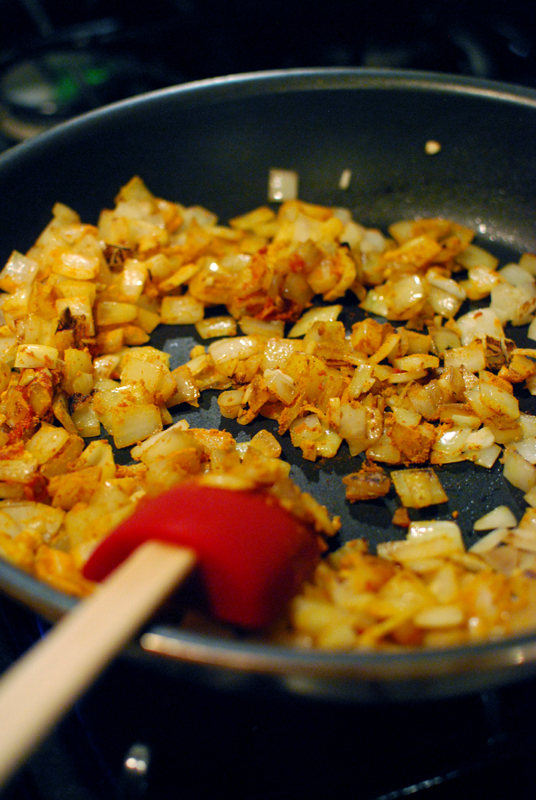
2. Add the onion, sprinkle with a pinch of salt, and stir to coat with the oil. Cook for 5-10 minutes, or until the onion has softened and begun to brown.

3. Add the garlic, turmeric, cloves, cayenne, and a grind or two of black pepper. Stir, and cook until fragrant, about 1 minute. Stir in the tomato paste.

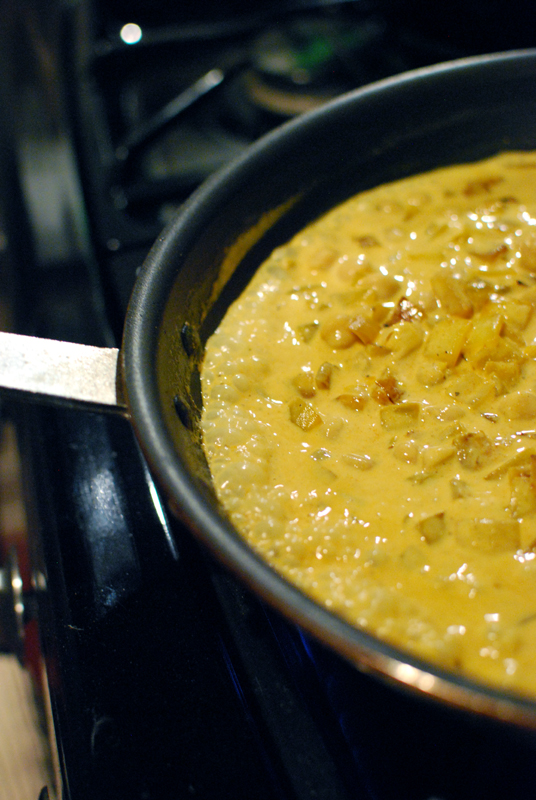
4. Add the chickpeas and a scant 1/2 teaspoon of salt, and pour in the coconut milk. Stir to combine, reduce heat to medium, and let simmer for about 10 minutes, until thickened. If it thickens too much, add a little water to thin.

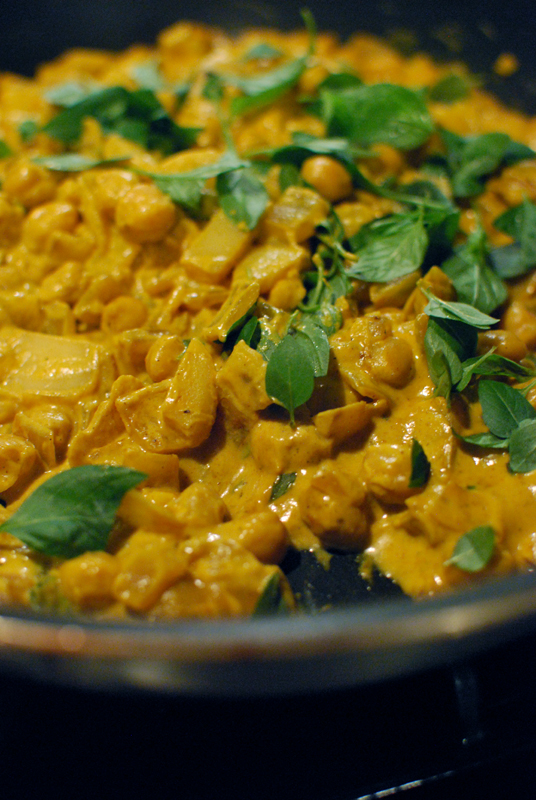
5. Stir in the fish sauce, if using, and the herbs. Taste, and correct seasoning with salt and pepper as needed. Serve at once over rice or couscous.

https://onehundredeggs.com/chickpeas-in-coconut-milk-or-turmeric-for-dummies/


Five Minute Photo Shoot: Noodle Times

Two recent noodle dishes, very dissimilar in character:

First, some Sesame Noodles with Chili and Scallion.  This is one of my new favorite recipes.  I added peas because, hey, peas.  Also appearing are soba noodles, because soba + sesame = luuurve.

sesame noodles with chili and scallions

I’ve made this with shrimp added to the mix which is also luuurvely.

sesame noodles with chili and scallions

Next up: Linguine Limone.

linguine summut

This dish could not be simpler.  And oh my goodness is it fantastic.

I added a small mountain of parsley and pecorino romano on top.  Totally unnecessary, but totally awesome all the same.

linguine summut

FIve Minute Photo Shoot: Deviled Avocado Pasta, Take Two

Remember the Deviled Avocado Pasta I made last year with some extra deviled egg yolks?  Because I sure do.  It looked a little something like this:

deviled avocado pasta

Last year, it was more green.  I do not know why.

This year, I made it twice; one time with soba noodles instead of traditional pasta.  So freakin’ good.

deviled avocado pasta

Ohhh yes.

Recipe is here, if you like.

Stir-Fried Asparagus and Tofu; Or, How to Get Asparagus to Punch You in the Face

Stir-Fried Asparagus and Tofu

Asparagus!  It’s asparagus season!

Are you sick of it yet?  Let me help.

Stir-Fried Asparagus and Tofu

It’s perfectly fine to treat asparagus like a delicate flower, seasoning with just a splash of olive oil and lemon juice and maybe some herbs – but just a skosh.  It’s lovely.  I do it often.

But man, asparagus can stand up to some flavor.

Stir-Fried Asparagus and Tofu

It reminds me of that other Spring delicacy, crawfish.  The French treat them with care, preserving the mild flavor by cooking with care and saucing gently.  The Cajuns, on the other hand, boil the crap out of them with spice measured in cups and gallons, not teaspoons.  I’m from New Orleans.  It’s clear what crawfish camp I’m in.  Of course I’m going to use the same spice-theory with asparagus.

Stir-Fried Asparagus and Tofu

Don’t be afraid to get a little saucy with your asparagus.  Stir-fry it with tofu, garlic, scallions, and fish sauce.  Char it.  Pitch in some exotic red pepper.  Punch your refined palate in its little face.

Stir-Fried Asparagus and Tofu

If you miss the more subdued flavor of lightly-handled asparagus, I assure you there is a restaurant nearby serving a perfectly lovely side of roasted asparagus.  Me?  I’m going for the stir-fry.

Stir-Fried Asparagus and Tofu

Stir-Fried Asparagus and Tofu

Yield: 2 to 3 servings

Stir-Fried Asparagus and Tofu

For tofu that will soak up more flavorful sauce, try freezing it solid before thawing and using as directed. The water in the tofu will expand as it freezes, creating an open structure in the texture of the tofu. When thawed, the tofu will act like a sponge, soaking up more liquid than it would otherwise. It will also have a "meatier" texture. Science!

You can substitute 1/4 teaspoon crushed red pepper flakes (or more) for the gochugaru, which I understand not everyone has sitting around.

Ingredients

  • 2 tablespoons neutral-flavored high-heat oil, such as safflower
  • 1/2 pound firm tofu, cut into domino-sized pieces and dried well
  • 2 teaspoons fish sauce, divided
  • 1 bunch asparagus, bottoms trimmed, cut into 1-inch pieces
  • 1 bunch scallions, cut into 1-inch pieces, whites and greens separated
  • 3 cloves garlic, minced
  • 1 teaspoon gochugaru (Korean chile flakes), or more to taste
  • 1-2 teaspoons sherry vinegar, to taste
  • 1/4 cup minced cilantro
  • Juice of 1/2 lime

Instructions

1. Prepare all ingredients before starting. I mean it.

2. In a wok or large sauté pan, heat 1 tablespoon oil over high or medium-high heat. Add the tofu and toss to coat with the oil. Cook until browned, tossing as needed to brown evenly. Add 1 teaspoon fish sauce, stir, and cook just until liquid evaporates. Remove tofu from pan and set aside.

3. Heat another tablespoon oil in the same pan. Add the asparagus, toss, and cook undisturbed until beginning to brown. Toss in the scallion whites, and continue cooking until vegetables are softened and lightly charred.

4. Remove pan from the heat, add garlic, gochugaru, remaining teaspoon fish sauce, and a splash of sherry vinegar. The residual heat should be enough to lightly cook the garlic and reduce the liquid.

5. Add the tofu, cilantro, scallion greens, and a generous squeeze of lime juice. Taste, and correct the seasoning with additional lime juice, vinegar, gochugaru, salt, and/or pepper as needed. It should taste a little earthy, but with a bright acidity and spice.

6. Serve at once, with extra lime wedges if you like.

https://onehundredeggs.com/stir-fried-asparagus-and-tofu-or-how-to-get-asparagus-to-punch-you-in-the-face/

Spicy Wheatberries with Beet Greens, Olives, and Hazelnuts

spicy wheatberries with beet greens, olives, and hazelnuts

I had beet greens.  I had cooked wheatberries and lentils.  I had toasted hazelnuts, and olives marinated with chilies.

I had dinner, and it was frickin’ awesome.


Good lord, I’m getting lazy over here.  I need to step it up.

Spicy Wheatberries and Lentils with Beet Greens, Olives, and Hazelnuts

Yield: 4 servings

Spicy Wheatberries and Lentils with Beet Greens, Olives, and Hazelnuts

Please forgive me for using a list of ingredients that are all pre-cooked. I know it adds about ten hours of prep time if you want to make it from scratch exactly as written. I'm terrible like that.

But that's the beauty of such dishes, right? You don't really need to follow the recipe to the letter. It's a mélange de frigo. Use what you got.

The olives I used were from a large gourmet grocery (cough cough whole foods cough), and were pre-pitted and marinated with red chilies. I minced and used all three chilies that I picked up along with the olives, and I dearly loved the level of spice. Use less chili (or none) if you're a wuss.

Ingredients

  • Greens from 2 bunches of beets, washed well
  • 2 tablespoons olive oil (or bacon fat, if you're fancy)
  • 2-3 cloves garlic, minced
  • 3/4 cup cooked lentils du Puy
  • 1 cup cooked wheatberries
  • 1/2 cup green and black olives marinated in chilies (or olives and your preferred red chile or hot sauce)
  • 1/4 cup hazelnuts, toasted
  • 2 cups baby spinach
  • Juice from 1/2 lemon
  • Salt and black pepper, as needed

Instructions

1. Heat a large sauté pan over medium-high heat. Meanwhile, roughly chop the beet greens into 1/2 inch lengths. Add the olive oil to the pan, followed by the chopped stems of the beet greens. Salt lightly, toss to combine, and cook for 2-4 minutes to soften the stems.

2. Add the remaining bits of beet greens, along with a splash of water (or stock, if you have it), about 1/4 cup or less, and cook until wilted and the liquid has mostly evaporated.

3. While the greens cook, mince the garlic. Add to the pan, and cook about 1 minute.

4. Add the lentils and wheatberries. Cook another minute or so, until warmed through.

5. Meanwhile, chop the olives and hazelnuts roughly, and mince any chile that may be included in the olives. Add to the pan, and remove from heat. Stir in the spinach at once, so the heat can wilt it. Squeeze a little lemon juice over everything.

6. Taste, and correct the seasoning as needed with salt, pepper, lemon juice, and additional olive oil. Serve warm, or at room temperature.

https://onehundredeggs.com/spicy-wheatberries-with-beet-greens-olives-and-hazelnuts/

Harissa Tuna & Chickpea Salad

harissa tuna & chickpea salad

This is the best kind of salad.

It’s one that requires no stove, oven, microwave, or any other sort of heating device.  It doesn’t require any special equipment or power tools.  All you need is a can opener, a knife, a cutting board, and a big ol’ mixing bowl.  I guess most people would want a spoon, but in a pinch you can just use your hands to mix.

It’s a very zen thing, making this salad.  It comes together as fast as you choose to chop.  There’s no worry about over-cooking or under-cooking.  No pressure at all.

harissa tuna & chickpea salad

A main feature of this salad is the harissa.  You can tell because it is the first word in the title.  I know, I just know someone out there is wondering what can be used instead of harissa because who on god’s green earth has harissa sitting around and where can you get it and what is it even.

If you can’t find harissa (or can’t be bothered, and girl I feel you), remember that it is red and spicy.  Use something else red and spicy and understand that it won’t be the same but this is not always bad.

Taste your harissa.  If it tastes good, congratulations!  You’re well on your way to a delicious salad.  If it tastes musty or weird or off, you might want to consider a different brand next time.  Or try cutting it with sriracha, which fixes any number of ills.

harissa tuna & chickpea salad

Harissa Tuna & Chickpea Salad

Yield: 4 to 6 servings

Harissa Tuna & Chickpea Salad

We all know how to smash garlic into a paste with a chef's knife, yes? A microplane will do the job just as well, and in about a tenth of the time. Just mind your fingertips.

This dish will keep for several days in the refrigerator, and might be better the second day.

Ingredients

  • 1 clove garlic, grated finely or smashed into a paste
  • 4 tablespoons harissa, or less if you're a wuss
  • 2 tablespoons sherry vinegar
  • 2 tablespoons extra virgin olive oil
  • 3 stalks celery, diced
  • 1 can chickpeas, drained and rinsed
  • 1 can hearts of palm, drained and chopped roughly
  • 2 cans tuna (about 10 ounces total), drained
  • 1/3 cup cilantro, chopped roughly
  • 1/3 cup parsley, chopped roughly
  • Fresh salad greens (optional; I used spinach)
  • Salt and pepper, to taste

Instructions

1. In a large bowl, stir or whisk together the garlic, harissa, sherry vinegar, and olive oil.

2. Add the remaining ingredients, along with a generous pinch of salt, and toss together.

3. Taste, and correct seasoning if necessary with salt, pepper, harissa, sherry vinegar, and olive oil.

https://onehundredeggs.com/harissa-tuna-chickpea-salad/

Dukkah-Spiced Carrot Sauté with Red Quinoa

Dukkah-Spiced Carrot Sauté with Red Quinoa

I’ll be honest.  I don’t love cooked carrots.  They’re too often mushy and have that somehow sweet blandness that screams “overcooked”.

But I’ve found that a quick toss in a hot sauté pan does something to carrots that I really enjoy.  They stay al dente in the middle, but soften enough so you’re not eating great chunks of raw roots.

Dukkah-Spiced Carrot Sauté with Red Quinoa

Add some vaguely North African flavors to the mix, and it’s a meal I can go to town on.  It’s all red onion, ginger, dukkah, cilantro, and lime, tossed together à la Ottolenghi, and served on red quinoa.

Dukkah-Spiced Carrot Sauté with Red Quinoa

Super healthy, super fast, super flavorful.  Exactly the way I want to eat.

Dukkah-Spiced Carrot Sauté with Red Quinoa
always serve a salad

Dukkah-Spiced Carrot Sauté with Red Quinoa

Yield: 2 to 3 servings

Dukkah-Spiced Carrot Sauté with Red Quinoa

If you don't have (or can't be bothered to make) dukkah, you can substitute 2 to 3 teaspoons Garam Masala, or even curry powder. Use less, because dukkah contains nuts which mitigates the spices. Woe betide you if you use 3 tablespoons curry powder in this.

The way I cut the carrots sounds more complicated than it is. But here goes: cut the carrot on a 45° angle. Roll the carrot over a little (maybe a quarter or half a turn). Cut again on a 45° angle. You should end up with a vaguely trapezoidal shape. Continue cutting the carrot, and rolling it, until you have a pile of irregularly-shaped bits of carrot, some bigger, some smaller. They will not cook entirely evenly. This is kind of the point.

Ingredients

  • 1 pound carrots, preferably small
  • 2 tablespoons olive oil
  • 1 small red onion, chopped
  • 2 to 3 stalks celery, preferably from the heart and with leaves
  • 1-inch piece of ginger, peeled and minced (or grated)
  • 2 to 3 tablespoons dukkah (such as this recipe )
  • 3 scallions, chopped
  • 1/2 bunch cilantro, roughly chopped (about 1/3 cup)
  • Fresh lime juice (optional)
  • Cooked red quinoa, or other grain of choice, for serving

Instructions

1. Peel the carrots. Using angled knife strokes, cut them into irregular pieces. Prepare the remaining vegetables.

2. Heat the olive oil in a sauté pan over medium-high heat. Add the carrots, and toss to coat with the oil. Season with a sprinkle of salt and black pepper, and let cook until beginning to soften and the edges just start to brown, about 3 minutes.

3. Toss in the onion and celery. Cook until just beginning to soften, about 2 to 3 minutes.

4. Add the ginger, dukkah, and white parts of the scallions. Stir to combine, and cook until fragrant, about 1 minute more. Remove from heat.

5. Stir in the cilantro and green scallion tops. Taste, and correct seasoning with salt, pepper, and maybe a squeeze of lime juice if you've got it.

6. Serve over red quinoa, or any other lovely grain.

https://onehundredeggs.com/dukkah-spiced-carrot-saute-with-red-quinoa/

Sautéed Kale with Tahini and Currants

Sautéed Kale with Tahini and Currants

Are we still talking about kale?  Has kale jumped the shark yet?

Whatever.  I don’t think I could ever get sick of greens of any sort.  Kale, chard, collards, mustard greens, turnip greens… they just do it for me.  Kale in particular has this wonderful texture, much like your workaday cabbage, that’s just as good cooked as it is raw.

Passion for kale notwithstanding, this recipe was born out of desperation, as so many of my recipes are.  My traditional post-Christmas detox* this year resulted in a steady supply of fresh greens in the fridge, and not much else.

Needing protein, I added almonds and tahini.  Kale screams for garlic; I obliged.  A handful of currants made for a Middle-Eastern sweetness.  And I couldn’t help but add some heat via fresh chile.

The overall flavor hinted at peanut butter on celery sticks, but way more soigné.  It was one of those times where I took a taste, then grabbed a pen and some paper to feverishly try to remember what the hell I did to make it.  It’s all slightly al dente kale, nutty tahini, sharp garlic and lemon, jammy currants.  It’s flippin’ awesome.

*It’s not so much a detox as an “oh god I might actually die unless I eat the most healthy things I can for about three weeks, so fetch me all the kale”.  Fixes me right up.

Sautéed Kale with Tahini and Currants

2 lunch servings, or 4 side servings

Sautéed Kale with Tahini and Currants

I used regular curly-leaf kale, which stayed reasonably al dente in this preparation. This was enough for two light lunches, served with bread and fruit on the side. A drizzle of olive oil over the top is not out of place here.

Ingredients

  • Olive oil, as needed
  • 3 to 4 cloves garlic, minced
  • 1 tablespoon minced fresh chile pepper (or to taste), such as Serrano
  • 1 bunch kale, stemmed and chopped
  • 3 tablespoons tahini
  • 2 tablespoons fresh lemon juice
  • 3 tablespoons chopped roasted almonds (1 large handful)
  • 2 tablespoons dried currants (1 small handful)
  • Salt and pepper, as needed

Instructions

1. Heat 2 tablespoons olive oil in a large skillet over medium heat. Add the minced garlic and chile; cook until fragrant, 30 to 60 seconds.

2. Add the kale, in batches if necessary, and sprinkle with a pinch of salt. As it wilts, stir to coat with the oil. Cook for about 5 minutes, until softened.

3. Drizzle the tahini and lemon juice over the kale, and stir to incorporate. Add a spoonful of water if needed to thin the sauce. Heat briefly to warm through, then remove from heat.

4. Stir in the currants and almonds. Taste, and correct seasoning as needed with salt, pepper, and additional olive oil and/or lemon juice. Serve warm.

https://onehundredeggs.com/sauteed-kale-with-tahini-and-currants/


Brussels Sprouts with Bacon, Pecans, and Preserved Lemon

Brussels Sprouts with Bacon, Pecans, and Preserved Lemon

Man, who doesn’t like a big ol’ bowl of roasted Brussels sprouts?

If you don’t, I suspect you haven’t had them prepared correctly.  And while it’s tempting to treat Brussels sprouts like any other vegetable when roasting, the usual “toss ’em in olive oil, add salt and pepper, roast at 400º F” business doesn’t really work as well as it should.

Too often, the little guys are burnt black on the outside while the insides are still crunchy and nearly raw.  And of course, Cook’s Illustrated has a simple solution to that problem: roast them covered, with a tiny splash of water, so they steam a little before getting uncovered and roasted until nicely browned.

Brussels Sprouts with Bacon, Pecans, and Preserved Lemon
dark brown is okay, black is not

Tell you what, I love me some Brussels sprouts, and this is the best method I’ve ever used for roasting them.

But plain roasted Brussels sprouts — lovely as they are — can be a little boring.  I get bored easily.  Besides, I have a fridge to clean out.

Brussels Sprouts with Bacon, Pecans, and Preserved Lemon

So I tossed my sprouts with some bacon, pecans, preserved lemon, scallions, and some phenomenal hot sauce that came with a recent order of Ethiopian take-out.  (I have no idea what it is, but I’m tempted to order from that place again just for the hot sauce.)

Brussels Sprouts with Bacon, Pecans, and Preserved Lemon
quinoa turns any side dish into an entrée, right?

I was going to grate some pecorino romano over everything, but that would’ve meant washing the Microplane later.  That was one step too far.  Next time, maybe.  It didn’t need it.

This is one of those dishes that’s greater than the sum of its parts.  The ingredients all sound good together on paper, but on the plate, it’s like daaaaang.

Brussels Sprouts with Bacon, Pecans, and Preserved Lemon

Daaaaang.

Brussels Sprouts with Bacon, Pecans, and Preserved Lemon

Yield: 2 servings

Brussels Sprouts with Bacon, Pecans, and Preserved Lemon

Adapted in part from Cook's Illustrated.

This dish is equally viable as a side or an entrée (served over quinoa or other starch of choice), and is awfully satisfying. Even better: it all comes together in the time it takes to heat the oven and roast the Brussels sprouts.

I happen to have an aging jar of preserved lemon in my fridge, which I love using with most any roasted vegetable. If you don't have such a jar, do not fear. It will be just as good without.

Ingredients

  • 6 to 8 ounces Brussels sprouts, ends trimmed
  • A drizzle of olive oil, about 1 tablespoon
  • 1/3 cup pecans, toasted and chopped
  • 2 slices thick-cut bacon
  • 4 scallions, sliced thinly
  • 1 tablespoon preserved lemon (optional, but lovely), chopped finely
  • 1 tablespoon fresh lemon juice
  • 1 teaspoon hot sauce of choice, or to taste
  • Cooked quinoa, rice, couscous, or short pasta, to serve (optional)

Instructions

1. Preheat the oven to 500º F, and place a rack in the upper-middle position. (This is a perfect time to toast the pecans, while the oven heats. They'll need about 5-10 minutes in the warming oven. And if you need to make some quinoa or couscous or what-have-you, now's the time to start it.)

2. Slice the Brussels sprouts in half lengthwise (or into quarters if they're large). Toss on a rimmed baking sheet with a light drizzle of olive oil, a sprinkle of salt and black pepper, and 1 tablespoon water. Arrange the sprouts cut-side down, and cover the pan tightly with aluminum foil.

3. Roast for 10 minutes. Remove the aluminum foil, and continue roasting for 8 to 12 minutes more, or until knife-tender and browned.

4. Meanwhile, cook the bacon in a pan over medium heat until browned and crisp. Remove the bacon from the pan, chop, and set aside. Save the rendered fat, because it is delicious and it makes the best fried eggs.

5. In a large bowl, combine the pecans, scallions, preserved lemon, lemon juice, and hot sauce. Mix in the bacon, and a spoonful of bacon fat; set aside.

6. When the Brussels sprouts are done, toss them while still hot with the bacon and other ingredients in the bowl. Serve immediately as a side, or over quinoa (or what-have-you) as an entrée.

Want to cook some quinoa, but don't know how? It's your lucky day.

1 part quinoa (1/2 cup is more than enough for 2 servings)

2 parts water

Salt

Bay leaf (optional)

1. Rinse the quinoa in a fine mesh sieve. Yes, you really should do this.

2. Put rinsed quinoa in a pan over medium heat. Toast and stir frequently until you don't hear any more sizzling-type noises (this means the quinoa is dry and getting toasted).

3. Add the water slowly, because those quinoa like to jump when the water hits 'em, and they're a pain to clean off your stove later.

4. Add salt (1 scant teaspoon per cup of quinoa) and bay leaf, and bring to a boil.

5. Cover and reduce heat to low. Simmer for 12-15 minutes, or until all water is absorbed.

6. Remove from heat and let stand, covered, at least 5 minutes. Fluff with a fork before serving. Quinoa!

https://onehundredeggs.com/brussels-sprouts-with-bacon-pecans-and-preserved-lemon/

How I Learned to Stop Worrying and Love Cooking Chickpeas

Part of the reason I never cook beans is because I lack foresight.  I never think about soaking them overnight, partly because I never want beans hard enough.  Overnight pizza crust, I can do; but then, I kinda love bread.

Also, you’re somewhat tied to the kitchen when you have a pot of beans on.  Sure, you can do other things around the house, but you really can’t leave.  What if they need more water?  When will they be done (and you know they always take longer than expected)?

So why the hell did I decide to bring home a pound of dried chickpeas the other day, instead of just buying a can or two?  *shrug*

I left them sitting on my counter to remind me to cook the stupid things, instead of shoving them into the pantry and promptly forgetting about them.  So with a tiny mountain of chickpeas eyeballing me balefully, Google and I got on that stick.  And I was reminded of a trick I’ve recently heard.  It’s two words, and it will change your bean-cookin’ life:

Baking soda.

Oh yes.  One teaspoon of baking soda will not only soften one pound of beans to perfection — no hard, gritty centers here — but it also eliminates the need to soak overnight.  And they cook faster than usual.  I’m dead serious.

I don’t remember exactly where I first heard about this trick, but let’s just say it was Harold McGee.  Him, or Cook’s Illustrated; it’s got to be one of them, right?

It’s the perfect lazy-man’s method.  I didn’t even bother rinsing the chickpeas.  I literally just dumped it all together in a pot.  And for extra flavor, I tied up some leeks and pork bones in a sachet (to make removal super-easy) so that it made its own quick stock while it simmered away.

When things are too simple and easy like this, I tend to assume that it’s not going to taste good.  And I was never happier to be wrong.

Because man cannot live on chickpeas alone, I paired some with mustard greens, onion, and garlic.  On top is a little fromage blanc, which looks a bit like a poached egg.  (That would also be amazing.)  Nothing fancy, but it was very, very good.

I might have to start cooking beans more often.

Chickpeas and Mustard Greens

Yield: A million chickpeas; the greens will serve 4

Chickpeas and Mustard Greens

Forget everything you've ever heard about cooking beans. Add salt at the beginning. Don't soak overnight. Just use a little baking soda. Perfect.

My chickpeas were well done at the 2 hour mark, even a little softer than I'd intended. Depending on how old yours are, you might need to let them cook longer. I like leeks in the sachet, but if you'd rather, a quartered onion will do just as well.

I specify mustard greens, but clearly you can use whatever greens you prefer. I used mustard greens so that I didn't have to remove the ribs, because my god is that a pain sometimes.

Ingredients

    For the Chickpeas:
  • 1 pound dried chickpeas
  • 2 teaspoons kosher salt
  • 1 teaspoon baking powder
  • 1 pound bones (chicken, pig, or cow)
  • 2 big leeks, washed well, cut into 3 or 4 pieces
  • 4 bay leaves
  • 1 large sprig thyme
  • For the Greens:
  • 2 tablespoons olive oil
  • 1 onion, diced
  • 5 cloves garlic, minced
  • 2 to 3 cups cooked chickpeas, plus cooking liquid
  • 1 bunch mustard greens, cut crossways into 1-inch ribbons
  • Salt and pepper to taste

Instructions

For the Chickpeas:

1. Put the chickpeas in a large Dutch oven. Add enough water to cover by about 3 inches, and add the salt and baking powder. Bring to a boil over high heat (covering the pot will make the process go faster).

2. Meanwhile, tie the bones, leeks, bay leaves, and thyme up in a piece of cheesecloth so that you have a nice little sachet. Put the sachet in the pot with the chickpeas.

3. When the pot comes to a boil, reduce the temperature to low or medium-low, to maintain a simmer. Cover the pot and cook for 2 to 3 hours, or until chickpeas are soft. Remove sachet (so easy!), and enjoy a wealth of chickpeas. (They will freeze beautifully.)

For the Greens:

1. Heat the olive oil over medium heat in a Dutch oven. Stir in the onion, sprinkle with salt, and cook until just translucent, about 10 minutes.

2. Add the garlic and cook about 1 minute, or until fragrant.

3. Stir in the chickpeas and cooking liquid, and pile the mustard greens on top. Cover the pan, and reduce the heat to medium-low. Cook, stirring occasionally, until greens are tender, at least 15 minutes.

4. Taste, and correct the seasoning as needed with salt and pepper. Serve with a lovely drizzle of olive oil for good measure.

https://onehundredeggs.com/how-i-learned-to-stop-worrying-and-love-cooking-chickpeas/